Fort Floriet on Tuesday: Mahrajah: Jim v. Nick
Jim's Compagnia Carri: HQ L3, 2x5M14, 3x75mm howitzers, 2x90/53, 3L6 reece, Berseligieri, Sporadic Air.
Nick's US Rifles: HQ, 2 inf, 4xShermans, 4xM3TDs, 4x57mmA/T, 4x37mmA/T, 4x105mm howitzers.
UN Observers: Chris, Starn & Coreen.
Scenario: Decided by dice on Chris's Mission Table. 1st dice gave Phased Withdrawal but was vetoed by Ities. 2nd try, Hold the Line was accepted by both & the Ities chose to defend.
The terrain was fairly flat with a few hills at the Itie end but with a lot of hedgerows, walls and ploughed fields.
Dinner: Chosen by dice on the Take Away Mission Table. Hari Curry selected & kindly fetched by Coreen.
Nick placed his objective on the Itie right flank in fields with walls he thought would restrict the 90's ability to defend it. The Ities placed the other objective in a wood in the rear behind the other one. They deployed the Bersaligieri on the forward objective with the artillery in close support behind a wall about 20cm back from the objective. The 90/53s were in ambush. The Ities were somewhat dismayed when they threw a 1 for the Bersaligieri 8 Million Bayonettes roll making the front line troops reluctant trained, but consoled themselves with the thought that Hewey owed them some luck for later.
Phase 1: First US attack.
The US immediately advanced on the closer objective with infantry and Shermans supported by M3s and smoke from the 105s.
Despite distressingly cunning use of smoke, the attack failed because:
1) The 90/53 ambush joined the 75s behind the wall and popped one Sherman and bailed another which stayed bailed for a vital 2 or 3 turns.
2) The 75s pinned one of the infantry plats and it too stayed pinned for a vital 3 turns.
3) The Itie armour arrived on turns 1 and 2.
4) The 75's went to counter battery fire, were repayed their luck deficit and quickly destroyed the 105s.
5) The hedgerows stopped the M3s giving effective support.
With the smoke supply drying up, troops left behind pinned & Iron Coffins arriving in bulk, the Yanks decided to pull back while they could.
Phase 2: Reorganising.
The US pulled back, reorganised and moved their armour to the right.
Meanwhile there was skirmish between the 37mm A/T that the US had pushed down the right flank as a distraction and the Itie Reece. The Reece got 2 of the guns, but couldn't finish the job and were destroyed.
The Itie artillery destroyed the 57s to pass the time.
Phase 3: Second US attack.
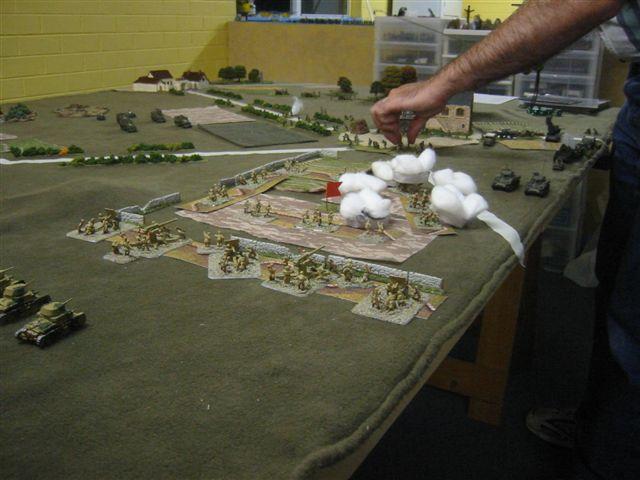
The US armour pushed down the right flank - carefully keeping their distance from the 90/53s (see pic).
The Itie armour moved back on interior lines to form up behind a hill in the rear to wait for them.
The hill prevented the Yanks using their superior range and the 90/53s dissuaded them from going around it.
When the Yanks got close enough, the Iron Coffins rushed forward en masse hoping to get the M3s while the artillery smoked the Shermans. The Yanks saved their M3s using sneaky TD Evade Rules, but the Shermans didn't do enough when they moved out of the smoke and the M14s were now all around them. They Ronsoned one Sherman - then a vital firepower dice teeted on edge before flopping over 6 to bail another and force a morale test - which they failed. Now the M3's faced the mob alone with the edge of the table preventing any more sneaky escapes. They took a few with them, but were doomed.
Phase 4: Mopping up.
The Ities now had the only armour on table (5M14s), the only artillery on the table, both their 90/53's intact, and the Bersaligieri reluctant as it was, still dug in with only 1 casualty The Yanks could only hope the Reggio Aeronautica would show up and bomb the wrong side.
The Italian firepower soon reduced the Yanks below half strength but they refused to fail multiple company morale checks and only lost when the last team on the defenders half of the table was destroyed.
The RA Stukas never did show up - not once in a long battle of about 20 turns - that's not bad going even for sporadic air.
The Ities had lost 2 platoons - tank + reece, so a 4:3 victory for Il Duce !
This was one of those long close exciting battles that make us love FOW.
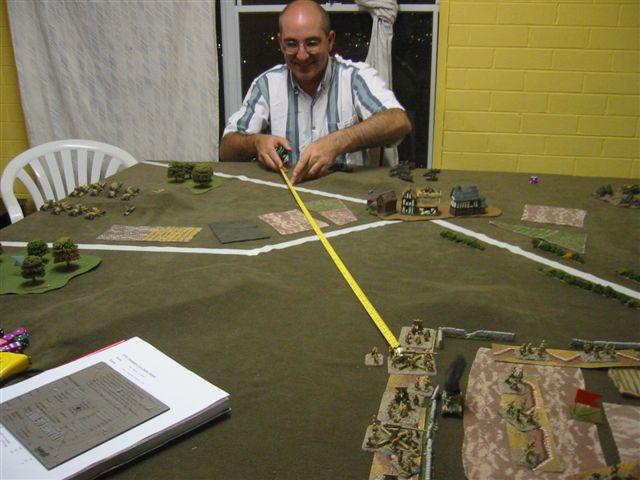
Thursday at Camp Cromwell: Maharajah: Steve v. Peter
Free For All Scenario diced on Mission Table - on very open terrain.
Steve's Grenadiers: HQ, 2 Inf, MG, Inf guns, Pak 40s, Artillery, Priority Air (Hs129)
Peter's US Infantry: HQ, 3 Inf, MG, Honeys, SP75s, 57mm A/T, Artillery, Limited Air.
Peter advanced on his left & centre with 2 Inf plats, MGs, SP75s & Honeys. The Germans just dug in.
The Honeys worked their way round the German's right flank but they were delayed by a Luftwaffe attack that bailed up a couple of them. The MGs & one inf in the centre were destroyed in the advance.
For several turns the US got a respite from the Luftwaffe as they either didn't show or were intercepted. In this time the Honeys attacked. They took out the Inf guns, then the Grenadiers on the objective.
Then the Luftwaffe came back two turns in a row and destroyed the Honeys while the German HQ & Grenadiers maintained a presence within 10cm of the objective.
The US infantry came up in support of the Honeys and now drove the Germans back to take the objective.
The Luftwaffe returned again but couldn't destroy enough infantry. The GIs passed their morale test and held the objective.
A 4:3 win to the US.
This battle took a long time because of the slow infantry advance and the continual air attack resolution. It was bit dull in the early stages, but livened up with the struggle for the objective. The USAF probably earned their keep by interceptions, but they in turn were intercepted just about every time they showed up. The Hs129s were murder when they weren't intercepted.
Next week:
Easter: Chris is down south for the weekend. Maybe we'll get a game in for him. Mornings might be best because of Steve's late shifts at work.
Thursday: Barrie's US Inf v. Mark's Italian Infantry.
Friday: Junior's night. James Oakes' Germans v. Dillon Oakford's Yanks.
No comments:
Post a Comment