Tuesday, November 26, 2013

Maharajah 2013 2nd Preliminary Final: Rome v. Seleucis

Mike's Marian Romans v. Steve's Seleucids

This the 2nd preliminary final with the winner to fight Jim's Pontic army in the Grand Final.
The Seleucids are on the left waiting for the Romans.  Cavalry on the near flank, phalanx right centre, mixed infantry left centre & the zoo on the far flank.   The Romans have advanced steadily with 2 legions in the centre with cavalry on the near flank and Scutari on the far flank.
The first clash was the cavalry on the near flank. 
The Roman cavalry is getting the worst of the cavalry melee, but is not broken.  The legions have charged the phalanx, but their right was overlapped & a flanking counterattack from the right is hurting them.
The cavalry fight has turned into a desultory fire fight.  The legions have fallen back a bit & repaired their line in the centre.  The Scutari are keeping the Seleucid left occupied.
The Romans are advancing to renew their attack left of centre.  There is desultory action along the rest of the line.
Steve's left flank division may not be particularly powerful, but it sure looks good.
On the far flank, the Scutari have seen off the chariots & driven the elephants back.  On this flank, the Roman cavalry drew back in the face of superior shooting, but left an opening for a cavalry unit lead by Seleucis himself to charge the Roman centre.  Attacked from both sides, that legion was broken & has been removed.  The other legion had pushed the phalanx back, but it hasn't broken.  
The Roman cavalry has been broken but a Scutari unit made it to the camp before the Seleucid cavalry could get there & gain the extra VP to finish the battle.  The Romans are reduced to the battered Scutari division on the far flank and one legion which having just failed to break the phalanx is now getting surrounded near the enemy camp.   The Scutari did make a last desperate attack & broke the elephant division, but soon after that the Scutari also broke - finally ending an epic struggle.

Sunday, November 24, 2013

Hail Caesar: Sunday Afternoon Punic War

Mark's Carthaginians v. Jim's Romans

Mark used Chris' Maharajah army v. Jim's Republican Romans.
The Romans on the left have 3 legions each 4 Hastasi/Principes, 1 Triari, 2 Velites with the flank divisions both adding 1 light & 1 med Cav.
The Carthaginians have Spanish on the near flank, African infantry in front of the camp, then Gauls & Punic cavalry on the right.
Initially, the Romans send out skirmishers & wait.
The Romans are advancing their centre in reaction to the inverted V of the Carthaginian advance.
The Romans counterattack on the left. 
The photographer got a bit engrossed & missed a lot of action between shots.  The Punic cavalry has been stopped & bottled into a pocket by cavalry and infantry.  The Gauls & the elephants have been broken.  This left the flank of the African spearmen exposed and they too are about to break.  The Spanish are making progress, but the Roman right is still delaying them.
 
The Romans have smashed through the Carthaginian centre and reached the camp - the Carthaginians have conceded.

We used small units for the Romans to represent the manipular system - a subject of some discussion on the forums where some think that the small units give the Romans an excessive advantage.  The Romans certainly won this one comfortably, but they exploited a discontinuity in the enemy line to break first the Gauls, then the Africans and break their line apart - grand tactics that would have worked just well with standard units. 

Friday, November 22, 2013

Nick in Launceston

Nick vs Shane in a FOW 1650 point battle. A German Stug Batterie (Shane, using Nick's figs) vs a Russian Udarny Company (Nick).

The lists were:

Stug Batterie


Compulsory StuG Batterie HQ - CinC StuG G, Begleit Assault rifle (110 pts)
- General Von Saucken - General Von Saucken, Sd Kfz 250 half-track (65 pts)

Compulsory StuG Platoon - Command StuG G, 2x StuG G, 3x Begleit Assault rifle (330 pts)
- Options - Replace StuG G with StuH42 (0 pts)

Compulsory StuG Platoon - Command StuG G, 2x StuG G, 3x Begleit Assault rifle (330 pts)
- Options - Replace StuG G with StuH42 (0 pts)

Pionier Platoon - Command Pioneer Rifle, 9x Pioneer Rifle (235 pts)
- Command Upgrade - Replace Command Pioneer Rifle with Command Pioneer Panzerfaust SMG (10 pts)
- Pioneer Supply Truck - Pioneer Supply Horse-drawn wagon (20 pts)

Tank-Hunter Platoon - Command Hornisse, 2x Hornisse (350 pts)

Sturm Scout Platoon - Command Motorcycle MG, 2x Motorcycle MG (110 pts)
- Command Upgrade - Replace Command Motorcycle MG with Command Panzerfaust SMG (10 pts)

Sturm Anti-Aircraft Gun Platoon - Command SMG, 3x 2cm FlaK38 gun (75 pts)
- Transport - Kfz 15 field car, 3x RSO (5 pts)


1650 Points, 6 Platoons


Udarny


Compulsory Udarny Strelkovy Batalon HQ - CinC Rifle, 2iC Rifle, Battalion Komissar (40 pts)
- Anti-tank rifle Platoon - 4x PTRD anti-tank rifle (45 pts)
- Anti-tank gun Platoon - 2x 45mm obr 1942 gun, 2x Horse-drawn limber (50 pts)
- Sapper Platoon - 5x Pioneer Rifle, Supply Horse-drawn wagon (135 pts)

Compulsory Udarny Strelkovy Company - Command Rifle/MG, 12x Rifle/MG (275 pts)
- Kommisar - Komissar (15 pts)
- SMG - 4x Replace Rifle/MG with SMG (0 pts)

Compulsory Udarny Strelkovy Company - Command Rifle/MG, 8x Rifle/MG (190 pts)
- Maksims HMG - Maksim HMG (25 pts)
- Kommisar - Komissar (15 pts)
- SMG - 4x Replace Rifle/MG with SMG (0 pts)

Shock Scout Platoon - Command SMG, 2x SMG (100 pts)

Gvardeyskiy Tyazhelyy Tankovy Company - Command IS-2 obr 1943, 3x IS-2 obr 1943, 4x SMG Tank Escort (580 pts)

Flame-thrower Platoon - 4x Flame-thrower (180 pts)


1650 Points, 4 Platoons


Shane's Gift


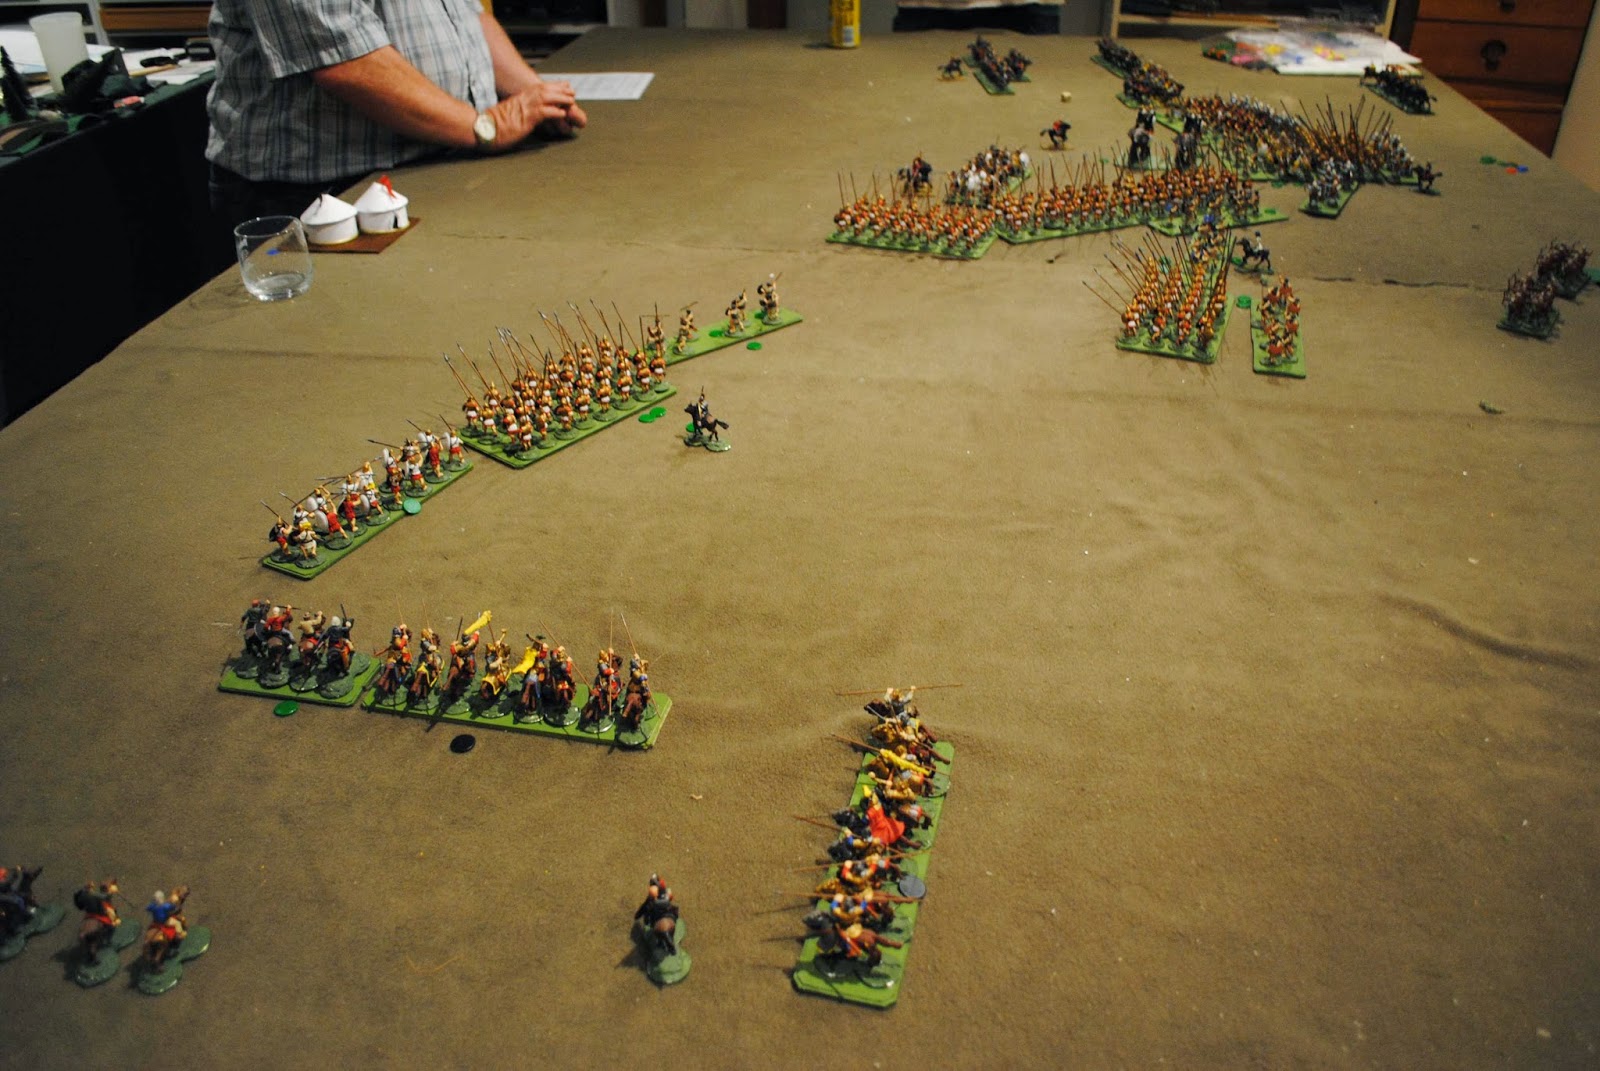
The Udarny company is designed to attack and take an objective, using scouts to infiltrate, and flamethrowers to pin before the assault. This works fine in most missions, where a single objective is all that is required. But we played a domination mission. No infiltration. Further to walk (so more damage from tanks etc.) And what's worse, the Stug List was a perfect foil for the Udarny, with Hornisse's able to destroy the Russian heavy tanks when they appeared. The IS-2's were forced to hide behind a hill. The Udarny were forced to entrench in a forest. The plan was to make the Germans attack the Udarny if they wanted a win. That worked -- Shane moved his forces forward aggressively.

Just a little too aggressively. Shane left his Stug's (with CinC) just a little bit too close to an Udarny with attached sappers and flamethrowers. The Soviets charged, and seconds later the Stug's were a burning mass - the flamethrowers stopped the defensive fire from the tanks, and the tank escorts didn't have enough shots to stop the charge. Shane also charge Stugs on the other flank, and the IS-2's popped out from behind a hill to take those Stug's down. The IS-2's had to withstand return fire from Hornisses, but a combination of Soviet 6's and German 1's left the IS-2's with two bailed tanks, one dead, and one alive. The bailed tanks remounted and skedaddled.

At this point Shane was down to a pioneer platoon, hornisses, and damaged motorcycle recon and AA units. Shane decided to try to assault the Udarny with the pioneers. This didn't work well, and resulted in the motorcycle recon being dragged in and destroyed as well. Shanes force then failed morale, and I extracted a victory

This was Shanes battle to lose, and a moments inattention lost it for him. he had out picked and out deployed me. But it was a fun game, on a knife edge for most of the night.


Tuesday, November 19, 2013

Maharajah Trophy 2013: Hail Caesar

Jim's Pontic army v. Chris' Carthaginians

The Carthaginians are on the left.  Their divisions are: Spanish on their right, Gauls right centre, Carthaginian foot & elephants left centre & cavalry on their left.   The Pontic army has cavalry divisions on both wings & 2 infantry divisions in the centre.
The Pontic army is making a steady advance - all divisions moving forward slowly.  The Carthaginians have their centre advanced.
The Ponts sent foot archers forward to fight the elephants.  They disordered one, but were driven back by the other one which caused am unwanted kink in the Pontic line. 
The archers have fallen back from the elephants as the Pontic cavalry advance to outflank the Punic spearmen.  The Pontic horse failed to get the command dice required to charge into the flank and left their own flank exposed in the process.
The Pontic gamble on the far flank did not come off.  The Punic cavalry got the 3 moves they needed to hit their flank.  In the centre, the Gauls charged the phalanx.   The phalanx closed ranks & stopped the rush.  On the near flank the Spanish allies have held off the first Samartan cavalry charge.  
The Pontic cavalry is in dire straits, but has not broken.  The Punic spearmen are preparing to attack the end of the infantry line.  Half the Gauls (off pic to the left) have already broken, the others are hard pressed. 
The Spanish division is in deep doo doo as infantry hit one end of the line and cavalry wrap around the other end. 
Somehow the Pontic right is still there.  The cavalry is hanging on and the levy bows on the end of the infantry line followed good Closing Fire that disordered the spearmen with some more hot combat dice.  With the Gauls gone the phalanx is wrapping around the flank of the spearmen.
The Spanish have broken and a horde of Ponts is charging towards the Punic camp (which would be the 3rd VP needed to clinch victory).
The last straw for the Carthagians was when levy archers broke the spearmen at the end of the infantry line.
The Carthaginian infantry have now broken under the converging assault of the phalanxes (& the ferocious defence of the levy bowmen) while still the Pontic cavalry hold on.

The battle ended up as crushing Pontic victory, yet at one stage that result looked anything but likely as the Pontic right was in grave danger of being rolled up.  But Mithridates kept his cool, played for time on the right and maintained the attack on the left.  As the Pontic counterattack gained momentum the dice gods decided to change sides & it help out.  In the last few turns the Carthaginians couldn't take a trick and it all feel apart very quickly.

Next Maharajah battle is between Mike's Marian Romans & Steve's Seleucids - winner to play Jim's Ponts in the Grand Final.


Friday, November 15, 2013

Nick in Launceston


A full house at the club tonight, with games in 3 rooms.

I played a Flames of War game vs Ben, who can only make it occasionally. 1750 points Late War -- Stug Batterie (me) vs US 2nd Armour (Ben). The game was 'pincer'. Unfortunately, 1/2 of Ben's army was off the table to start with, and it never arrived. This let me take apart his armoured infantry and artillery.

Rob and Starn played a domination mission with 2050 points. There were troops everywhere. I thought Rob was done for -- there was lots of smoke from his tanks burning. But his 5 panthers proved invulnerable, and saved the day!

There was also a great looking X-Wing furball -- I may have to break down and get this game.

Thursday, November 14, 2013

Thursday Afternoon Bolt Action

Jim's German Panzergrenadiers v. Chris' Soviets:   1250 points with armour

The Germans had 2 infantry squads, medium mortars, Schreck, 1 Stug, 1 Marder, 1 MkII & 3 Hanomags - all Regs.  The Soviets had 3 rifle squads, 1 smg squad, a/tank rifles, heavy mortar, MMG, 2nd Lieutenant, Commissar, 1 T34/85 & an SU76 - all Inexperienced except for the Reg smg squad.
The Soviets are on the far side.  They have infantry in the far wood & behind the houses.  The smoke behind the house is a burning Soviet truck popped by the Stug, but the infantry bailed out intact.  There is a T34 beyond the village.  The other T34 & the SU are on the ridge with the other Soviet support weapons.
The Germans havecome on in two columns, infantry in Hanomags down the road with the Stug & MkII.  Their mortar is on the left with the Marder & the other Hanomag with the schreck.
On the left the Marder & Schreck popped the T34.  In the centre the Soviet infantry grabbed the 2 houses.  The Panzsergrens deployed behind hedges.  The Hanomag in the village was assaulted & destroyed by the smg squad who then went back in the house.   The Soviet armour got the MkII
The village the Germans poured fire into the LH house while the Soviets hammered the forward Panzergrens.
The Soviets in the LH house have been broken by concentrated fire from Panzergrens, Hanomags & Marder.  The foreward Panzergrens have been destroyed by MMG, mortar & tank fire.  The Stug has advanced & popped the T34 & immobilised the SU76.
Having disposed of the infantry in the LH house the Germans concentrate on the smg squad. It evaculated the house to escape mortar fire only to be mown down by Hitler's buzzsaws.  the Soviet infantry on the far flank came out too late to help and were stopped by the Marder & Hanomag.  

Win or lose we both enjoyed the battle.  The Soviets looked formidable and made early gains, but they didn't maintain the pressure & the Bad Guys struck back. 

Comparing this battle with the Chain of command battle last Sunday only confirms the opinion expressed in my report comparing COC & BA.   Playing COC on Sunday I was all the time thinking about how to get the best value out of the command dice.  In BA's simpler system I feel I'm spending my time thinking about the tactics rather than the system. 

Tuesday, November 12, 2013

Maharjah Trophy: Chris v. Mark

Chris' Carthaginians v. Mark's Spanish

Round 2 of the Maharajah Trophy 2013 (Jim & Steve umpiring).
The Carthaginians are on the left deployed with all their horse on the near flank, their Spearmen & elephants on the far flank and Gauls in the centre with their Spanish Allies behind. 
The Spanish have their cavalry on the near flank, their Celtiberians on the far flank and 2 divisions of Scutari side by side in the centre.
 Initially, the Carthaginians let the Spanish come to them.
The first clash was on the near flank between the cavalry.  The Carthaginians lost the fight and quickly leaving their right flank exposed.  The only saving grace for them was that half the enemy cavalry was left shaken.
On the far flank the Celtiberians didn't quite make contact with their charge & failed to much damage with their javelins either.
In the centre the Gauls are now advancing.
The Spearmen & elephants have charged the Cetiberians on the far flank.  Thing are about to happen in the centre.  The Spanish cavalry is not getting far with reorganising.  The Spanish Allies have redeployed to protect the flank.
The Celtiberians are getting beaten on the far flank.  The fight in the centre has started.  The Spanish cavalry have done nothing much useful.
The Celtiberians have broken.  In the centre the Scutari broke a Gallic unit, but the nearest one broke their opponents and followed up to break their supports.
The 2nd Scutrai division right of centre has smashed a warband and a supporting Spanish unit, but now finds itself flanked by the Spearmen & elephants.  The 1st Scutrai has broken and the warbands are gleefully rushing towards the undefended Spanish camp.  The Spanish cavalry has totally failed to make anything of their initial success.  The Spanish have conceded as they have lost half their divisions & have no hope of saving their camp which will count as another point to break the army.

In the next round of the Maharajah Chris's Cartaginians will be taking on Jim's Pontic army. Mike's Marians will be fighting Steve's Seleucids.
An example of why I love living here - the other day I looked up from my painting table to see a U-boat going by the wargames room window.