Tuesday, June 29, 2021

More Mech War in the Desert

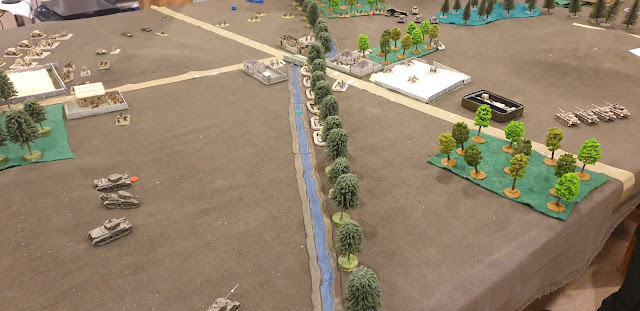
 An encounter battle for the oasis on 9'x6'xtable.  Commonwealth (Mitch & Mark v. Italians (Chris & Mike).

The Italians are on the right.  Both sides deployed much of their forces hidden & not on the table.
Both sides have advanced infantry into the house on their side of the oasis with infantry support on the nearby hills.  Matildas are advancing on the Italians in the house. The artillery have started a duel trying to range in on each other.  Tanks are engaging on both flanks.
On the near flank 10 M14's are advancing on 6 Crusaders. In the centre 5 L6's are engaging 3 Matildas.  On the far flank 5M14s are taking on 3 Valentines & 3 Crusaders.  The Brits have won the artillery duel, wiping out the Italian howitzers.
On the near flank the Italians are getting the upper hand over the crusaders. The 25pdrs are redeployeing to support the Crusaders.  In the centre the L6's are keeping the Matildas busy while boths sides' infantry are content to dig in let the armour do the fighting.  The M14's have been destroyed on the far flank. On the far side of the village the Italians have deployed a/tank guns & the Brits are advancing with bugs.On the near flank the M14's have finished off the Crusaders & most of the 25 pdrs. In the centre the Matildas fell back to cover their right flank. exposed by the success of the M14's.  On the far flank the successful British armour is moving towards the centre.At 10pm real time, we called nightfall. & the battle a draw.  Both side have won on one flank & hold half the oasis & no one is near failing army morale.  We failed to reach a decision because most players hadn't played the rules before & the tank v. tank actions were slow to resolve because while the early war tanks were mostly light, they also only carried pop guns.


Sunday, June 27, 2021

Mechanised War in the Desert

Jim's Commonwealth force (Oz inf + Brit armour) v. Chris' Italians.
The Italians are defending the oasis.  The attackers have a 15% points advantage.

The Italian infantry & artillery are dug in around the oasis.  The Commonweath forces are mainly coming on from near the far RH corner, but they are allowed a flanking force of up to 3 platoons to come on in the near corner.  The Italian armour has hidden deployment.  The mini playing cards denote possible deployment areas.  The hidden units starting with the figs off table have a matching card placed face down with them denoting where they actually are.
The Commonwealth have 3 Matildas, 3 Valentines & a infantry platoon coming on from the flank (at the far left in this camera angle).  Their main force has advanced either side of the rocky ridge with 9 Crusaders leading on the right.
The Brits suffered an early set back when the Italian howitzers destroyed their 25pdr battery before it had completed deployment on the plateau.  The Oz inf have de-trucked on the edge of the escarpment.  5 M14's have appeared among the palm trees to oppose the Crusaders.
The Commonwealth flank attack was met with 5M14's & 5 Semoventes hidden behind the rocky ridge.
The Commonwealth's flank attack was totally destroyed by the Italian armour's counterattack  The Oz infantry on the left have dug in on slope rather than advance without artillery or armour support.   On the right the 9 Crusaders are battling it out with 5 M14s which are in cover with artillery support.  In the centre, Oz inf supported by 4 carriers have broken thru the Fucileri & taken one of the houses. 
On the left the Oz inf made a last throw of the dice type attack on the Italian inf, but were beaten off.  On the right, the Crusader have finally overcome the M14's but have suffered significant losses themselves.  In the centre, the Semoventes have arrived having disposed of the Matildas on the other flank & have destroyed the bugs.   Next turn the Oz inf in the house are destoyed & the Commonwealth force fails army morale.    

Our new house rules for WWII are designed for mechanised battles on a large table & we think they do it really well.  It's a much faster game than either FOW or BA, with simpler rules that allow for larger forces to be used without player fatigue. 
 

Thursday, June 24, 2021

Ancients at Black Hills

A trip to the Black Hills to fight ancients chez PeterC.
Jim: Romans
PeterC: Pathians

The Romans have their legions supported by slingers on a ridge with javelinmen in the wood on their right & their cavalry on their left.
The Parthians are a mix of horse archers & cataphracts with no infantry.

On the left one Roman cavalry unit has chased a horse archer unit off the field.  the 2nd Roman cavalry unit has turned onto the Parthian flank & 2 Parthian cavalry units have turned to face them.
Along the ridge the horse archers are softening up the legionaries while the Roman slingers fire back.  On the right, the javelinmen have advanced from the wood to exchange shots with horse archers.

On the left the 1st Roman cavalry is returning having chased the horse archers away.  The 2nd Roman cavalry has been broken by cataphracts who have pursued out of shot.
On the left end of the ridge the legionaries have advanced & have been counterattacked by the cataphracts. On the right the legionaries have held their ground on the ridge & the cataphracts are attacking them.
On the left end of the ridge the legionaries are being pushed back back by the cataphracts, but the returning Roman cavalry have slammed into the rear of of end unit of the cataphract line.
On the right end of the ridge, the cataphracts have been repulsed.
On the left the cataphracts who defeated the Roman cavalry 2nd line are returning, but legionaries have deployed to meet them. 
In the centre some cataphracts have broken thru, but Roman infantry & cavalry are now rolling up the Parthian line from the left.
On the right the cataphacts are renewing their attack on the ridge. 
Another cataphract unit has broken thru in the centre, but the left of the Parthian line is either broken or flanked & about to break.  The Romans have won.
 

Tuesday, June 22, 2021

Napoleonic Naval

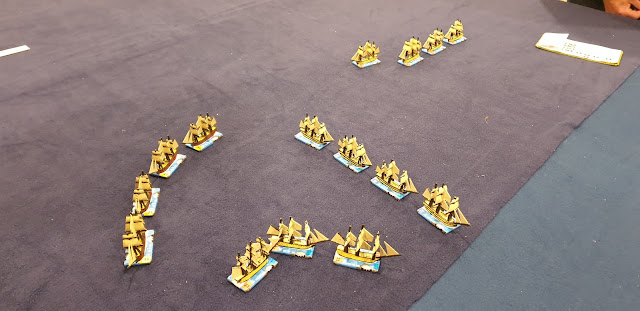
Having made enough 1:1000 models on my 3D printer to fight a battle, tonight we tried them out.  We used our old "Men o' War" house rules we used with the old Victory models, but modified them to dispense with the hex grid - now using templates to control simultaneous maneuvre. 

Allies (SteveJ): French: 1st rate & 3 3rd rates, all regular crews.
                          Spanish: 1 oversize 1st rate & 3 3rd rates, all inexperienced crews.
British (Mike):  1 st rate & 3 3rd rates.  (Jim & Mark): 1 2nd rate & 2 3rd rates.
                          All elite crews.

Down wind is to the left on the seam.  The Allies are at the far end if the table, French to windward.  

The Allies sailed directly at the downwind British squadron.  
The leeward British squadron realised they had blundered too late.  They tried to tack away, but the Allies surrounded them while the windward British squadron was too far away to help.
The leeward British squadron is being pounded from 2 sides.  The lead ship is already a shambles & drifting helplessly downwind.
The other 2 ships of the leeward Brit squadron are now critically damaged & the windward Brit squadron is still not able to help.  
A 2nd British ship has floundered,.  The third ship is a drifting hulk, but the windward squadron has arrived & saved it from having to strike its colours.  The Spanish are content with their day's work & are running for home . The French briefly exchange shots with the British windward squadron before turning to follow their Allies.

The Brits lost 2 ships sunk & 1 a dismasted wreck but still afloat.  The Allies lost no ships in rare victory.

The experiment of using templates instead of hexes worked well.  The players soon got the hang of using the templates & the new command logs.   The extra flexibility of having turns measured in 22.5 deg points rather then 60 degrees hex sides definitely improves the game. 

Tuesday, June 15, 2021

More Flaming Bolt Action

 After last week's promising start I fiddled tour new house rules for WWII a bit & set up a tank battle in the desert on 10'x6' table.   As I haven't sorted out  a points system yet I made up 2 similar armies, all regulars.  Both sides had 3 infantry platoons of 6 RMG + 1 ATR, 2 MMGs & a commander.  The brits had a 25pdr battery, the Germans a medium mortar battery.  The British armour was 3 platoons of 3 Crusaders & 1 platoon of 3 Valentines.  The Germans had a platoon of 5 MkIV shorts, 5 MkIII specials & 2 Mk III shorts. All the infantry had transport.

The German are on the near side.  Both sides did a map deployment within 18" of their base line.  There are 3 objectives.  The village & each side's line of supply road.
The German got first turn & their infantry drove down the road & deployed all their infantry in the village & the oasis.  The British infantry made a more measured advance expected their artillery to soften up the Germans in the village before they attacked. The Brits had all their Crusaders on the far flank advancing on the German supply line, so the Germans sent their MkIIIs from the centre to meet them.  On the left the MkIVs rushed forward down the left side of the table intending to take out the 25 pdrs to protect their infantry in the village. 
The MkIV's lost one tank before murdering the 25 pdrs with MMG fire.  The Valentines didn't arrive in time to save the guns, but they won the close range tank duel, taking out the MkIVs.  On the far flank the MkIIIs got the better of the Crusaders, losing 2 but taking out 6 Crusader & the surviving Crusaders fell back behind the ridge.  In the centre, British fire broke the Germans in the oasis, but the infantry platoon & MMGs in the village held firm.
With the Crusaders on the run, some of the MkIIIs diverted left into the palm trees to hose down the left flank British infantry with MMG fire & when their infantry attack on the other flank was beaten off, the Brits failed army morale.

The tweaks to the rules engendered by last week generally worked well.  A couple of minor issues came up, but will be fixed for next time.  The game rattled along fast with plenty of the strategic manouvre usually lacking in traditional BA on a small table.  QED.  Swirling tank battles on a big table is what these rules are meant to do & the verdict so far is that they do it well.  At present the rules take up just 3 pages of text & a 1 page QRS.  Now I've got the basics working I need to add a points list & some scenario rules.

Tuesday, June 08, 2021

New WWII house rules play test

During my 2 1/2 weeks in the NT desert I spent a lot of time mulling about a new set of Camp Cromwell House Rules for WWII - designed for much bigger battles than Bolt Action, but without the undue complications & Mickey Mouse-isms of Flames of War.  The concept is to use Flames of War figures, scale of action & IGoUGo turn sequence, but with a lot of Bolt Action game mechanics.  

The scenario had Germans dug in to defend a village at a river crossing against a British attack.

Brits (Mike & Chris): 4 Inf of 6 stands. 1 MG platoon for 4 MMGs & bugs for transport. A 4 gun 15pdr battery. 2 platoons of tanks (3 Cromwells & 1 Firefly).  All regulars.

Germans(SteveJ): 3 infantry platoons of 5 rifles. 4 Pak 38.  4 MMG. 4 medium mortars. 4 MkIV.   All vets.  The Paks & MMGs were distributed attached to the infantry. The tanks were in reserve to come on no sooner than turn 3.  The Germans were dug in & hidden in Ambush, the location of the Paks & MMGs secret.

The pic is taken from behind the German left after their MkIVs have arrived.
The Brits have a platoon of tanks on each flank, artillery bombarding & making a converging advance with their infantry directly at the village.
3 of the British infantry platoons were mown down as they advanced, but the Germans were being whittled away & lacked reserves to fill the gaps.  This pic is taken after the decisive turn when a good round of shooting from the Cromwells on the far flank took out 2 MkIVs while the Cromwells on the near flank broke thru their last remaining infantry platoon.  

The rules worked pretty well for a first draft of just 5 pages.  There is of course room for improvement, but the game certainly flowed fast & confirmed that the concept is worth developing further. 


Monday, June 07, 2021

3D printing for naval wargames

I've been exploring the potential of 3D printing for naval wargames.  At this stage the range of 3D ship model files available is limited.  But there are kick starters popping up & I expect it won't be long before there will be a plethora of them.  

The best I've found for WWI are kick starters by Empires of Steel out of Brisbane.  I've missed the boat for their kick starters but I understand they will be marketinggn their range as soon as they sort out the commercial details.  They provide a freeby WWI battlecruiser HMS Queen Mary on Thingaverse as a teaser.

This is the HMS Queen Mary:  The large model is 1:1500 & 144mm long.  The small one 1:3000 & 72mm long.  This range will be perfect for wargames once they are become available. This file is nominally for 1:1500, but you can vary the scale of a model quite a bit either way & still get good results.

Things are better for the age of sail.  Thingaverse have a free set of files for Nelson era ships.  These include typical examples of 1st, 2nd, 3rd & 4th rate ships of the line for serious battles, plus 5th & 6th rates plus sloops for small actions. 

This a HMS Victory printed at 1:1000 scale.  The hull is 70mm long.  The hull & the sail sets each take a bit over an hour to print. 
Here are my first 3 ships, assembled & painted deplyed on a 65mm hex grid.  The front ship is a Victory with the heavy duty spar option.  The 2nd is a Victory with the lighter spars option.  The thicker spars look clunky when printed, but when assembled & viewed from wargaming distance they look fine & they make a more robust model for wargaming purposes.  The rear ship is a 3rd rater.  The front Victory is on a 64 x 34mm base I printed from a file I designed & made myself using the free app Tinkercad to fit on my existing 65mm hex grid.  Paper dials are printed & glued to the disks which are rotated to record hull hits (on the big one) & rigging hits (on the small one).  The cogs are to allow your fingernails to grip the dials to turn them.  Tinkercad is easy to use & great for making devices composed of geometric shapes in its library. 


Wednesday, June 02, 2021

Bolt Action Tank War

There has been a 3 week hiatus while I was walking the Larapinta Trail in NT.  WE re-fought the scenario from our last battel with the US & German swapping sides of the table & the US amending their list to use heavier very late war tanks. 1,500 pts.
US: Mike & Mitch
German: Jim & Mark

The Germans are on the right.
Turn 1 featured the US getting the first 9 command dice before the Germans could do anything, much to their frustration.
On the near flank it was tank v. tank at long range.
In the centre infantry contested the two bridge objectives.
On the far flank a MkIII advanced to keep a super-Sherman busy.
On the near flank a bazooka team in a jeep diverted the attention of ne Hetzer & although the bazooka team were mown down by MG fire, the diversion helped the US win the tank duel. 
In the centre the Germans secured one of the two objectives, the US contested the other. 
On the near flank the US tanks advanced & took out the last Hetzer & took the objective before turning to help out the infantry in the centre.
On the far flank the MkIII was immobilised & pinned down, but survived to keep the Supersherman  busy.
In the centre the Germans couldn't destroy the US infantry contesting the railway bridge.
So the US won with 3 objectives to 2 held & 1 in dispute.