Sunday, July 31, 2016

The Looting of the Relics

The bonfires went up - the alarm had been sounded!  The Vikings were approaching the coast of Scotland!  Soon a messenger arrived -- it appeared that the most noble of Vikings, Niklaus Angrimson, was leading a raid!!!

But what were they after?  Iain McWadsley had no doubt.  This was an attempt to steal the precious and saintly relic -- the Madonna with the large Boobies.  There was only one thing to do -- hide the relic in the mountain caves.

But the cunning Niklaus predicted this is what the Scots would do!  He set up his men in a village on the way to the mountains, and waited for the treasure to come to him ....


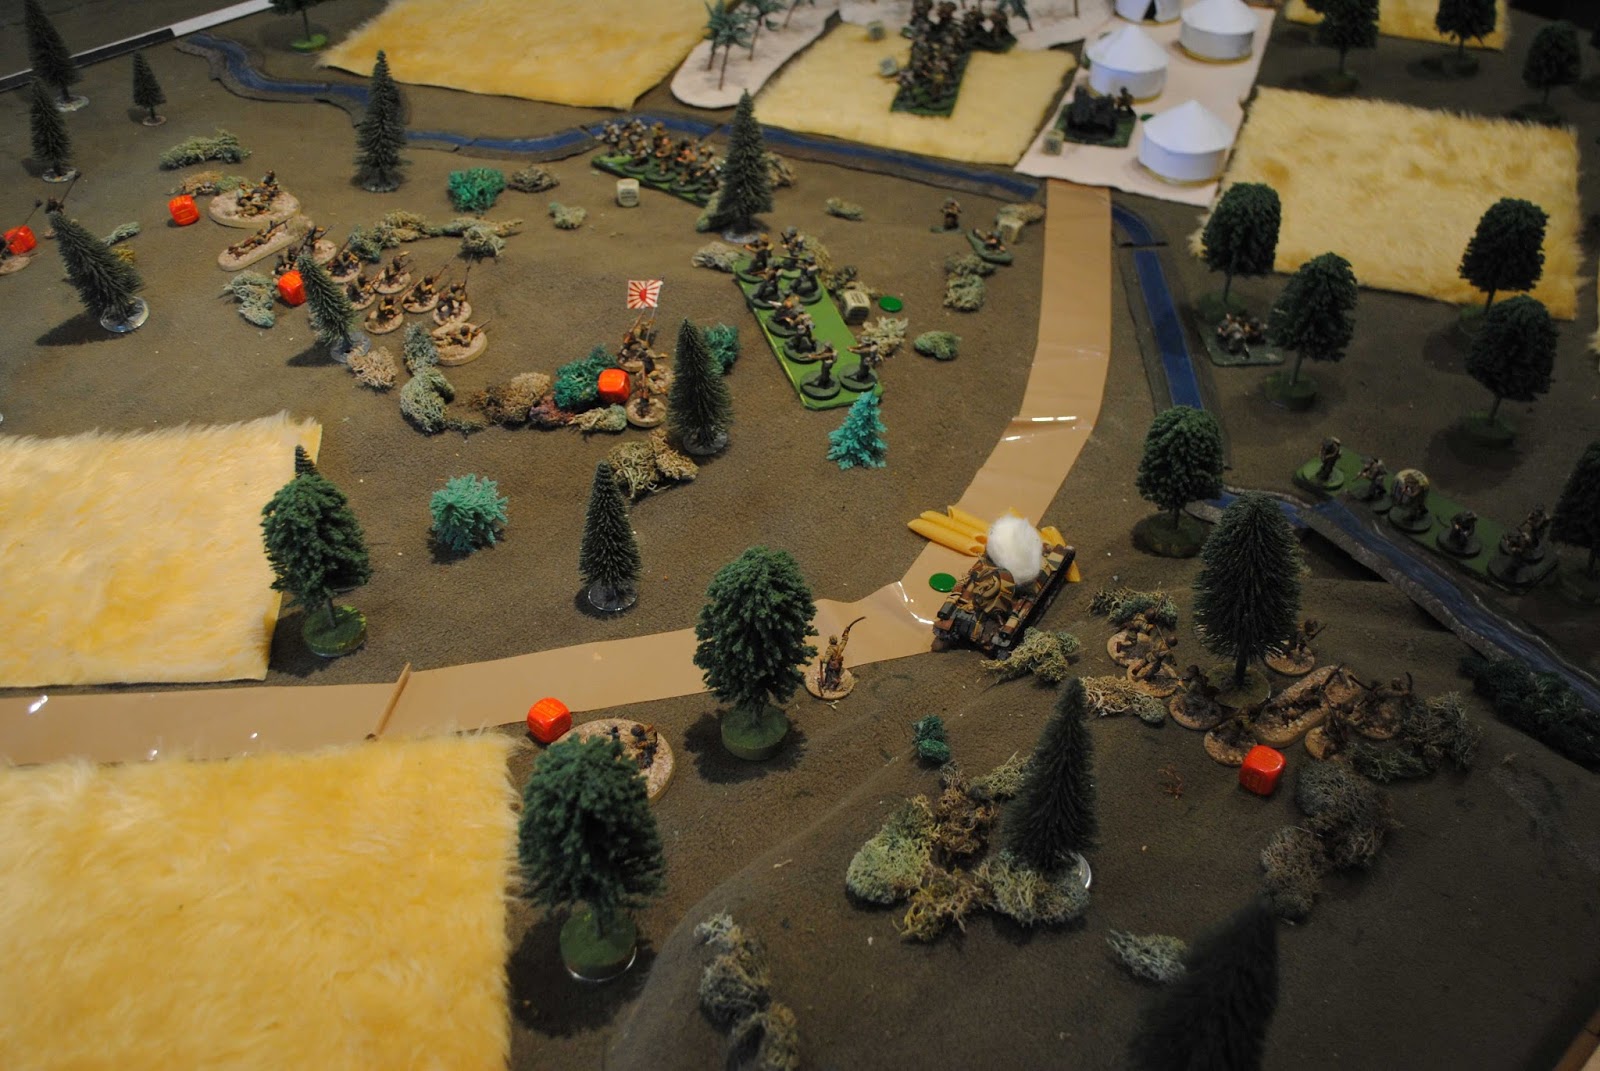
The first battle of our Saga campaign.  Nick (with Vikings), leading a raid on John (with Scots).  It was "The Escort" scenario, with John having to get two out of three wagons of loot off the other edge of the table.

The mounted Scottish nobles on each flank charged forward

The Noble McWadsley had to consult the good book to determine the effect of his nobles throwing javelins.


Unfortunately, the nobles got too close on one flank.  The Viking bondi charged in, and were repulsed.  But the beserkers then finished off the nobles.  Meanwhile, Niklaus and some other warriors charged forward to attack the Scottish archers.

A unit of Scottish nobles got around the village, and prepared to attach some Viking archers

The vile McWadsley got too close to some Vikings, and the only action he could take was to charge them.  Things may have worked out well -- McWadsley wasn't called 'Troll Hide' for nothing.  But even his thick skin couldn't save him!!!

Meanwhile the precious treasure was making its way to safety.  Could McWadsley's noble sacrifice allow the treasure to escape?  Um, no.  McWadsley went down, as did his warriors and nobles.  Then the baggage was easy pickings.


All that survived of McWadsley's force were 7 archers that fled to spread the tale of the fearsome Vikings.

But what is this limping in -- if it isn't the troll hide McWadsley himself!  Muttering 'it's just a flesh wound', he lives to fight another day, though he has another scar to add to his troll hide!  And his noble example has inspired the local nobles.  Troops have flocked to McWadsley, eager to avenge the loss of the 'Madonna with the large Boobies'.  He now has better troops than before!!!!!  (75% of John's casualties came back post game.  Then he got some recruits to bring one unit of warriors back to 8 men.  And then, after a game of crap dice, John rolled double 6 on the post battle results table, letting him choose his bonus.  He upgraded the 8 warrior unit to hearthguard!).

But Niklaus didn't do too badly either.  He now has extra treasure.  And the experience slaughtering Scots has toughened his forces up -- he also got to upgrade a unit of warriors to hearthguard!

Bolt Action Sunday School

At his Sunday School Barrie was doing Saga, a game I'm not that keen on (too much game & not enough war), so we put on a Sunday School for another denomination at Camp Cromwell.  I'd been contacted by a newby Bolt Action player & invited him & his brother for a lesson in playing the game.

Steve mentored Mathew with German Vets while I mentored Sean with Brit Regs.  1,000 pts a side on a table area about 6'x6' in a tank War style scenario with 4 objectives & deployment zones up to 24" in from baselines.
The Brits are on the left, the battle zone is the far side of the river.  There are objectives where the roads cross each side's baseline, one at the road junction, & one on the ridge on the far side (under the quad).  The German strategy was to grab & dispute the junction objective so objectives would be tied & win my killing 2 more units than they lost.  The British strategy was to take both central objectives.

The Brits grabbed the objective on the ridge unopposed, but the junction objective was defended by heavily armed veteran panzergrenadiers.  The Brits tried to stop the Germans reinforcing the troops at the junction with fire support & attacks in the centre while sending 2 squads, HQ & PIAT through the woods to attack them.

The Cromwell won the fight with a Puma & then joined in with fire support until pinned down by artillery fire from the far ridge. The British plan worked as they gained the objective on turn 6 & there was no turn 7.  But the Germans nearly escaped with a draw as they lost only 1 more unit than the Brits (those vets are hard to kill off) & only just failed to keep the junction objective in dispute to the end.

Tuesday, July 26, 2016

Bolt Action Tank War

Bolt Action Tank War Scenario:
2200 pts a side in 2 platoons each on 10'x6' table.
Germans: Steve, Nick & Mark
Brits: Jim, Mike & Chris
The table has 10 objectives 3 near each long edge and 4 along the centreline.
The game started with a deployment turn #0 when units were placed within 18" of own table edge (without firing) as command dice were drawn.
The Brits are on the right. 
The Germans make a big push on their left with Steve's platoon of MkII's & Pumas.  Mike is defending it with a small force, ordered to buy time.
The British centre was left with no targets when Steve's platoon went into the village & have begun to advance.

Nick's Germans on their left took the objective on the the ridge on that flank.


The Brits have taken the two objectives in the centre while Steve attacks the village. The Firefly & 6pdr are on ambush ready to fire at any German vehicles trying to rush to the rear objective.
At the end of turn 7: On the far flank a Hanomag ran the guantlet past the British ambushes and took the rear objective.  In the centre Mark's counterattack has been stopped by infantry in the wood & Shermans.  On the left the Brits have counterattacked and now possess the objective on the hill.

The dice decreed that there was a turn 8, but the only objective in any danger of changing hands was the one the near ridge.   When the Stug failed to pop the Cromwell the battle was called.   Objectives were tied at 5 all, but the British had lost a lot more units giving the Germans victory.   The Brits actually felt they had done alright in equalising the objectives in the face of a game-long run of very ordinary luck.  They got off to a bad start when their artillery barrage turned into friendly fire & pinned down their PIAT crew in the village & it didn't get better. The Germans got all the vital first dice each turn & the British shooting was consistently ineffective.  The battle took less than 3 hours - not bad for such a big game.


Tuesday, July 19, 2016

American Civil War

Union: Mike & Steve.
2 Inf divs of 6 regulars
1 Inf div of 4 regulars
1 Cav div of 5
5 cannon
Command 8 for all divs & CIC.

Condeferacy: Jim
1 Inf div of 6 veterans
2 Inf divs of 4 veterans
1 Cav div of 3
3 cannon
Command 9 for all divs & CIC

The amies were deployed by each side taking turns to place a division within 18" of their table edge.
Initial deployment: The Union are on the left, the Rebs on the right.
The Rebs advance on their right.  The union cavalry advance to meet the Reb's cavalry advancing through the town.
The cavalry fight is indecisive, but the Reb infantry has moved up to help out.  The Reb centre is moving forward to support the main attack while the Union's 3 rd inf div is dithering off camera to the left.
The Rebel infantry on the right should have swept the shaken Union cavalry off the table, but they couldn't hit an elephant while the Reb cavalry was broken.
The big Rebel Infantry division braved the artillery battery join in the attack.  Two units were forced back by the fire, but the other four got into the action - the Zouaves breaking through on the right to help finally break the Union cavalry and put their left flank division in dire straits.  Mike's infantry on the Union right is still dithering with poor command dice.
Steve's infantry on the Union left are only just hanging on, but Jim's infantry is running out of steam.
The Rebs continue to press home their attacks, trying to snatch victory before the 3rd Union infantry div arrives.
The Union left has finally broken, but so has one of the Rebel inf divs.  Both sides have lost 2 divs out of 4, but the only Reb unit left unshaken is their battery, which 1 hit off being so.  They clearly cannot win, so the Rebs conceded the battle & started marching back to Dixie.

The Union won without one division even firing a shot.  The failure of the Rebel right to quickly break the Union cavalry was decisive.  It bought time for the union guns to inflict decisive casualties.  Thanks to Dave Hay we didn't have to use any ECW ring-ins for Confederates for this battle, but looking more authentic did nothing for their performance.


Friday, July 15, 2016

Bolt Action at Good Games

We had 4 punters this afternoon.  I skilfully avoided fighting JohnM by pointing out that it would be interesting for him to fight Japs which he hadn't fought with his Soviets before.

Jim's British v. Rusty's Germans
Point Defence scenario, German's defending.
The Germans are on the left.  The objectives are the house far left, the bridge & the hill in foreground. The Brits initial deployment put an LMG squad near each objective plus their MMG, 25pdr & heavy mortar on the table.  The German first wave had infantry in both woods and their Tiger on their right.  The German support weapons were brought on from reserve down the sides of the woods.  The Brits Reserves reinforced the centre & right.
The Brits had a good plan backed with good luck making an irresistible combination.   The German infantry was pinned down on the edges of the woods.  Their support weapons were picked off by the 25pdr & mortar.  The Tiger was pinned down by the Artillery Barrage.  The PIAT advanced behind the central house and popped the Hanomag, then before the Tiger could recover from the artillery pins, popped it as well.


John's Soviets v. Chris' Japanese
1,000 pts Hold Until Relieved scenario, Soviets defending.
Your reporter was having too much fun popping Hanomags & Tigers with a PIAT & ranging in first time to observe the other battle closely, but Chris enjoyed being given a lesson on how to use Soviets as JohnM won a convincing victory. 

Tuesday, July 12, 2016

Lutzen 1632

Mike set up a scenario based on Lutzen 1632.
The Imperialist army was commanded by Jim & Chris, the Swedes by Mike & Mark.
The Swedes are on the far side.  Both sides have 3 infantry divs of 4 shot & 2 pike in the centre, a cavalry div of 4 on each flank of them and a dragoon div on the near flank.   The Imperialists have a battery on the hill on their far right (just off shot).  The Swedes have some heavy guns on that flank too as well some light guns with their foot.  2 of their inf divs are Swedes with +1 dice for their musketeers shooting & HTH.  The Swedish dragoons are supported by 2 cavalry units.  Both sides have a cavalry division in reserve to come on from turn 3 when they get a normal command through.  The Imperialist had 4 skirmisher units.  The Swedish foot have command rating 9, Wallenstein is 9, Gustavus 10, the rest 8.
Neither side showed any intention of advancing on the enemy guns on the far flank.  The cavalry on that wing is being moved across the rear of both armies.  The Swedes are making a steady advance on the centre & right, except their dragoons are hanging back.  Wallenstein has thrown his left flank cavalry forward hoping to outflank the Swedish foot.
Both sides have pulled back their cavalry on this flank while the infantry get into action in the centre. The Swedish reserve has arrived, but no sign of the Imperialist's. 
The Swedes right flank has finally advanced to attack the dragoons.  The Imperialist cavalry has attacked again.  The infantry fight has become a general slug-fest.
The cavalry on this flank have broken off again, but this time the Swedes are fatally weakened and are broken, though not yet removed.  The Imperialist cavalry from the far flank have finally got up into the front line.   The infantry fight continues
Half the Imperialist dismounted dragoons have been swept aside, but the Imperialist cavalry have counterattacked.  The cavalry fight between the Swedish reserves and the Imperialists from the right is still indecisive.   The Imperialist left flank infantry has broken.    At last the Imperialist reserves have arrived behind their centre. 
The Imperialist left is still hanging on but it's getting pretty desperate.  Likewise their right flank infantry.   Their last hope is the reserve cavalry which is working its way to the front.
The Imperialist reserves have charged the Swedish cavalry in the centre in a desperate last throw of the dice.  But it seems they were tired by their march to the battle.  They threw rotten dice and the division broke in one turn.  At that Wallenstein conceded the battle.

The battle was fought with our Pike & Shot era variant of Hail Caesar, Hail Cromwell.  We had 7 divisions a side over 70 units on the table & it took only 2 & half hours.  The odds were a bit against the Imperialists & the failure of their cavalry to turn up until too late didn't help, but a good time was had by all. 

Monday, July 11, 2016

Barrie's Sunday School

A cast of six showed up for Barrie's Sunday School.
Barrie & JohnW played Saga.
JohnM & Jim's French fought Rusty & Jake's Brits at Muskets & Tomahawks. 
The Brits had a supply convoy escorted by 2 Militia units marching for the fort. 2 regular inf could march out from the fort to escort them in. They also had a gun in the fort. meet them  in the fort.
The French had 3 Indian units coming on fon the right and 3 Militia coming on from the left.
The French distracted & delayed the regs with a couple of units and over-ran the convoy.  While one can get frustrated in M&T when your cards don't turn up, this has an up-side.  On turn 1 John's Indian cards were the last 4 to come out & this made the convoy escorts sitting ducks.

Friday, July 08, 2016

Bolt Action in the PNG Jungle

Jim's Australians v. Chris' Japanese
1000 pts, Ambush scenario from Empires in Flames book.
Chris' force was from the Japanese book - mostly veterans.
Jim's force was from the Australians in the pacific pdf - all veterans.  Basically standard Brits except instead of free Barrage Observer & choice of special rules in the Brit book, there is a different set of special rules to chose 1 of.   Australia is Next which made all infantry Tough Fighters was chosen.
The scenario requires a table covered in jungle with a road running roughly lengthwise.  (We don't have any junglely trees, so a bit of imagination is required). There is a roadblock n the table centreline.  The Allies come from the south (far end), they initially place half their units on the road Japs The Allies put half their force bewteen 6" from the roadblock & 12" from their table edge.  The Japs then place half their force no closer than 12" from the road in the south half, or 6" in the north half.  The Allied reserves come on from turn 1, but no more than 2 per turn. The Jap reserves come on normally but from either long table edge. The game length is 12-13 turns.  The Japs get 2VPs per enemy unit destroyed. The Allies get 1 VP per enemy unit destroyed plus 2VPs for a vehicle or 4 VPs for a inf or art unit that gets off the north edge.

Chris chose to mainly make a defensive line rather than go for a first strike ambush. He tried a strike on his right, but it was discovered that Tough Fighters trumped Fanatic in HTH.
The Ozzies advanced methodically down the centre.  The Jap tank moved up to the roadblock to dominate the road, but a flurry of sixes from the Oz mortar knocked it out. It was all downhill for Nippon after that.
The Ozzie attack in the centre swept away the Japs on the ridge with an irresistable combination of hot dice and tough fighters.  At the end of turn 7 Chris conceded.  More than half his army had been destroyed and the path north was open.

The large number of turns is clearly necessary to allow the Allies any chance of getting to the other end.  The 12-13 turns looked a bit much at first, but in practice we found the game ripped through the turns as the jungle made most combats HTH.  We did 7 turns in about 1 1/4 hours.  We made visibility in the jungle 6" as the standard woods rule is clearly nonsense in PNG.  (Trust me I've been there).

Tuesday, July 05, 2016

Hail Caesar! Macedon v. Persia

Before putting the troops I took to Barrie's two weeks back out of the transport trays onto the shelves I thought we may as well use them again. The only player who was a Barrie's was Steve & he changed sides, this time commanding the Macedonian cavalry on their right while Chris commanded the phalanx in the centre & the hoplites & peltasts on their left.   Mike commanded the Persian cavalry, Mark their centre & Jim their right.
The Persians are on the left.
The Macedonians make a general advance.  The persian cavalry go forward to meet them. 
A cavalry fight is swirling back and forth on the far flank.  The phalanx is advancing relentlessly in the centre.  The Macedonian left though has held back with bad command rolls. The Persian's mercenary hoplites have advanced to put some pressure on the phalanx's exposed flank. 
The right end unit of the phalanx broke their opponents and have turned the flank of the Persian foot.  But at this end of the phalanx the Persains have gained an overlap.  But poor command prevented the flank attack going in & the Macedian left is finally advancing.
On the far flank one of the Persian cavalry divs has broken, but the remaining cavalry of both sides is no fit state to do anything.  The Persian Guard infantry have been broken, but they weakened the phalanx and the Levy of the second line are counterattacking.  The Persian's mercenaries are outflanked and in trouble.
The phalanx has broken under the combined attack of the Levy and Hoplites, but although the phalanx counts double in the Army Break Test they still had 3 divisions.  In the next turn the Persian mercenaries broke and that was 3 of 5 Persian divs broken and game over.

It was a very close battle that could ahev easily gone the other way had the dice gods so decreed.  Both sides had good plans, but only one came off.  But good fun for all anyway.  So these armies of eaqual points have fought twice and each has won one.  The system must be about right. 

Sunday, July 03, 2016

Hail King Richard: Medieval

With Barrie's Sunday School not on this week Chris & I introduced Darren to Hail King Richard at Camp Cromwell - that is our tweak of Hail Caesar for the medieval period.
Darren's Yorkists are on the far side. Chris' Lancs on this side.  I am umpiring plus giving Darren a bit of advice. In turn 1Chris advanced except where his cavalry held back.  Darren advanced his right & sent his left flank cavalry across the front to the right.
Chris' line had firmed up into neat line.  Darren's cavalry in the centre failed to charge, but so did Chris'
Finally Darren got his cavalry to charge.  It destroyed the enemy bowmen & his cavalry, but was then all shaken & unable to do any more.   Chris is trying to attack on the right.
Daren has tried to pull his cavaly back to get it rallied.  On the near flank the bows & crossbows are exchanging fire. 
 Chris attacks on the right.
 Chris' attack ran out of steam, the advantage of his armoured infantry negated by the hill & Darren's billmen.   Darren's attack on the left of Chris' attack is the last straw and Chris' army breaks.