Tuesday, December 28, 2021

Bull Run Day 3: Part 2

 We picked up where we left off last week.

Having driven most of the Reb artillery out of the line the Union have limbered up their artillery in the centre & are moving forward into closer range as the Union infantry advance with them.
The Union are now putting the pressure of numbers with infantry against the Reb right & with artilelry in the centre.  On the far flank the Union have enagaged the Rebs in the wood  but are not pressing an attack, being content to tie the enemy down.
On the far flank the Union far left beyond the woods has been driven back, but the fight in the woods remains an indecisive sideshow as intended by the Union.  But on the near flank the Reb line east of manassas Junction is collapsing under the pressure.  With 6 turns of daylight left the Reb comander has decided his position is hiopeless and is ordering a general withdrawal conceding victory to the Union.

So ends our mini-compaign.  It produced a week or so of intersting email manoeuvring on map, leading to 3 great nights on the wargames table (at least the Union thought they were great).  

The battle went very differently to the real thing.  The Union command decided that long flank marches into s confused battel situation were not a good idea with green troops.  Instead of preparing on day 2 & then going out around the CSA left on day 3 as in the real thing, they attacked the fords directly on day 2.  When the Union succeded in gaining a crossing the Rebs fell back to defensive position in front of Manassas Junction.  So the main battle on day 3 was more of set piece making it much easier for the Union to control their green troops in an attack.


Tuesday, December 21, 2021

Bull Run Day 3

As night approached on day 2 the Confederates fell back towards Manassas & the Union consolidated their positions on the south side of Bull Run.

In the morning the Confederates were deployed defending Manassas Junction while the Union advanced to a new line just outside artillery range.  

The deployment was a slow process with green trooops, but once the infnatry was in a good line the Union artillery was advanced to within rifled artillery range to begin  a bombardment of the CSA centre.
A musket duel began on the Union right where the Union attempt to outflank the Rebs was countered by an infantry brigade advancing out of the woods & a cavalry regiment.
On the Union left the Rebs advanced a brigade, and 2 Union brigades have advanced to meet them. 
In the centre the superior numbers of Union rifled guns have forced most of the Reb artillery to withdraw.  

We were never going to finish this in one night, so we decided this seemed to be a good time to call a halt tonight.  The deployment phase is over & we can start into the serious fighting fresh next week. 

The battle was fought with 2 comanders for each side on the table, whuile the umpire, Union CIC & 2 other interested spectators were on Zoom from Canberra, Bruny Is & a distant suburb.  There is a fixed tablet camera on a high tripod giving an overview & a phone camera on a mini tripod for Zooming in close on request.

Wednesday, December 15, 2021

Bull Run: Day 2

We are fighting a Bull Run as a mini campaign over 4 campaign days.
CSA: Mark, Mitch, Chris.
USA: SteveD*, Renfrey, Jim, SteveJ.
Umpire: PeterW*.
* in Canberra by email & Zoom. 
The map covers an area 20x16km.
Figs are 15mm, CSA old metals of various makes, Union 3-D printed. 
Ground scale 400mm per km.

On day 1 the forces assembled, the Union north of Bull Run, the Rebs to the south.
On day 2 in the real thing, the Union spent the day resupplying & resting up, then on day 3 made a flank march to the west to cross the Run at Sudley Springs.  

In this campaign, the Union advanced on a broad front directly towards Manassas Junction on day 2.  All the fords were defended by Reb detachments.  

The table was set up 16' long & 6' to 8' wide to allow plenty of scope for movement hidden from the enemy.
View of the table from the east before any deployment.
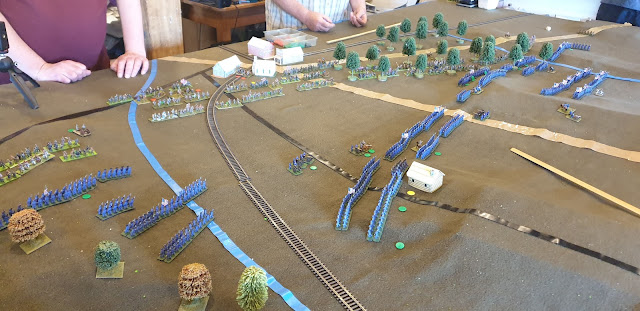
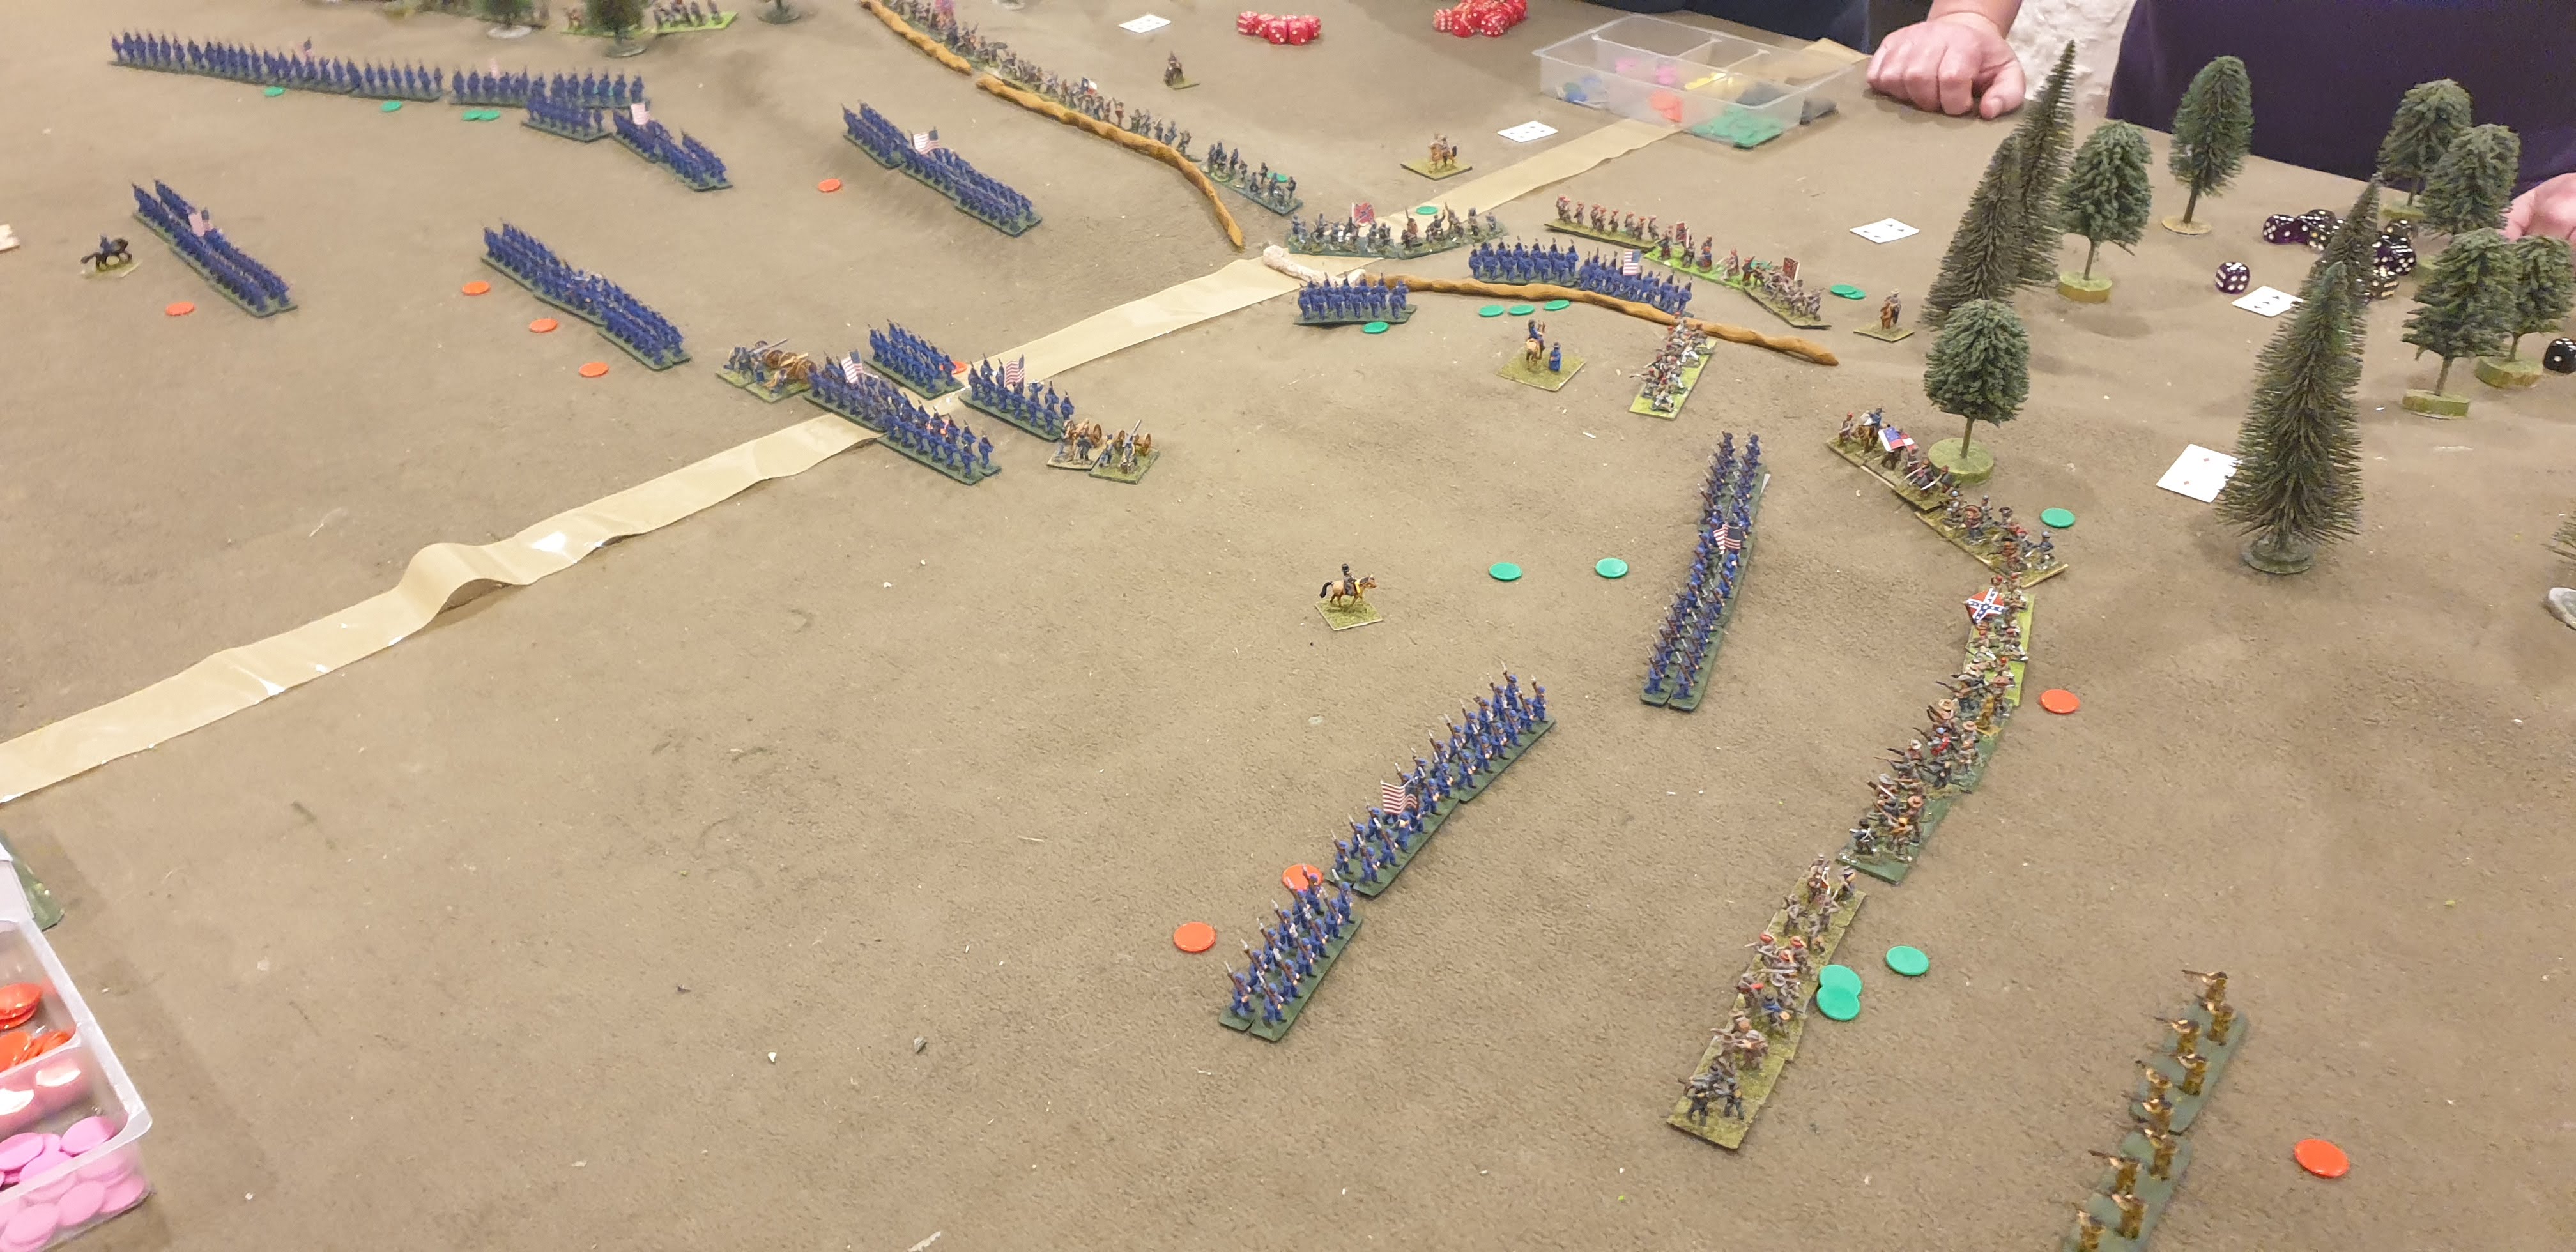
It was turn 9 before your correspondant remembered to start taking photos (being too engrossed in commanding the Union left).  In the foreground a Union brigade stands back from Simpson ford defended by a small CSA brigade with artillery.  On their right a Union brigade supported by 3 batteries is threatening McCleans ford.  At the head of the big bend in the Run a Union brigade is attacking Blackburn ford.  In the distance 2 Union brigades supported by 5 batteries is attacking Michells ford.  Out of shot another Union brigade is watching Lewis & Balls fords.
The first Union success is at Blackburn ford where the Union attack is supported by artillery from their right flank & the Rebs are outnumbered.  The Reb regiment on the ford was broken by fire & 1 Union regiment has crossed the ford.
At Mitchels ford the Union artillery has forced the Rebs back & Union infantry have started crossing the ford.
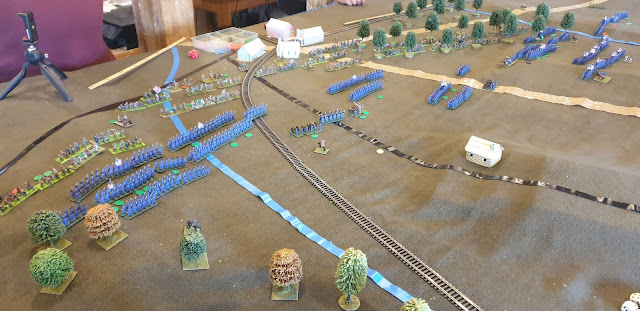
At Balls ford a Union brigade is inactive guarding the Union flank, but the Rebs are withdrawing their forces from all the fords on that flank.
At McClains the Union are still waiting for their artillery to inflict serious damage.  At Blackburn the Union have crossed in strength & the Reb defence is in trouble.  At Mitchels Reb reinforcements have arrived & the the Union troops across the ford are copping a pounding.
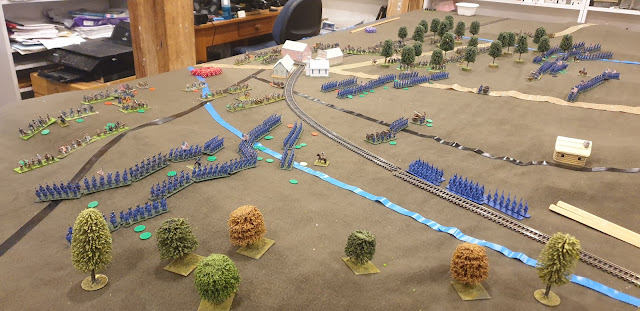
At McClains CSA reinforcements have arrived before the Union even attempted a crossing.
At Blackburn the Reb have broken under musket fire from the front & artillery from the flank.  More Union troops have appeared & are advancing down the ridge.
At Mitchels the Union have been driven back across the ford.
After 16 turns with 6 left until nightfall, only 2 fords had been crossed by the Union & at one of them the attack was beaten back.  But the loss of Blackburn has compromised the Rebel line & the CSA commander has lost his nerve & ordered a general retreat back towards Manassas Junction.  The Union are happy to see them go.  They will occupy the fords before nightfall in a good position to renew the attack across open ground in the morning.

The butchers bill is not high for either, but favours the Union.  Most of the losses were from artillery fire.  The 2 sides had the same number of guns, but the Union's were better concentrated & more effective.

Tuesday, December 07, 2021

Modder Fokkers

With a Bull Run campaign running by email but not yet resulting in battle we took a break from ACW & dusted off the WWI 1/72nd scale airplanes using our old Modder Fokker house rules.
British:  Lt Oakford (Camel). Lt Nash (SPAD).  Lt Arthur minor (Camel).
Germans:  Oberleutant Gandy (Pfalz). Lt Jendrich (Fokker DVII).  Lt Pearson (Albatros).

The Germans are on the left.
The dogfight starts in two parts: Camel v. Fokker on the left & the other 4 mixing it up on the right.
The two dogfights coalessed, then the Pfalz gets on the Spad's tail & the pair split off.  The SPAD used it's speed to break away, but it was lucky in receiving few hits, it received critial airframe damage.
Meanwhile the Fokker & Albatros combined to shoot the wings off Lt Oakford's Camel. 
The Brits might have been wiser to run for it, but they gamely turned back into the fray.
The Pfalz & the Albatross ganged up on the 2nd camel as the Fokker kept the SPAD occupied.
A lucky shot from the SPAD dmaged the Pfalz wich flew off to a safe distance while the Fokker & Albatross finished off the SPAD.

Lt Pearson took the honours with 3 shared kills,  Lt Jendrich shared 2 kills & Ob Gandy shared 1 kill in a 3 nill German victory.


Wednesday, November 24, 2021

ACW 15mm

Union: Jim & SteveJ
CSA: Mark & Mitch
Both sides had 6 brigades of 6 regiments of inf & 1 brigade of 4 regs of cavalry.  The union had 6 guns to the CSA's 4, but the CSA had a Stubborn rule allowig them to take more casulties before breaking.
Deployment was simultaneous with troops out of sight of not put on the table.  (Areas of dead ground were marked with a numbered card & the troops in those areas were kept off table with a corrsponding card face down).
Rules: Camp Cromwell house rules.

View from the Union side.  Most troops still out so sight of the enemy so not on table.
Both sides have now advanced troops into sight on the their right flanks.
The Union are deploying their left in defensive terrain.
The CSA are pulling their left back to a line on the ridge & the creek.  
After a pause for their artillery to silence the CSA battery on the ridge, the Union right is advancing. behind a skimish screen. A skirmish fight is going on on the left.
On the far flank the Union left has fallen back in the wood to a new line in the fenced fields.
On this flank dismounted CSA cavalry have crossed the creek to flank the Union infantry, but Union cavalry have moved up & dimounted to counter the move.
In the centre, the Union skirmishers have fallen back as the main line advances into musket range. 
On the far flank the CSA have had second thoughts about attacking the Union defense in the fields & have called off their attack there.  In the centre the fire fight continues along the line.
The Union have taken significant casualties, but the CSA have fared worse with their centre falling back before the Union advance.   

At 10 o'clock real time, time was called.  The Richmond Times will spin a victory out of holding off until nightfall, while the Washington Post will trumpet a great victory with the Union army forcing the CSA to slink off under the cover of darkness. 

So why did the Union win?  The Union left used the woods & farm terrain to keep 3 brigades of CSA infantry busy with just 2.  This gave the Union a 4 to 3 advantage in the centre.  The CSA had a ridge & river line to defend, but their line was compromised by the angle in the their line allowing converging fire.  A steady Union advance relying on musket & artillery fire rather than the bayonet won the day .

Thursday, November 18, 2021

American Civil War 15mm

Renfrey's Confederates v. Jim's Union
Both sides had 6 infantry brigades of 6 regiments & a cavary brigade of 4 regiments.
The Union had 6 batteries, the CSA 4.
Rules: Our M2M house rules, ACW 15mm variant.
The CSA troops are rated stubborn so theri brigades can take an extra casualty before breaking. 

The CSA are defending & deployed first.
The Union came on in columns & deployed to attack.
As the Union deployed to attack the CSA fell back a bit to reduce the length of their line & to anchor both flanks on woods.
On the left the CSA didn't quite fall back far enough & the Union has a small overlap on the end of the line.  On the right Union skirmishers have covered the advance of the main body.  In the cntre the Union have deployed their artillery in two batteries in gaps in their infnatry line. 
On the far flank the Union attack on the flank supported by artillery has broken the end CSA brigade & swpt away one of theri batteries. A fire fight is happening on the right.
On the far flank the CSA reserve brigade has counterattacked.  In the cnetre the CSA brigade in front of the church has been broken by a combination of musketry & artillery.  The fire fights continue on the rest of the line.
On the far flank the CSA counterattack is outnumbered & beginning to falter. The Union artillery dominates the centre. A desperate CSA charge on the near flank has been beaten off.  The CSA concede defeat.


Tuesday, November 16, 2021

Rome v. Carthage 28mm

Rome:  Jim & Mitch
Carthage: Mark & SteveJ
Umpire: Mike.
Rules: House rules M2M.

The Romans are on the near side of the table.
The Carthaginians have rapidly advanced their cavalry on the near flank, held their centre back & advanced their elephants in front of their cavalry on the far flank 
The Roman centre has advanced while their outnumbered cavalry is being held back on both flanks. Their plan is to smash the Punic centre while their outnimbered cavalry fight delaying actions on both flanks. 
The Roman left has been largely shattered on the first charge. Triari have been deployed to cover the infantry's flank as it continues forward.  On the far flank the triari have been attacked by elephants.
Mike's newly painted elphants are a fearsome sight.

On the near flank the Triati stand alone against masses of Punic cavaly who so far have been prevented from exploiting their advatage by bad command dice.
In the Carthaginian spearmen have stood firm with Scutari on each side.  The Roman line was overlapped on both sides & manoples of the second line have been stretched out to prevent flanking by the Scutari.
On the far flank the Triari & Roman cavalry have dealt with half the elphants, but at high cost.   The Scatari on this side of the Spearmen have counterattcked the legion's flank, but the Romans re-reployed some 2nd rank maniples to the right to hold them off.
On the near flank the Punic cavalry is  still taking its time reforming while peppering the triari with javelins.
In the centre things have gone bad for the Romans. Half the Scutari on this side of the spearmen have broken thru their line & the first line had been broken by the spearmen in the centre.  Only on the far side have the Romans done well, breaking the Scutari there.
The Roman 2nd line attacked the Punic spearmen & broke half of them, but its' too late.  The victorious Punic cavalry has finally got it's act together & arrived in the legions' rear.  It's game over for Rome.

The Roman plan nearly worked, but was stymied by the Citizen spearmen.  If they had broken, the Roman second line would have been free to counter the victorious Scutari & then hold off the Punic cavalry. 


Thursday, November 11, 2021

Ancients at Black Hills

The Persians occupy a ridge opposing a slightly larger Arab force.
Figures: PeterC's 70's vintage 25mm metal.  Rules: Camp Cromwell Houes Rules M2M. 

The Arabs are on the near side.
The Arabs initally advance only their front line of archers.  The Persians charge forward with elephants & cavalry on their left while their right & centre remain on the hill.
The Arabs have advanced their centre & wheeled their rear lines to flank the Persian advance.
The elephants turn to face the flank threat on their right with light infantry covering their left flank.
The Persian centre has now charged to support their elephants.  On the elephant's left flank, their light infantry have driven off the Arab light infantry, but Arab cavalry have found a gap to hit them in flank anyway.
The elephants have broken, the Persian counterattack in the centre has been held off & is now outflanked.  Only half the forces of either side have been engaged, but the Perisians have lost their left flank & their centre is doomed, so they concede defeat.  
 

Tuesday, November 09, 2021

The Confederates defend the pass

Union (Chris & Mitch): 8 brigades of 6 regiments + 4guns (all freshly minted 3-D printed 15mm)
CSA (Mark & SteveJ): 6 brigades of 6 regiments (all old minifigs).

The Rebs have improvised defenses thrown up across the pass flanked by think woods.  Most of their troops are out of sight, positon recorded by cards.
The Union have made a rapid advance.  
Rebs have appeared at the edge of the woods on both flanks sending skirmishers forward to harass the flanks of the Union advance.
On the far flank the Reb skirmishers have been driven back & therre is a stalemate. 
On the left of the ridge the first Federal wave has been beaten off.  The attack on the right side of the ridge has only just gone in.  More Rebs have appeared in the woods on the immediate right of the ridge.
On the near flank both sides have a brigade engaged.
The Union attack on the left side of the ridge has been broken off with heavy losses.
The attack on the right of the ridge has broken through the front CSA line.
The Union tried to support the breakthrough, but it has been halted by Reb reserves & flanked.  
View from the CSA side as the Union breakthough has come to a sticky end. 

The game was played with our M2M house rules & took about 1 3/4 hours.