Wednesday, January 31, 2024

New Model Army v. Scots Round 3

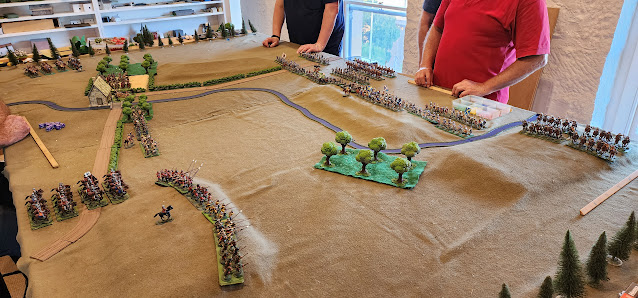
 To provide a 5 player game, the Scots were divided into 3 divisions, the English into 2 divisions.  The divisions were allotted to the players by lot & each division's starting locations was determined by lot. 

Mitch's English started at the near left corner, Steve's English centre right.
Jim's Scots near right, Mark's Scots far right & Chris' Scots far left. 
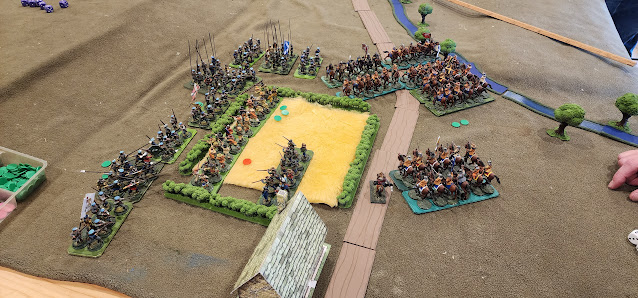
Mitch has moved quickly to send a cavalry brigade to the centre, while the rest of his force of cavalry & & musketeers move on Jim's highlanders.
Steve has formed hedgehogs to face Mark's cavalry with one regiment facing Jim's highlanders.
Mark's Scottish cavalry have deployed on the plateau & Chris is moving his pike & shot towards the centre as fast as he can towards the centre. 
Jim's highlanders are in big trouble as most of Mitch's division & par to Steve's converge on them.
Mitch's cavalry inn the centre have charged up the hill to keep Mark busy.
Chris' pike & shot's advance is hindered by the terrain.
Jim's highlanders are being destroyed by superior numbers.
The cavalry melee on the plateau continues.
Chris's pike & shot  is still marching towards the action.
Jim's division has been reduced to 2 shaken units. 
One English musketeers unit has been left to finish them off while the rest of the English are redeploying to face the other two Scottish divisions.
Mitch's cavalry attack on Marks' cavalry has been beaten off with heavy loss, but has achieved it's objective of keeping Mark's division busy while the highlanders are destroyed.
Chris' pike & shot have finally got into action against Steve's.
Mark is moving his cavalry around the rear of Chris' division to cover it's right flank against Mitch's division.
The English have formed a good defensive line against the Scot's counterattack.
The Scot's counterattack attack was disjointed & has failed to break the English line as the Scot's casualties mounted until they failed their army morale test. 

The random deployment system usually produces interesting scenarios.  The English used their superior command well to control the action, delaying most of the Scots until the highlanders were destroyed, then forming a sound defense against the belated Scot's counterattack. 

Our series of 3 actions have pitted a small high quality army against a larger regular force.  Eight players have been involved with 2 or 3 a side, often swapping sides.  The points system has the armies about equal points.  The English have won all three, but in each case have also had the better battle plan, so the points system seems pretty good.


Wednesday, January 24, 2024

New Model Army still in Scotland

Same armies as last time, but the player have changed sides with a new scenario & terrain utilising the my 3D printing of the last week.  1st pic from behind NMA left flank.

Both sides have had their pike & shot, artillery & one cavalry brigade camped on the plateau on their side of the river. Both sides can deploy their camped force anywhere on the flat area of their plateau before the start.

Both sides have reinforcements coming on along the road on their left.  The English have 4 cavalry & 3 musketeers, the Scots have 4 cavalry, 2 musketeers & 6 highlanders. The road columns can start to deploy on turn 1.  (The Scots' columns extends off the table, so 3 highlander units will march on along the road).

The Scots are on the left.   They have sent their cavalry forward off the plateau to cut off the English left flank force while their pike & shot move directly at the musketeers deploying in the farm. 
On the far flank the Scots have advanced their cavalry down the road & the English have charged towards them, but not yet in contact.  The English foot are advancing directly at the Scots foot.
On the near flank the English musketeers are desperately trying to defend the farm against heavy odds while their cavalry defend their flank.
On the far flank, the English are winning the cavalry fight.
The English musketeers in the farm yard are being cut down by superior numbers of muskets.
The Scots cavalry have lost their 1st line  & the 2nd line has rallied back.
Both sides have detached part of their right flank force to move to the centre.
On the far flank the English cavalry have finished off the Sots cavalry & have engaged infnatry as the English infantry are still coming up.  
The Scots have cleared the musketeers out of the farmyard, but their cavalry has been destroyed.
on the far flank the Scots infantry is still holding on, but the English foot is closing in.
Both sides have had the infantry of their smaller division destroyed by superior numbers, but the English cavalry destroyed all the Scots cavalry making decisive difference.  The Scots  fail their army morale test & the New Model win again.


Tuesday, January 16, 2024

The New Model Army invades Scotland

Scots: Mark, Renfrey & Dale. 4 pike & shot, 6 highlanders, 2 musketeers, 8 medium cavalry, 3 guns. All troops Regular grade.
English: Jim, Mike & Mitch. 4 pike & shot, 3 musketeer, 4 heavy cavalry, 4 medium cavalry, 2 guns.  All elite veterans (except gunners).

The Scots are in the far side.
The English make a general advance, including cavalry moving towards both Scot's flanks.
The Scots are redeploying their right flank to meet the English advance on that flank.  
On the far flank the Scots redeployed quickly & the English advance is a bit disordered.
On the near flank the Scots have formed a sound defensive position with their cavalry on a ridge with musketeers in support on one flank.  The English are attacking the wood with infantry to try & clear the flank threat to their cavalry.
In the centre, the English musketeers have advanced to the river line.
On the near flank the English heavy cavalry are waiting for their infantry to clear their flank.
In the centre the Scots artillerymen have been driven away by musket fire. 
on the far flank both sides have shaken themselves out into neat lines.
On the near flank some of the English have moved furtehr right & prepare to attack whie the fight in the wood remains indecisive.
In the centre the Scots have advanced from behind the ridge line & driven off the English gunners with a pike & shot charge.
On the far flank the cavalry of each side are engaged & the infantry of each side are exchanging fire. 
On the near flank half the English cavalry have charged.  In the woods the English have broken the first line of musketeers, but are being held up by highlanders.
In the centre the Scots have charged across the river against the English foot.
on the far flank the cavalry fight is still indecisive, but the new Model's superior fire power has broken the Scots foot.
On the near flank the English cavalry have been held off & their infantry attack on the wood has failed.
On the far flank the cavalry ahs neutralised each other, but one of the English pike & shot are still unshaken & are advancing on the Scot's centre.
In the centre the Scots won one of three combats & those losses caused them to fail their Army MoraleTest.

The English plan was to win with even numbers but better troops on the left flank, use the river to neutalise the Scot's centre with inferior numbers & wrap around the Scots right with the heavy cavalry.  The left flank plan worked, the right flank plan was thwarted by a sound defense.  The centre plan sort of worked, as the mostly successful defense of the river line inflicted critical casualties on the Scots.

Some new 3D printed terrain

 I've been making some more terrain features with my 3D printer.

The hedgerows are not a new item, but I've printed off more of them.
The trees are a freebee from Thingaverse. I've been printing them in various sizes.
The river is based on a section of straight that I got from Thingaverse.  I use Tinkercad to modify the original file to make various lengths & curves.
The road sections are also made by modifying the river file. The wheel tracks are added by dragging a hot soldering iron over the prints.  I found this was easier to do than making multiple meandering grooves on the model in Tinkercad.
The house is an old paper model.  I still think paper models are easier to make than 3D printed ones as you don't have to paint them, & they are surprisingly robust.
I've printed some hedgerows printed smaller & here they form a vineyard for 15mm figs.


Saturday, January 13, 2024

WWI Cruiser Action

Both sides had 2 CA, 3CL & 4DD.
Germans: Jim.  Brits: Dale.

The Germans are on the right in two columns of CA + CL + DD.
The Brits are in two columns, CAs + DDs in the nearest column, CLs + DDs in the other one.

The Brits turn away to port with their CAs heading to the right of the island & their CLs to the left. 
The Germans also turn to port, but are converging their CAs.
The CAs opened fire at extreme range for their 8" or 9" guns.
The Germans ranged in immediately, but the bBits did not. 

One Brit CA eventually got some hits on one German CA, but they were both being pounded by both German CAs so the Brits sent their DDs forward laying smoke to cover their retreat.
A torpedo attack by the Brit DDs on the German CLs failed
The final butcher's bill was one Brit DD flotilla disabled & severe damage to both Brit CAs while the Germans suffered minor damage to one CA.

Not a long engagement as the German's hot targeting at extreme range quickly made the scenario one sided.  The game then turned into an interesting exercise in the Brits finding a way to get out of German barrage & escape.  Their foresight in keeping some DDs near the CAs gave them a way to do this.  


Wednesday, January 10, 2024

Napoleonic Naval

With Renfrey visiting from UK, Dale visiting from Canberra & Mark recovered fromhis operation, we had a full house of 6 tonight fro a Napoleonic naval battle.
Brits: Jim, Renfrey & Dale.
French: Mitch & Mike.  Spanish allies: Mark.
The Allies have 2 more ships than the Brits to compensate for the Brits being Elite crews to the French regular & the Spanish raw.
Ships are 3D printed.  House rules.

The Brits are on the right, the Allies on the left.  The wind is blowing accross the table towards the camera giving the allies the weather gauge.
Both sides manouvre their 3 squadrons towards forming a single long line as they approach each other.
As the lead squadrons pass each other the lead French ship is pounded so hard the strikes her colours & turns out of the line.
The British form a perfect line, but their seamanship is better than their gunnery dice & they get much the worse in the exchange of fire as the fleets pass each other.
The 2nd French squadron takes advantage of the weather gauge to turn towards the brit line & open fire with double shotted guns.
The 2nd French squadron breaks thru the Brit line wrecking havoc with close range raking double shot.  The Spanish also turn towards the British line.
With their line broken in two places the British fleet is shattered.  Only 3 British ships manage to escape to the left, the other 6 striking their colours.   The Brits had no opportunity to take possession of the one French ship that stuck it's colours, so that ship ran it's flag back up.

It was a rare crushing defeat for the Brits.  The island cramped their action & their gunnery dice wasn't good, but the main factor in their defeat was the allies' use of the weather gauge to break the British line.  
 

Sunday, January 07, 2024

WWI Cruiser Action

Dale is in Hobart & was introduced to WWI Naval Camp Cromwell style.
Germans (Dale): Seydlitz, Moltke, Blucher, 2 LC & 3 DD flots.
Brits (Jim): Lion, Tiger, New Zealand, 2 LC,& 3 DD flots.

The Brits are in the foreground in a long column with a LC + DD on each flank. 
The German DDs are going around the island, the Blucher leads their LCs in front of the big cats.
The Brits get a good start when the Tiger's first salvo lands on Seydlitz.
Disaster struck the Brits when the New Zealand tried to cross between the cats & collided with Lion.  The Lion survived ok, but New Zealand crumpled her bow & sunk. 
The British line has been T'd by Blucher & the lead LC is in big trouble.
The BC's are now trading salvoes , but an LC is taking the punishment.
The German DD's are closing on the British rear.
The leading British LC & DD have been sunk.
The Seydlitz has been sunk by Tiger.
Blucher had turned to starboard to fire on Lion, but has turned away after the British DDs launched torpedoes in their direction.
Moltke has sunk Lion, but Tiger has retaliated & sunk Lion (the ship with smoke all over it).  
Blucher has turned back towards the fray.
The Lion is still afloat, but badly damaged & under torpedo attack as the Brit DDs try to protect her with smoke.  Lion has managed to evade the torps & despite her damage is still faster than Blucher.
The Brits have lost 2 BC, 2 LC & 1 DD.
The Germans have lost 2 BC & 1DD.
All the DDs have fired all their torps.

The papers in both London & Berlin will be proclaim heavy losses suffered by the enemy.
Both sides lost 2 capital ships. 
One of the Brit losses was only an obsolete BC, but they also lost 2 LC. 
The battle has to be called a draw despite what the papers might say.


Tuesday, January 02, 2024

Mech War in Tunisia again

 Same armies as last week, but this time Jim commands the Afrika Korps & the terrain has been tweeked.

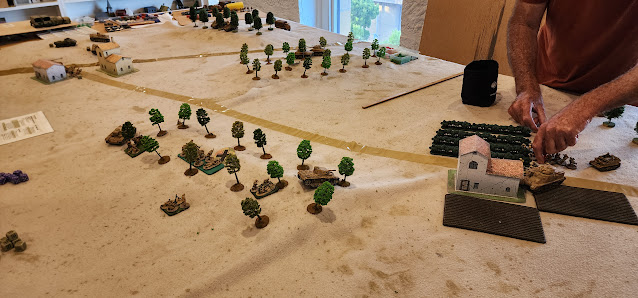
The Germans are on the left..  There are 4 objectives, the two farms & the two ridges either side of the centre. The terrain naturally led to Mike deploying the Brits in 3 groups while Jim deployed the Germans in two groups.
On the right the Brits are advancing thru the farm towards the German left flank.
On the far flank the Germans have advanced the armour is exchanging shots across the valley.
Both sides have already secured two objectives.
On the far flank both sides are taking losses. 
The Germans have sent their armoured car from their left down the road to support their right.
on the right the Brits are moving up to attack the German flank. 

On the far flank, the Brits eventually got on top & destroyed all 3 panzers losing a Honey & having a Sherman immobilised. They then moved the Shermans on the centre ridge to support their left, but the Germans countered that by moving their Pak & Panzer out from behind the left of the ridge.
on the near flank the armoured car tipped the balance in favour of the Germans & the British attack petered out.

Both sides hold 2 objectives, but the Brits have lost 2 more units than the Germans (6 to 4) 6 units to the German's so it's a narrow German victory.