Tuesday, December 29, 2015

Birthday Battles at Black Hills

Chris & Jim helped PeterC celebrate his 66th birthday with 2 wargames.

Battle 1:  Zama 202BC:
Chris' Romans v. Peter's Carthos
The Carthaginians are on the right.  Their infantry are deployed in Hannibal's 3 lines, but their elephants have been put on the wings to support the cavalry.  (On the right the elephants are already in contact with the Roman horse).
The Roman left wing cavalry is already broken by the combined elephant & cavalry attack.   The Roman light cav on the far flank is giving ground but not beaten.  In the centre the legionaries have smashed the front line & are moving up on the second line.
The Roman left is still holding on.  On this flank the Carthos are reorganising to attack the legion's flank.  The triari are forming to prtect the flanks as the legions keep pushing forward. 
The Roman left has finally broken, but they enemy right is scattered and largely shaken.  The Cartho attack on the near flank  is meeting stubborn resistance.  The Roman attack in the centre still hasn't broken the second line.
The Cartho centre held on just long enough for the flank attack to break the RH legion and give Hannibal victory.

This battle got a bit messy, I think largely because we are using narrow frontage units with Peter's old 15mm's (single 60mm stands for small, 2x=120mm for standard).

Battle 2: Brienne 1814
Jim's French v. Chris' Prussians
The Prussians are deployed in and around the village & chateau (on the hill).  They have anotehr Infantry Corps coming up.  The French are coming on the far end with an Infantry Corps and 2 Cavalry Corps.  They have another Infantry Corps coming up, but "it's Ney so don't hold your breath".  The French objectives are to take the village & Chateau plus get troops over the raod to the left behind the Prussians.
The French struggle to get their cavalry from their right to the left where the clear ground is & theri infantry from their left to their right to attack the village.
Afetr a good deal of blundering about and confusion the French finally sort themselves out so theri cavalry can attack the enemt cavalry and their infantry can attack the village & chateau. 
The French have taken the village, but not the chateau.  The narrow front between the village & the wood full of yegers makes it hard for the French to get advantage from their superior numbers of cavalry.  The Prussian reserves are coming up behind the village, but no sign of Ney.. 
A counterattack by fresh Prussian troops has retaken the village, but the Prussian cavalry has finally broken. 
The French cavalry just make it to the road to the left as night falls, but the Prussians still hold the town and chateau, so the battle is declared to be a draw.


Friday, December 25, 2015

Bolt Action Practice for Cancon

Jim's Germans v. Chris' Soviets
Breakout Mission:  In this scenario both sides start with 3 units in their 6" wide deployment zone with rest either 1st wave or reserve with no flanking. VPs are gained by killinf enemy units or by getting units to the enemy deployment area.

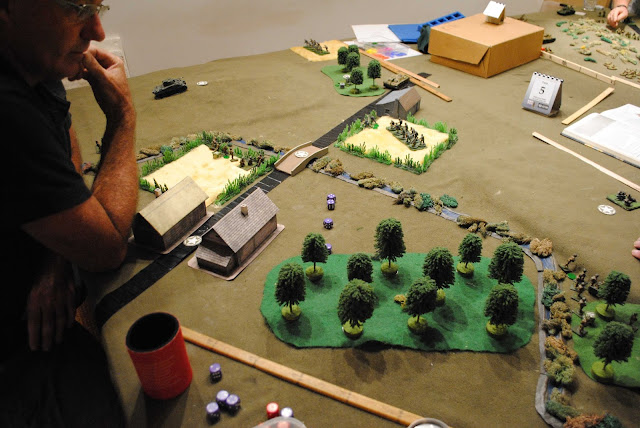
The Soviets are on the near side.  They had mortar, HMG & an inf on at the atart & they have brought on another inf before the pic was taken.  The Germans have Inf gun, HMG & a small inf in the village.
The Soviets put only 1 inf unit on their left flank where the Germans put their best infantry & CO.  The Germans advanced on that flank and defended on the other flank.
On the near flank the Germans quickly destroyed the weak oposition & gained 4 VPs, 1 for destroying the inf and 3 for units over the line.  On the other flank the Germans delayed the Soviet advance with pinning fire.  The Germans lost heavy casualties, but only 2 units were destroyed while the Soviets lost 1 and didn't get any units over the line.  So the Germans won 5:2

Mike's US v. Mark's Germans (on 29 Dec):
Mark used my proposed Cancon army in a Heartbreak Ridge scenario.  The battle ended in a draw with high losses on both sides.

Chris' Soviets v. Dave's Japs (on Dec 29): 
Dave gave us a valuable chance to see Japs in action.  An odd-ball army that required much refering to the rule book.  Tis battle was also a bloody draw.

Tuesday, December 22, 2015

Hail Caesar Lite: Macedonians v. Dacians

Dacians: Mark & Jim
Macedonians: Mike & Chris
The Macedonians & Dacians aren't quite in the same time zone, but what's a couple of hundred years amongst so many?  We picked out two 4 division armies we thought looked about equal then diced for sides.
The Dacians are on the left.  Mark commands their two inf divs in the centre & the far flank, Jim has the 2 cav divs on the near flank.
The Macedonians also put both cav divs on the near flank (commanded by Mike) and their 2 inf divs (commanded by Chris centre & far flank.
The Dacians are advancing their left while their centre waits.  On the near flank the Dacians send their horse archers forward while the Sarmartan heavies wait on the hill.  The Macedonians are making a general advance.
In the centre the Dacians blew their chance for an impetuous charge and the phalanx charged them.  The Dacian infantry in the hills is having the inevitable command problems barbarians have when their commanders get too smart. In the foreground a confused cavalry fight has started

The cavalry seem to be on a path to mutual destruction with neither side gaining a clear advantage.  In the centre the phalanx gaining the upper hand, though not without some loss.  The dacian left still hasn't got into the action.
The Dacian centre is hanging on by a thread as their left finally begins to get involved.  One dacian cav div has broken, but the other div's poor command dice have left it in good shape for a counterattack.  
The Dacian cavalry counterattack has broken 1 Macedonian cav div, but lacks the punch to finish off the other one.  The Dacian left has finally got involved, but the Macedonian flank guard has survived the first rush and the Dacian centre has broken.  With 2 of 4 divs broken & the 2 being more thna half the army, the Dacians fail their Army Break Test.

The Dacian plan may have been better suited to an army with better command (we rated them 9 for going max distance forward & 7 for anything else).  Bothe flanks were too late getting into the action.  The Dacians also mishandled their centre, being too defensive & losing much of their their impetuous charge advantage.

Tuesday, December 08, 2015

Zulu !

British: Mike & Chris
Zulu: Mark & SteveD
Rules: Hail Queen Victoria
The British want to teach the Zulus a lesson by destroying their Krall.  But the Zulus know they are coming & there are hordes of Zulus behind the hills & ridges.  The Zulus have used hidden deployment using our alphabetical chit system & will only reveal themselves when they come into view of the Brits. 
The Brits send their cavalry to scout to the left and advance in echelon.

The first Zulus appear out of the woods.
The Brits delpoy to face the threat to their left & send skirmishers up the hill on their left to scout.
More Zulus appear on both flanks as the 1st Impi is driven back into the woods by massed volleys.
The 4th Zulu Impi has appeared on the right.  All the 1st 3 Impis threw poor command dice, failed to charge in immediately and have been hammered by British firepower.  But the 2nd Impi on the far left has now charged home.
The 2nd Impi has broken one unit, but a second line was formed and they have not broken through.  The 3rd has charged home in the foreground.  The 4th is still coming  up.   

On the far left the hussars have counterattacked, the infantry has held and 2nd Impi is about to break.  On the far right the 1st Impi has rallied and came out of the wood only to be broken by hot shooting.  On the near left the 3rd Impi has been driven back & is a shaken mob waiting for bad Break Test dice to let them run away.  On the right the 4th Impi's attack was disrupted by defensive fire and has also  run out of steam.

Last time we fought Hail Queen Victoria the Mahdi got all the breaks.  This time everything went the Brit's way.  The Zulu attacks were poorly uncoordinated with lousy command dice at critical times while the Brits just kept throwing hot dice - for Command, for shooting, in combat & in Break tests. This period seems to have a habit of being a devastating defeat one way or the other, but always good fun.

Hohenlinden 1800 at Black Hills

PeterC put on a Holenlinden 1800 scenario with his 15mm figs using our Hail Frederick rules.

French: SteveD & Jim v. Austrians & Bavarians: PeterC & Mark

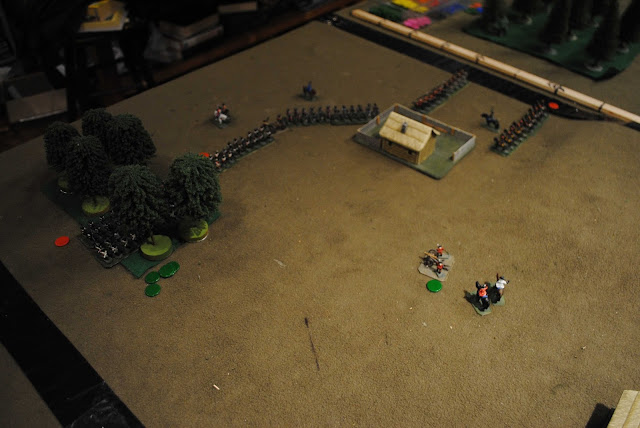
 At the start only the advance guards were on the table.  Austrians on the right, French on the left.
Both side's advance guards stay and wait for reinforcements.
The Austrians make the first aggressive move by advancing their cavalry on their right.
The hasty Austrian attack over the stream was easily defeated.  The French have reinforced their left with cavalry and began a cautious advance.
 The French are now attacking all along the front.
The French advance from the town was too slow, the the second line blundered back while the reserve cavalry just sat there in front of the town for 4 turns.  This gave the Austrians too much scope for counterattacks and the French attacks on both flanks failed to break through.   The French cavalry in the centre broke first, soon followed by their left flank infantry.   With their left gone, the French right withdrew.

It all looked too easy for the French after the first Austrian attacks were easily defeated and the Austrian left cowered in squares at the sight of French cavalry, but the French became overconfident & attacked on too broad a front and found they weren't so superior after all.

Thursday, December 03, 2015

Napoleonic Encounter Battle

Jim & Mike's French
v. 
Chris' Russians & Steve's Austrians

Two Austrian infantry divs occupy the village.  Each has 2 line, 1 grenadier, 1 Landwehr battalion plus a battery and a half battalion of Croats.  A Russian infantry division of 6 battalions & 2 batteries and a Russian cavalry division of 2 dragoons & 3 hussars is coming to up.
Two French infantry divisions are lined up ready to attack the village.  Eash has 1 light and 4 line battalions, plus a battery.   The French have an infantry division of 6 line inf and a cavalry division of 2 dragoons & 2 hussars coming up.

The entry points for the reserves were decided by drawing chits A-D.  A = centre rear, B= left flank, C = left rear, D = right flank.  The entry points of your reserves was kept secret from the enemy.  On turn 2 each side threw 1 dice per reserve division & they were to arrive on 5+.  Then 2 dice on turn 3, etc.
 The French are on the left, Jim's infantry div on their right.
Both reserve infantry divisions came on in each side's turn 2.  The Russians on the road at the far end, the French behind their left.  Their first 2 divisions have both rushed forward.
On turn 3 the Russian cavalry came on behind the Austrian rear.  The flanks of the Austrian position are being pushed back.
On the right of the village the Austrian Grenadiers are giving ground, but still haven't broken.  On their left the Austrians have lost a battalion, but it bought enough time for redeployment on new defence line.  There's no sign of the French horse.
On the far flank the Russian infantry is slowly deploying out of its road columns - just doing so in time before the French columns hit them.  The Austrian grenadiers are still hanging on in the centre.  On the near flank the French infantry has run out of steam, but the Russian cavalry has been slow to deploy.  The French horse has finally showed up in the French rear
The Austrian grenadiers have finally broken in the centre, but the Russian Hussars were ordered to about face and charge the victorious French.  Despite their poor command rating they got the distance they needed and charged home.  The column got into square alright, but then threw rotten dice and got ridden down anyway.  The sweeping advance then took the adjacent column out and Mike's 1st division having lost another battalion in a futile attack on the cornfield was broken.
On the far flank, squares & poor command kept the Russian hussars at bay but the French atatck has shuddered to a halt in the face of determined Russian infantry.  On the near flank the French cavalry has swept forward while their infantry & artillery regrouped.
The far flank has turned into a stalemate.   On the near flank the French are on the attack again.

The French battery, now well sited on the hill, is pounding massed targets as the cavalry finally get into action.
The Austrian left has broken but the 2nd division has redeployed to cover the flank.
Mike's last hope of breaking the Russian infantry disappeared in a flurry of of 1's. 
Both sides have lost one division and all the rest of them have so few units unshaken they cannot make a serious attack.  It was after 10 so nightfall was declared and the battle was agreed to be an honourable draw.

Wednesday, December 02, 2015

Hail Napoleon! 1 scenario, 3 scales - 6mm, 15mm & 28mm

While our Hail Whoever house rules based on Hail Caesar are mainly used with 28mm figures, the system allows for the use of 15mm & 6mm figures as well.   28mm battles make great games (arguably the best games) but correlation of the move distances, units sizes and ranges indicates a ground scale of about 40" per km while our 200mm wide infantry units represent a battalion of about 600 men.  Thus a battle on a normal 10'x8' table is on ground about 3km wide by 1.8 km.  There is room to deploy & manoeuvre with armies of say 18 infantry units, 8 cavalry units & 4 guns a side & we can fight such battles in an evening.  These represent an army of about 13,000 men - this is not an army, it's not even a Corps - it's only a mixed arms division.

You can make up scenarios based on historical actions by fudging the scale of the ground to fit the table and calling the units brigades or divisions instead of battalions, and it can be great gaming scenario, but it's not a true simulation.  Even so, this works pretty well for ancient & medieval battles, even for ECW.  But in the 19th century when the armies were very much larger and the terrain was more critical and orders of battle more complex, such a simulation is less satisfactory and less instructive.

Hail Whoever provides for battles with 15mm figures with a ground scale of about 16" per km and  with 6mm figures with a ground scale of about 10" per km.   With 15mm figs our infantry units are about 1200 men and with 6mm figs they are about 2400 men.  So with each step down in figure scale we are fighting larger and larger battles with more and more men, but with the same number of units on the table.  While we think that 28mm makes for the best games we also like to explore historical simulations of the famous (and usually big) battles.  We also fight campaign and like to be able to get a good one night's battle from a clash regardless of the size of the forces.  

Tonight we set up and simultaneously fought the same small battle 3 times - with 28mm, 15mm & 6mm figs.  Each battle had the same 1.8km square terrain and the same 4,800 infantry, 1200 cavalry & 8 guns a side  Chris commanded the Austrians, Mike commanded the French.
When we change scales we keep move rates the same, but change the time scale and weapon ranges.  At 28mm we calculate that the time scale is 10 mins per double turn, at 15mm 20 mins & at 6mm 40 mins.  As we played the 28mm game we paused it after every second double turn to play a double turn in the 15mm game, and every 4th double turn we played a double turn on the 6mm game as well.  Our objectives for the exercise were: 1) To directly compare the three scales as games.  2) To see if the battles last the same amount of simulated time to confirm that we've got the arithmetic right.

The 28mm battle

The Austrians advance & seize the farm.  
 The French attack on the near flank.
The infantry slug it out on the near flank.  The French hold back their left while the Austrians send cavalry rot support their left.
The Austrian dragoons attack on this flank as the French begin an advance on the far flank.
The Austrian cavalry attack has bounced off, but the French cavalry advance has been halted by fire from the farm and by the lone square behind it.  The French infantry attack on the farm has been beaten off.  French counterbattery fire has broken the Austrian artillery.
 Both sides have regrouped.  The French artillery is now pounding the farm.
The Austrians have consolidated their cavalry and launched a last desperate attack to try and win the battle before the farm falls.
The Austrian cavalry has been beaten off and the concentrate d French fire on the farm has broken the second Austrian foot division to break the Austrian army on turn 17.

The 15mm Battle:
TheAustrians attack left and centre, but the French get to the farm too.
The cavalry square off on the far flank, infantry dispute the farm and the Austrians advance on the left & centre.
After initial success the French cavalry ran out of steam and was withdrawn. The Austrians have taken the farm but lost a unit to a countertattack in the centre.
The Austrians in the farm were blown out by artillery and the French took control of the centre as their cavalry fought back.  The Austrians have broken on turn 7.

The 6mm battle:
The Austrians have seized the farm but their left has been slow to advance.
 The Austrians took the farm.  Their cavalry drove the French back then broke themselves.

The Austrian foot drive the French off the table to win the battle on turn 4.

Comments:
 
The 28mm battle lasted 17 double turns x 10 mins = 2 hrs 50 mins.
The 15mm battle lasted 7 turns x 20 mins = 2 hrs 20 mins.
The 6mm battle lasted 4 turns x 40 mins = 2 hours 40 mins.
This as good a correlation as one could get considering the vagaries of the dice & is a pretty convincing demonstration that we have our sums right with regard time & distance scales.

The course of the three battles varied considerably due to the vagaries of the Hail Caesar command dice providing the players with different challenges in each case.  As games, the 28mm was obviously the most interesting, the best looking and the most fun.   But the 15mm & 6mm battles were much smaller than we would ever use outside of an experiment.  With more units they too become more interesting. 

A 15mm battle with the same number of units as our 28mm would be of 12,000 men a side, a 6mm battle would be of 24,000 men a side.  We know from experience that we can fight much bigger battles single battles in a night.  The  15mm system works well for small Corps sized battles up to about 30,000 men where our 10'x6' table is 7km x 5km.   Our 6mm variant simplifies combat to speed up play even more and allows us to fight even the big Napoleonic and ACW epics when our table might covers 15km x 9m.  The simplifications remove some of the tactical niceties, but are not missed when there are so many units on the table and so much room to manoeuvre.