Saturday, July 28, 2007

Kingston 26/07/07


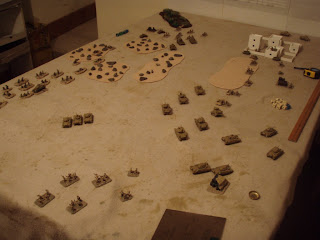
The big table was divided in to 3 6x4's side by side for 3 1500 pt Mid War battles. Not the most convenient arrangement with battles being fought crosswise but noone seemed to mind & it's nice to have one huge room like Chateau Cromwell had.

MarkW's Death or Glory Boys faced off Smithy's DAK Armour on a fairly open (though quite green) desert table in a FFA. It was all Death & no Glory for the Boys though. The Valentines' charge was gallant but too slow - the Panzers just picked them off before their pop guns could do anything. 6pdr portees scratched a little paint before being blown apart. Crusaders got closer by sneaking up a Gully, but it was just too bad when they popped out.

Andrew's Grenadiers put up a stiff fight defending a Cauldron against Andrew's Elite US Mech. But lack of experience caused his counterattacks to melt away & the US prevailed.

In the middle of all that Keith's Brits attacked Griggsy's Grenadiers in an Encounter. Griggsy's Tiger stood in the middle of the table like Ned Kelly as 3" and 6pdr shells bounced off it. But then the Brits double battery ranged in with a double template over a nest of A/tank guns, heavy mortars and HMGs and suddenly much of the German army disintergrated. Infantry over-ran the German right. Then a Piat popped the Tiger and it was all over for the Germans.

Wednesday, July 25, 2007

Camp Cromwell 24/07/07


Kursk Axis of Attack Campaign Battle #1: (Big Push Mission with a few tweeks)

We had intended to try the FOW Kursk 3 pronged Axis of attack campaign. But with Nick away we decided to go for a single big battle for the first round. This is a Big Push with a few tweeks using the FOW Battalion Rules. Each side has 2 Coys and 3 commanders - 2 Coy Commanders & a Battalion Commander. The Battalion Commander initially has control of the Support, Ambush & Reserve Platoons and assigns them to the Coy Commanders when they get into action. The table is 8x6 fought lengthwise. The Germans have 4000 pts to the Russian 3000, but the Russian Reserves are to be rolled for from turn 1, not delayed. The Russian position featured some new entrenchments (provided by Richard) & some new Russian front bunkers.

Germans - SteveJ (CIC), Byron (Panzer) & Barrie (Panzer Pioneer) 4000 pts all up.
Russians - SteveP (CIC), MarkO (Strelkovy) & Richard (Strelkovy) 3000 pts all up.

The Russians deployed 2 Strelkovy Bats in the front line supported by 2 HMG bunkers & 2 a/tank bunkers. A minefield stretched across the table with wire in front & behind. Their AA was deployed behind with a/tank guns & Gods of War in ambush. In reserve they had 3KV1s, 6 Stuarts, 2 more Strelkovy & HMGS.

The Panzer Coy had 5 MkV, 2x3 MkIVF1, 3 Hummells, 2 Recon + Armoured Pioneers.
The Pioneer Coy had 2 x Armoured Pioneers, Armoured HMGs, Rockets, Inf Guns & 2 Stug 331B.

The Germans advanced slowly & methodically, using smoke to cover the Russian observers. The Russians dropped their a/tank ambush up front. It died but delayed Barrie & took a few with it. The Bunkers were reduced by the Stug 331Bs. The tanks cleared the wire and the Pioneers & Goliaths cleared some paths through the minefields. The GOW were finally deployed and immediately made their mark destroying a MkIV platoon one turn and a Panther the next.

We knocked off for the night after turn 6. The Germans had their toes over the centreline, but the Russian reserves were all on & mostly in position. It was slow hard but interesting work fighting such a large battle. Now the wire & minefields are penetrated, things should really heat up next week.

Wednesday, July 18, 2007

Camp Cromwell 17/07/07


Richard's Brat Light Armour v. Barrie's Bersaliglieri

1500 pts Encounter Mission on open desert table. Jim Umpiring.
Both sides started with Infantry & A/tank on the table which they dug in to protect their objectives. Richard made an advance on his right with Crusaders and when he got Grants on as first reserves also advanced on his right, using a hill to keep out of sight of the dreaded 90/53s. Barrie then got 2 reserve platoons & 5M14s showed up on each flank making flank attacks on the Brat tanks. The Crusaders evaporated while the Grants survived with a loss. More Crusaders arrived & went to help the Grants. They Ities got off lightly with a bunch of bails and the 90/53s murdered the Crusaders while the surviving M14s unbailed & finished off the Grants. The Brits were in trouble now - the 90/53s dominated the battlefield and they had no artillery to take them out and not enough tanks to rush them. The infantry on their LH objective were on their own, as any attempt to support them would have to enter the Zone of Death. Richard tried to gather his remaining armour for another attack on their right, but the 7 surviving Itie tanks overran the PBI on the other objective first.

Byron's Aufklarungsschwadron v. MarkO's US Rifles

1550 pts Encounter on crowded Tunisia table. SteveJ Umpiring.
There was a great deal of inconclusive fartarsing about as both sides sniped a bit while gathering their reserves at glacial pace. Both had air which just neutralised each other & did nothing. The US took a big hit when the Tiger took out the Shermans with 1 turn's potshotting over a vineyard. But time then ran out & the battle was declared a drawn.

Wednesday, July 11, 2007

Camp Cromwell 10/07/07


Present: Jim, SteveJ, SteveP, Nick, Richard, Byron.

Jim's Grenadiers v. Nicks US Paras in D-1 Seize & Hold

A first time for both in this scenario. The US got a good concentration of troops in the corner near one objective and quickly drove the Grenadiers off it. They then dug in in a hedged field around it with their FV RMGs with a Lt that magically doubled their defensive fire. There was no way the Grenadiers could assault the position so the Germans waited for reinforcements. When they finally got some reserves, they took their 105s so they could blast the objective, but the dice decreed that they came on amongst the US reserves and were immediately swamped. The Stugs and mortars didn't arrive until turn 5 and then the Stugs turned up at the wrong end of the table. There was an interesting sideshow as the two sides' mortar companies came on in the same corner and assaulted each other. The Germans won that one and finally had some fire support. But their infantry was wasting away as it had be hung out to dry to contest the objective until the Stugs could come up. The Stugs shrugged off the air attacks as they rushed across the table & finally got into the action. The US Pioneers took out the HMG platoon and then in their breakthough assaulted the Stugs in rear. Despite their pile of bazookas, the Pioneers got no hits & the Stugs counterattacked & destroyed them. The Germans were now on wood with the last Grenadiers down to 2 teams + attachments. They staked all on the Stugs and assaulted the objective. Despite several turns of MG, AA & mortar fire, the US platoon had few casualties & being Fearless, loaded with bombs & bazookas, & with the CO present, it was a big ask. The Stugs died gloriously for the Fuehrer & it was game over.

Richard's Grenadiers v. SteveP's Strelkovy in 1500 pt Hold the Line (Germans defending)

Richard with the help of SteveJ's advice got to experience the joys of shooting up the Soviet horde as it swarmed across the table towards his thin blue line. But there weren't enough bullets and the objective was over-run.

Camp Cromwell 05/07/07


Jim's Brit Armour v. Byron's Aufklarungsschwadron
Mid War FFA on Desert terrain 1500 pts

The reasonably open terrain made the 2 Grant Platoons King of the table with the only 80cm range guns. The Brits advanced infantry & Crusaders on their left, dug in on the right & lined up the Grants to cover the centre. The Grants made a big hit early by taking out 2 Pak38s while the platoon was trying to dig in. The Germans counterattacked on their left with Bersaliglieri supported by A/Cars & Panzer IVF1s & smoke from mortars. The Grants dodged the smoke to take out the Panzers & the Brit Inf stopped the Ities with the help of some bug MGs. On the other flank, the Brits pulled their attack & diverted 5 Crusaders to the right. The Germans then advanced. The Crusader platoon left behind counterattacked the HMGs (which were supported by an a/tank rifle) resulting in mutual destruction. The Germans continued with the attack on their right with P/Grenadiers & A/cars, but the Grants turned to help out the Infantry & it petered out. The 2nd Crusaders took the right objective and the Germans failed morale about the same time.

The Luftwaffe let Byron down badly. They rarely turned up & never did on the few turns when the Brits took a risk concentrating their armour. Their sole contribution was a bailed Crusader & the Germans needed a lot more than that from them. The open terrain and the FFA Mission also made it hard for the Germans.

Wednesday, July 04, 2007

Camp Cromwell 03/07/07


Stirling Bridge 1297

The scenario was based on Stirling Bridge but lack of time for detailed research made it a pretty rough approximation. The armies were comprised of typical types for the period with the English given a 15% advantage. The English had to attack across a bridge. The river was deemed to have some fords but to find them troops would have to move to the bank & throw a 6. (The English did try a couple of times, but didn't find one). The ground on the Scotts side had several areas of bog. On the English side there were hills which helped their bowmen cover the ground immediately over the bridge. The English had 6 Heavy Cav, 6 Longbow, 2 Spear & 2 Bill units. The Scotts had 3 Schiltons, 6 Highland, 2 Lowland levy, 2 Bow & 2 Cavalry.

SteveJ, Byron & Craig commanded the English, Nick, MarkO & Richard were the Scotts. Jim umpired using the Camp Cromwell Rules.

The Scotts deployed their Schiltrons on clear ground in their centre out of bow range of the river with other troops in the bogs on each flank & cavalry in reserve. The English deployed bowmen to cover the crossing and lined up most of their troops to cross the river. Billmen first, then some bowmen, then cavalry, then spearmen.

The Scotts waited for some Billmen to cross then counterattacked with the Highlanders. They destroyed the billmen and the bowmen who had got across. They pursued on against the Cavalry on the bridge, but it was too much to ask and they were beaten off by the cavalry. The cavalry pursued but were stopped dead by the Pikemen who then attacked. (The pic was taken about now). The Scots came soooo close to driving the English back over the bridge, but the English cavalry dice were magnificent - they stopped the rot, then bought time for reinforcements. Eventually the Scotts ran out of steam.

It turned out to be a very even scenario - both sides had lots of options, came up with reasonable plans & had their chances to win. The new rules worked well but the battle gave me some ideas for further tweeks.