Wednesday, May 30, 2018

Fort Donelson 1862

In Feburary 1862 Grant with 24,000 men bottled up 16,000 Rebs in Fort Donelson.  The Rebs tried to break out at dawn on February 15.
The perimeter of the CSA position has an abatis which we rate as a hard cover defended obstacle.  The CSA army is massed at the south end near the town of Dover ready to attempt their dawn breakout.  A thin line (Buckner's brigade) defends the perimeter on the western side.
The blue creeks & the river are uncrossable.
The Union has McClernand's division to the south, Smith's division on the north end & Lew Wallace's division in the centre.  Grant is having a meeting with his admiral & is not present when the battle starts.  The riverboats unsuccessfully attacked the fort the day before - the boat is decoration, not part of the scenario.
Union: Mark, Nick & Mitch.
CSA: Chris & JohnS.
Rules: Hail Mr Lincoln (modified Hail Caesar).
The first CSA brigade (Pillow's) has rushed forward & thrown itself at the Union line.
The first Reb attack has bounced back, but worse still for the Rebs, Floyd's brigade has failed to move for 2 turns & is still inside the perimeter.
Forrests' cavalry has been committed to help hold the line until Floyd's brigade comes up.  McClernand is counterattacking on his left.  Lew Wallace & Smith have defend orders & are reluctant to move to help without orders from Grant.
Pillow's brigade has broken & McClernand's counterattack is squeezing the CSA breakout into a pocket.
At 8pm (after about an hour's play) Grant arrived on the table & immediately gave Smith orders to attack.
Forrest's shaken cavalry is falling back into the perimeter as Floyd fights on.
Buckner's thin line is holding off Smith's attack.  Lew Wallace has now also advanced.  Floyd is retiring back behind the perimeter. 
Smith is still making no progress on the near flank, but Lew Wallace has broken through on his right.  Floyd has retired into the town while McClernand regroups his successful, but battered brigades.  
The weight of numbers has finally taken its toll on Buckner's men & gaps have appeared in his line.  McClernand & Wallace are now getting troops across the abatis to the south.  It is 10pm & thus nightfall.  The CSA breakout has been thwarted & the Union have taken most of the defensive line.

In the morning our plastic Grant can repeat the real Grant's reply to the Reb's plea for terms.  "No terms except for unconditional & immediate surrender can be accepted.  I propose to move immediately against your works." 


Fort Donelson was the first of the three times U.S. Grant captured a Confederate army.  In our scenario the Union actually did better than the original.  In the real deal about 3,000 Rebs managed to cut their way out, but none got away in our battle.  This was due to our McClernand (Mark) being much more aggressive in defense, plus bad command dice for Floyd's brigade which left Pillow out on a limb for too long.

Monday, May 28, 2018

Napoleonic Musket Action

We tried out Musket Action in the Napoleonic era with a lot of cavalry for a change.
Chris' French are on the left, Jim's Austrians on the right.  Objectives are the bridge & the road junction.  The french have 2 guns & 4 chassers a cheval on the far flank.  The Austeians have 3 hussars & 3 dragoons on their right.
The Astrans advance theri cavalry. The French advance their infnatry.
Th Austrian cavalry attack has had mixed fortunes.  The French guns stopped their opponents with fire & the chasseurs beat off the charge of the dragoons.  But on the left, the Austrian hussars in the second line broke through & are threatening the guns in flank.
In the cavalry fight, the French lost their guns, but the chasseurs have done well & still have 2 troops to face 2 troops of Austrian horse.  On the near flank the infantry are exchanging volleys at long range.
The French infantry are getting on top in the fire fight & are now adcancing.
The French cavalry have successfully counterattacked on the far flank & are about to take both objectives.
The Austrian infantry is collapsing under the French musketry.

The Austrians planned to use their superior numbers to win the cavalry fight, then attack the French infantry in flank to support their outnumbered infantry.  The plan fell apart when the French chasseurs won almost all the cavalry melees by just 1 hit even when at a disadvantage.  The winner takes all close combat system makes cavalry fights in Musket Action a risky business. With infantry you can choose a slower & steadier alternative to close combat in a musket duel, but that option isn't available to the cavalry so cavalry action is brutal and short.

Friday, May 25, 2018

Musket Action Playtest at Camp Cromwell

French & Indian Wars

The British are on the near side, the French & Canadians on the far side.  The two buildings beside the road are objectives.  Holding both wins the game, otherwise it can be won by killing 2 more units than you lost. 
Deployment unit by unit as command dice are drawn placed in 12" deployment zone.

 Both sides advance to get within musket range.
On the near flank the British light infantry have advanced through the orchard to meet the Canadian militia.  In the centre the French infantry is pushing forward with support from the light artillery.  Right of centre the British cavalry has charged the French infantry coy on the end of their line & broke it.  The cavalry then used their consolidation move to face the flank of the grenadiers.  The Indians of each side are negating each other with ineffective fire in cover on the far flank. 
The French got the vital first command dice on turn 3 & the grenadiers got into square before the cavalry could charge their flank.  But the square was then decimated by British artillery & musket fire.
On the near flank the weight of numbers of the Canadian militia had counted & the British light infantry has been driven back into the churchyard.   The French are also getting on top left of centre.  Their grenadiers have been broken by fire & now the French dragoons are covering the French left. 
The British centre is still holding on, but looking shaky.
The Canadian militia are wrapping around the  British left flank.  The British grenadiers have broken on the right of the church.  The British right is advancing but the dragoons are dodging their balls.
The British left has collapsed.  The Canadian militia have taken the church.  The dragoons have prevented the Brits from attacking the other objective.  There was no turn 7.  The Brits have lost 7 units to 6, but the 2 objectives held make it a French victory.

Musket Action Playtest at Good games

French & Indian War:

John's British are on the far side, Jim's French & Canadians on the near side.  The scenario is a mix of No Mans Land & Key Positions.  The church & the farmhouse on the right are objectives - holding both wins the game, otherwise if one side has broken 2 more enemy than they have lost, they win.
 
By turn 3 the battle is taking shape.   On the left the Brits have lost their cavalry in an impetuous charge at Indians in a hedge.   Losses are heavy on both sides in the firefight in the centre.  The British light infantry are getting the upper hand v. the Canadian militia on the far flank.
Both sides have advanced their grenadiers on their left of centre.
The French dragoons charge down the road.
The French dragoons have continued down the road towards the church though there was some opinion that they should have turned left & help take out the British grenadiers who celebrated by destroying the French infantry to their front with a withering volley.  On the right the British light infantry are lapping around the French flank.  On the left centre the French grenadiers & Indians are wrapping around the British flank.  
The French dragoons dismounted & took the church, but their good work was undone by the British grenadiers taking the farmhouse.  This meant that the result came down to casualties.  The French would have won, but an unnecessary attack by their Indians on the left lucked out & that loss made the battle a draw.

Wednesday, May 23, 2018

English Civil War: Seige of Worcester

This was a slightly modified version of the non-historical Worcester scenario in the Pike & Shotte book.  It was fought using Hail Cromwell, our modification of Hail Caesar for the era.
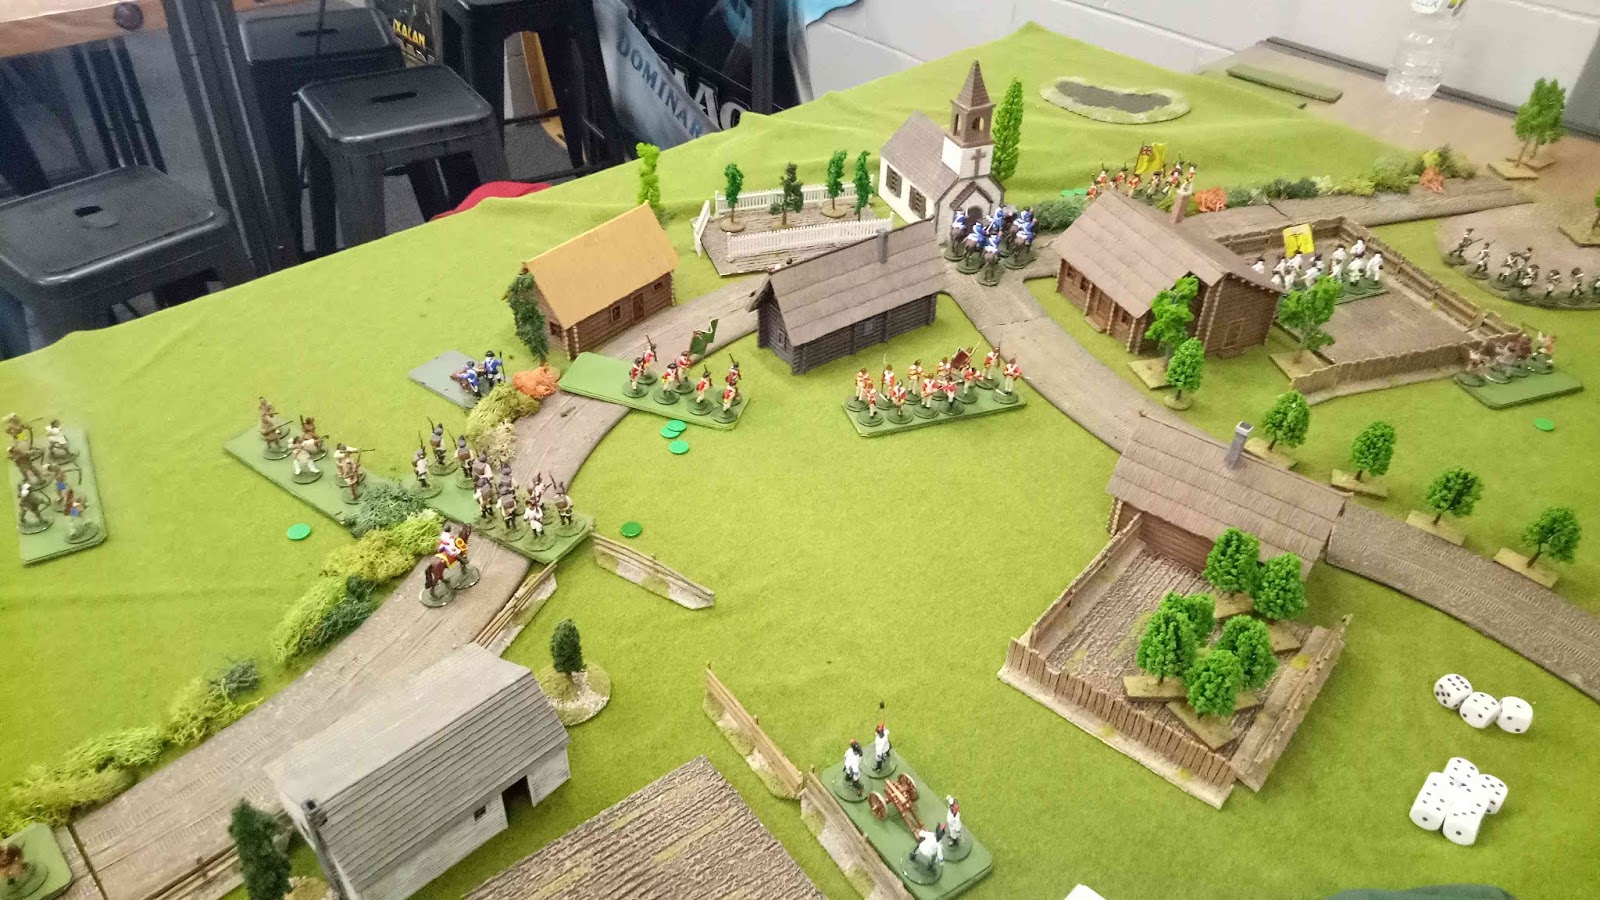
The Covenantors hold the town with 2 infantry divisions (2 pike, 4 musket & 1 highlander) & have a mixed division (3 cav, 1 musket & 1 dragoon) outside the town on each flank.  Chris commanded their left, JohnS their right.
The English had a mixed division on each flank (2 cavalry, 1 pike, 2 musket & a storming party), 3 pike & 6 muskets left centre, 2 pike & 4 musket right centre, 2 heavy cavalry right centre, plus 3 heavy guns.  Mitch commanded their left, Mark their centre & Jim their right.
The town wall has one breach from a previous seige (near the far corner).  The attackers can make more breaches with their artillery & their 2 storming parties who carry petards.  Some of the infantry carry ladders so they can storm the walls.
To win, the Engliah have to have 3 units inside the town at the end of a Covenanter turn before 10pm.
On the near flank the Covenanters repelled the initial English attacks, but the English have worked their way around their flank. 
On the far flank the Covenanters are doing well against the flanking force, but are being flanked by the English pike & shot.
Outflanked on their left, the Covenanter's left flank is about to break but it has inflicted significant casualties
Weight of numbers eventually also told on the far flank where the Covenanters outside the town are also close to breaking.
The English attack the old breach & the walls either side (yellow counters indicate the units with ladders)
The English cannon are pounding away at the wall near the 2nd tower from the corner & the storming party is setting up their petard this side of the corner.
The English forced their way though the old breach, but a counterattack threw them back out.  The attacks on the walls with ladders have been repulsed.  The storming party is preparing their petard.
Both the artillery & the petard have made breaches on the near flank.  The storming party is attacking their breach.
The storming party has broken through, but is shaken.  Pikes are attacking the other breach.
On the far flank the large English pike & shot division had been broken in its unsuccessful attacks while the storming party has made a breach, but have not yet forced their way past it.
The English have poured cavalry through the breach on the near flank.

One of the cavalry units in the town has been broken by musket fire to keep the Covenanters in the game, but another musketeer unit has pushed through the artillery breach & on the far flank the storming party has also entered the town.  This time the Covenanters fail to break any of the English units in the town giving the English the win.

It was a desperately close run thing.  All 4 remaining English divisions are on half strength, lucky to have passed break tests that would broken them in the last desperate turns, and they fulfilled their victory conditions just 4 minutes before the 10pm deadline.

Sunday, May 20, 2018

Kingston Bunker Rats Flames of War Tournament 2018

The Kingston Bunker Rats Annual Flames of War Tournament was held at Area 52 this weekend.  Not having played FOW since last year, I was a bit wary of combat fatigue playing 5 rounds in two days & Chris didn't feel confident enough to play on his own.  But the Rats allow a slot to be shared if a player can't play all rounds, so Chris & I shared a slot.   I played rounds 1, 3 & 5 while Chris played rounds 2 & 4 (with me providing tactical advice).  The theme was "Market Garden" so of course Team Cromwell took a British Armoured Reece Coy with Cromwells (backed up with some armoured infantry & the inevitable 25 pdrs).


The Team Cromwell plan was to make it easy for ourselves by having a small fast moving veteran force with no complications, and to attack at all costs so we would either win or lose fast before our old brains got too tired.  We were amazed at how well that worked.  The dice gods were also kind to us when it really mattered & we had 5 very enjoyable games.
Game 1: Free For All:  We lost a tank platoon on turn 1, but stuck to the plan & kept going at the objective on our left flank.  The dice gods relented & the enemy couldn't stop us.  8 VPs.
Game 2: Fighting Withdrawal:  We were the defenders, but we counterattacked anyway.  We destroyed the enemy armour on one flank then used the Cromwells' speed to rush back across our rear to also counterattack on the other flank before it fell.  8 VPs.

Game 3: Hold the line, with us attacking.  We swarmed forward drawing the inevitable 4 Tiger ambush onto the tanks on our right flank.  Then we plastered the Tigers with smoke, converged to the left & took the objective on our left flank before the German reserves could intervene.  8 VPs.

Game 4: Breakthrough:  We had to attack a German infantry army.  Chris got lucky on turn 1, wiping out the 3 Pak 40's before they even got to shoot, but German infantry armed to the teeth with fausts & annoying special rules still got to the objective before us.  A series of bloody attacks by infantry, tanks, bugs & more tanks saw the last of our Cromwells grab the objective & then hold off a desperate counterattack just before our army could fall below half strength. 6 VPs.

Game 5: Dust Up:  This was a blue on blue v. a Canadian army with a frightening array of artillery.  Our initial death or glory charge directly at our objective on the left, which was defended by infantry & artillery, soon proved to be all death & no glory.  So this time we abandoned plan A & found a plan B.  We left a tank platoon burning in front of the enemy line & used our speed to move right to counterattack the enemy's attack on our right.  It was a desperate struggle with neither side able to take an objective.  Both sides were reduced to half strength struggling to find a way to finish off one more enemy platoon to win by army morale.  It was a matter of luck, but it was the Canadians that broke first.  6 VPs.

Team Cromwell won the Tournament by a big margin with 5 wins & 36 VPs.
Pat came 2nd & Nick Ridge 3rd, both with about 25 VPs.


Friday, May 18, 2018

Flames of War again

The Kingston Bunker rats are running their annual FOW tournament at Area 52 this weekend.  Chris & Jim are making a team entry to fly the flag for Camp Cromwell (neither of us feeling quite up to playing 5 games in 2 days).  As we haven't played FOW since same time last year we had a practice match this afternoon.  We fought a Free-For-All Mission with Chris commanding our competition list of British Armoured Reece & Jim commanding a Panzer force.  (CV Cromwells v. CT Panthers).
 It was quick & bloody affair resulting in a table load of burning tanks.  It was a British victory, perhaps lulling us into a false sense of security, but it certainly helped to get our heads back around the rules - QED.