Tuesday, December 31, 2024

English Civil War: New Model v. Scots

English: Jim & Mark
Scots: MIke & ChrisThe Scots are on the far side of the table.
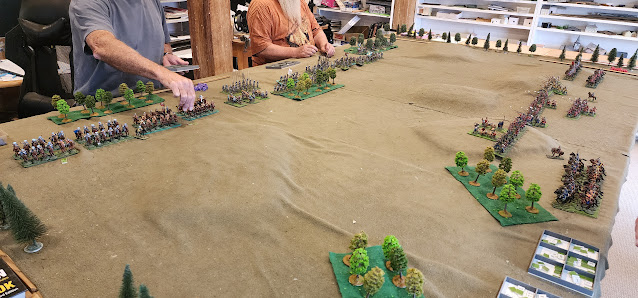
The Scots attack with their cavalry on the near flank while forming a defensive line with their foot.
The English advance their foot in the centre with cavalry covering both flanks.  Initially thay had 4 cavalry regs on each flank, but moved 2 from the right to the left where the Scots had all their horse.  
The English cavalry was better quality than the Scots, but bad English dice evened up the fight.
On the far flank the English cavalry neutralised the Scot's left flank. 
In the centre the Scots attacked the exposed left end of the English infantry line with artillery support.
The cavalry fight on the left was still indecisive, both sides losing heavy casualties.
On the left the Scots cavalry is giving ground & the Englsih cavalry are following up.
In the centre the Scots foot has broken an English pike & shot unit & attacked their supports. 
On the far flank both sides are content to look at each other from a safe distance.
Left of centre, the Scots attack is petering against the English second line.
On the left, the English cavalry has pushed forward, but the cavalry fight is turning into MAD.
In the centre, the English pulled back their left end of the line after beating off the Scot's attack as a fresh P&S unit moved up from the Scots right flank.
On the left the cavalry have virtually destroyed each other.

The Scots have lost half their units broken.  The English have lost fewer units broken, but have fewer units left unshaken than the Scots.  It was decided that both sides could declare victory to their own people, but in fact, as neither side was in a fit state to attack further it was a draw. 


Monday, December 23, 2024

ACW with 15mm fig again

We used much the ame forces as last week, but made a few tweaks to the terrain & modifed the starting positions.


Chris' Union Corps I is coming on far side left.
Mark's Union Corps II is coming on near side right.
SteveJ's Union cavalry is coming on from the left.
Jim's Southern 1st Corps are in the foreground.
Mike's Southern 2nd Corps are on the far side right.
The Union Corps I moved directly towards Soiuth's 1st Corps while the Union cavalry dismounted to skirmish againt their left & par tof Union Corps II attacked their right.  South's 1st Corps had advanced down the road the junction , but fell back to defensive U witht eh centtre on the small hill.
The South's 2nd Corps moved on Union II which mostly deployed to face them.
South's 1st Corps used interior lines to plug the gaps as they desperately held on against converging Union attacks, falling abck from the Union cavalry & partly beating off the attack on their right.
South's 2nd Corps took some of the pressure on 1st Corps by threatening the Union Corps I's left flank. 
The attack by the Unions's Corps I on South's 1st Corps was beaten off, but with heavy casualties.

The Union Corps I attack has inflicted heavy casulaties, but has failed & the Corps is broken.  Their cavalry was kept at bay by the fighting retreat of the South's left flank.  The fight between Union II & South 2nd was indecisive, but with the Union losing more casualties.  The Union conceded defeat.


Wednesday, December 18, 2024

ACW with 15mm figs

 ACw battle with 15mm figs & M2M rules.
Union: Jim & Mike
South: Mark & Chris
Each player had a Corps of 16 inf regs, 2 cavalry regs & 1 battery.

Each Corps started in a column along a road:
Jim's Union near RH side.  Mike's Union far RH side.
Mark's Rebels near LH side. Chris' Rebels far LH side.
Both sides move their Corps towards each other to forma line of battle diagonaly accross the table.  
In the foreground the Union realised they had superior forces on the left side of the river & attacked.
On the far end of the lines, the Union is advancing in strength.  In the centre both sides form up out of musket range. 
On the near flank the Union attack had mixed success.  While they are wrapping around the end of the Rebel line their frontal attack was stopped by artillery musket fire to their front fire plus musketry fire from across the river.
Omn the far flank the Rebels are defending the farm againt a heavy Union attack.
On the near flank the Union have riolled up the Rebel line & taken the ridge, but at high cost.  The Rebs lost more units broken, but most of the Union force is shaken & unable to exploit the success.
Likewaise on the far flank the Union have made progress, but at high cost. 
On the near flankfresh Rebel troops have crossed the river & are counterattacking.
In the centre the Rebels have advanced & the Union have fallen back.
On teh fra flank,  the Union have cleared the farm, but are too weakened to continue to attack. 

While both sides Have lost the same no. of units broken, most of the Union army is shaken by high casualties while most of the Rebels are still fit to fight.  The Union conceed the battle & order a withdrawal. 


Saturday, December 14, 2024

Saturday afternoon ACW

Chris' Confederates v. Jim's Union.
Both sides had 6 brigades of 4 infantry regs, 3 guns & 2 cavalry regs.
The Union had the advantage of rifled artillery, the Rebs were all Tough Fighters so could take an extra  casualty before being shaken.
Rules: M2M house rules.  Figures 15mm.

An encounter battle with each side coming on marching down a road towards each other.  South on the left of pic, Union on the right.
The Union dismounted their cavalry on the hill to theri front to cover the deppoyment of their left flank whole half their infantry set off ona flank march to the right.
The South deployed along the river line, extending their line to their left to face the Union flank march.
The Union stood on the defensive on their left.  Part of their flankinf force deployed into teh wood on their left, therrest croseds the river at the far end of shot.
The South have sent 2 regs to defend the farm on their left flank while advancing the rest of their line across the river.   
On the far flank the Union have cleared the farmyard & are atatcking the house in overwhelming numbers.  The South have dismounted their cavalry to cover that flank. 
In the centre the South have made good progrerss intot eh wood, but the Union are feeding reserves in from both flanks (inlcuding their cavalry, dismounted) to stiffen the line. 
On the Southern right they have been goaded in to an attack by the Union cannon fire.
The Union have cleared the farm on their right & are counterattcking the South's left. 
In the centre the South's attack is runing out of steam.
On the right the Union are counterattacking after getting the better of the fire fight on the hill.
For mosrt of the battle, the Union were losing more untis broken than the South, but when their flank attack got into gear the balance changed quickly as the South lost 5 units in one turn.  With much their army also now shaken, the South conceded the battle. 

This was a very enjoyable battle.  Both sides had their successes & failures & their runs of good & bad luck, but in the end the Union strategy paid off.

With the 15mm figures we use the same movement distance numbers as 28mm, but use special rulers with 15mm inches.  This makes the distances in scale with the smaller figures & units, and makes the table twice as big in area thus a lot more maneouvre space.   ACW also has the advantage of simplicity with very few different troops types so it's the easiest era to play, & the players have more brain space left for strategy. 


Tuesday, December 10, 2024

Mech War: Germans v. Soviets

Germans: SteveJ & Jim
Soviets: Mark & Chris

The Germans are on the left.  There are 5 objectives, the three garms, the bridge & the central hill.
The Germans used their half tracks to rush forward & sieze the bridge plus the nearest farm & the hill objective.  They deplyed the MkIVs in the woods to defend their left flank, put the Tigers on the central hill to  do what Tigers do & their Panthers on the right. 
The Soviets advanced behind the woods on the left & centre &defended in the woods & farm on their left.  
Three MkIVs were lost on the left, but with support from the Tigers the Sovet tanks opposing them were destroyed.
The Soviets moved up anti-tank guns but whenever they deployed they were all taken out either by the German artillery or tanks fring HE.
As the Germans held 3 of 5 objectives, the Soviets eventually had to attack.  But t[when tnye did, they were met with a flurry of 6's & the attack failed.  The Sobiets then conceeded.

The Scenario gave the Germasn an easier task as they had transports that allowed them to grab a majotity of the objectives at the start.  They then went on the defensive & held off the Soviet counteratacks which were not well coordinated. It also seemed that the Germans had been hoarding 6's waiting for the attack.    

Wednesday, December 04, 2024

Mech War: Germans v. Brits

Same armies as last game, terain tweaked, 5 players.
Germans: Jim& Chris.
Brits: Maike, Mark & SteveJ.
Mech War house rules v.2024.2 with simulatneous movement.

The Germans are on the left. 
The Brits have concetrated theri armour on their right flank & begun an advnce there.
The Germans deplyed their armour on a wider front between their left centre.  As the Brits advanced the MkIV's advance to the ridge line while the Pussies moved left to support them.
Some of the Brit tanks were masked by the wood, & with bit of help from the dice gods, the MkIVs on the ridge more than  held their own own until the Pussies arrived.  The Germsn sent their infnatry to the two patches of woods.  The brits attacked the far one, but after getting the worst in a firefight fell back. 
The fsailure of the Brits to take out the MkIVs before the pussies arrived was crucial & their AFVs  were whitled away when the MkIVs & pussies counterattacked, despite the 2 Tigers both getting popped with the first shot they took. 

Playing the game showed up a few details re simultaneous movement that needed clarifying, but we sorted them by discussion & overall it worked fine.

The run of 3 decsive German victories over the Brits with equal points might indicate that the points system needs looking at.  Though the Soviets beat them in the game before & they were seriously favoured by the dice Gods in 2 of the games. 


Friday, November 29, 2024

Mech War with simultaneous movement

Recently we changed our M2M house rules from IGOUGO to simultaneous movement using Comand counters.  Today we tried out a similar system for our Mech War WWII rules. 
We used the saem scenario as last Tuesday but with the sides on opposite sides of the table.

Chis cammands the Brits on the far side, Jim the Germans on the near side.
The Germans siezed the village with infnatry & MkIVs, but the british off-table artilley immediately ranged in on it.  A MkIV was knocked out & another bailed up whiel the infnatry in the houses were decimated before the survivors ran back behind the houses.
On the far flank the Germans siezed the cetral ridge with infantry & 5 Panthers.  The Brits declined to take on the Pussies & moved their right flank armour towards the centre.  But the Panthers still found brey firing long range fover the bockage from the ridge.
In the centre the Tigers won a long range duel with 17 pdrs on the ridge in the Brit rear.
On the near flank the Germans siezed the hill with infantry while the Brits advanced to support their attack on the village.    
In the centre the MkIVs set themselves in the bockage & took on the Cromwells.  The Brits sent infantry around the flank of the German infantry on the road.  The Tigers moved onto the hill behoind the village to open fire on teh British left flank tanks.  Teh Panthers ahve moved down off the ridge to threaten the British right flank.
The Pantehr have got around the British right, the Tigers have sniped away from their hill while the Mk IVs in the bockage beat up the Cromwells in the centre.  The Brits concede the battle.

The experiment in simultaneous movement worked even better than expected.  All my reservations about using the system, in WWII turned out to be unfounded after I spent some time devising systems to address the issues I was worried about.  The same set of 6 order chits we use in M2M also work here, but the command system is actually simpler as there are no formation changes so fewer options needed.  This battle was fought using a 1 page addendum, but we liked it so much I'm working on writing the changes into the rule book.  There are a few minor tweeks required here & there but mainly simplifications.  Eg: There is no need foran ambush rules as stationary troops fire before moving ones. 


Tuesday, November 26, 2024

WWII Tank Battle in Normandy

We rejigged the terrain from last week to be more French & used the same German army against a British force.
Germans: SteveJ (right flank) & Mike (left flank.
British: Chris (left flank), Mark (right flank) & Jim (right flank). 
Rules: Mech War house rules.  15mm figures.  10'x6' table.

The Brits are coming on from the left long edge, the Germasn from the right long edge.
The Brits take up defensive positions in the farm on their left & the central village & advance with armour on their right.
The Germans advance on ther right with armour & infantry.
The British tank attack on the left was met with a hail of hot dice & destroyed.  The Germans took out  Cromwells, 2 Fireflies & 2 17pdr antit tank guns at the cost of 3 MkIVs.
The British left was supposed to just buy time keeping the Panthers busy while the Brits won the battle eslewhere.  That didn't happen their left is slowly being ground down by the pussies.
The Brits concede the battle & the survors run for it. They lost 6 Cromwells, 3 Fireflies, 2 17 pdrs & half their infantry.  The Germans lost just 1 Panther (to a PIAT) & 3 Mk IVs.  It was all over in about an hour play time.

Wednesday, November 20, 2024

WWII Tank battle in the Ukraine

The Russians hold the village with infantry.
Two Germanarmoured platoons are to attack the village.
Two Russian armoured platoons are coming to the rescue.
Mech War house rules with 15mm figs on a 10'x6' table.

Chris' infantry are deployed in & around the village.
SteveJ's platoon of Panthers & asrmoured infantry are advancing from the far RH corner.
Renfrey's platoon af Mk IVs, Tiger & aroured infnatry are advancing from the near RH corner.
Mike's platoon of T34's is coming on the far LH corner.
Jim's platoon of T34's is coming on the near LH corner.
Both German platoons have advanced dirtectly on the village & began attacking it.
Jim's platoon has rushed forward to engage Renfrey who has turned most of his tanks to meet them.
Mike has moved his tanks down the table around the rear of the village.
The tank fight between Renfrey & Jim has ended in mutual destruction.
The attacks on the village with infantry supported by armour has killed half the defenders & taken part of it.  But Mike's armour has arrived in time to support the remaining infantry & stop the rot & the German attack  has faltered.

The Germans decided they couldn't break through & oredered a withdrawal.
The Soviet strategy for Mike to avoid direct confontation with the Panthers & manouvre to support the infantry form behind while Jim distracted Renfrey was succesful.  


Tuesday, November 12, 2024

WWII Cruisers & Destroyers

We had 6 players each with a squadron of 1 CA, 2 CL & 2 pairs of DD.
Deployment was random with 1 squadron in each corner & 1 centre of each long edge.

Far LH corner: Mark's Brits.
Far RH corner: Chris' Brits.
Near LH corner: Jim's Brits.
LH centre: SteveJ's Germans.
RH centre: Mike's Germans.
Near RH corner: Renfrey's Geermans.

Jim's Brits had an obvious risk of being caught between Renfrey & SteveJ.  But SteveJ took the safe option heading towards his comrades allowing Jim to slip across his stern before Renfrey cor Mike could come up.  
Mike's squadron came up in time to take out Jim's rearmost DD & severely damaged a CL.
Jim's squadron has laid smoke & got clear of immediate danger as Mike & Renfrey's squadron get mixed up.  SteveJ is now engaging Chris' squadron.
Chris & Mark now find themselves between the fire of SteveJ & Renfrey.

Renfrey has turned away with his CA badly damaged, but not until he'd helped Steve influict serious damage to Mark & Chris' squadrons & forced them to turn back. 

Mike's squadron has had a fruitless stern chase after Jim's squadron which has moved towards SteveJ's T forcing him to turn away.  But not before both Chris & Mark's CA's have been sunk & the rest of their squadrons badly damaged. 

At nightfall most of both fleets are heading for home with serious damage, but the Germans clearly won the battle losing only 1 pair of DDs to the Brit's 3 pairs of DDs & 2 CA's.    

Asan encounter battle the game was played with no overall cammander on either side & no council of war or secret communication between the players of each side.  The result was a realistic lack of coordination between the squadrons.


Friday, November 08, 2024

Mech War in the desert

We re-used the battlefield from last Tuesday but with 15mm figures & our Mech War house rules.
Germans (Chris): 5 MkIII, 3 MkIV, 2 inf platoons, 2MG, 2 Med mortars, 2 Pak 38 all Regular.
British (Renfrey): ( Crusaders, 2 inf platoons, 2MG, 2 25pdr, 2 carriers all Regular.

There are 7 objectives in the oasis & on the surrounding hills overlooking it. The Gernans started on the far side.
There were unequal tank fights on each flank.   The Germans had the advnatages & won on the near side & the Brits won on the far side, the German use of cover overcome by weight of numbers.
Both sides grabbed as much of the oasis as was easy. 
The Germans got to the objective on the rideg with the Sidi first, but the Brits are advancing to attack it.
The critical move was the British assault on the Sidi ridge.  The odds slightly favoured the Germans, but the Brits won the fight decisively.  Their Crusaders & infantry then turned right to attack the oasis which so far was a scene of indecisve shooting theough the palm trees.  This attack took the oasis before
the victorious MkIII's could intervene. 

Despite ealy setbacks in the tank fights, the bold British attack on the Sidi ridge paid off big time leading to a decisive victory. 

Our Mech War rules remain traditional IGOUO althought all our other house rules using simultaneous movement.  In WWII simultaneous movement doesn't work so well as other periods.  The battles are more chaotic making simultaneous movement tricky & there are issues with who shoots first if 2 untis face off.  And we don't use the BA command dice system because the game is designed for much bigger battles than BA & their system slows the game down too much with a large number of units.