Monday, October 21, 2013

Nick in Launceston -- Pieper's Demise


OK -- you would have thought that Kampfgruppe Pieper, with King Tigers and Panthers, would have run roughshod over a US Cavalry Company with armoured cars and light tanks. But it was not to be. One Panther died to a side shot by an armoured car that snuck around to the rear. Pieper died to a hellcat. And then the green horde rushed the objective!

On other tables there was a game of Force on Force by Daniel and Dennis, and another FOW game with Rob and Starn

Sunday, October 20, 2013

Bolt Action At Barrie's

Jim's Kiwis v. Barrie's Germans

We played the Demolition scenario from the rulebook.  Each side has an objective and wins by having a unit in contact with it at the end of a turn.  Delving into barrier's drawers for objectives, we selected a roast pig on a spit for the German objective and a flock of sheep for the Allied objective - naturally I declared that my Commonwealth troops were  Kiwis.  Both sides start with up to half their units on table, the rest in reserve to come on from turn 2.
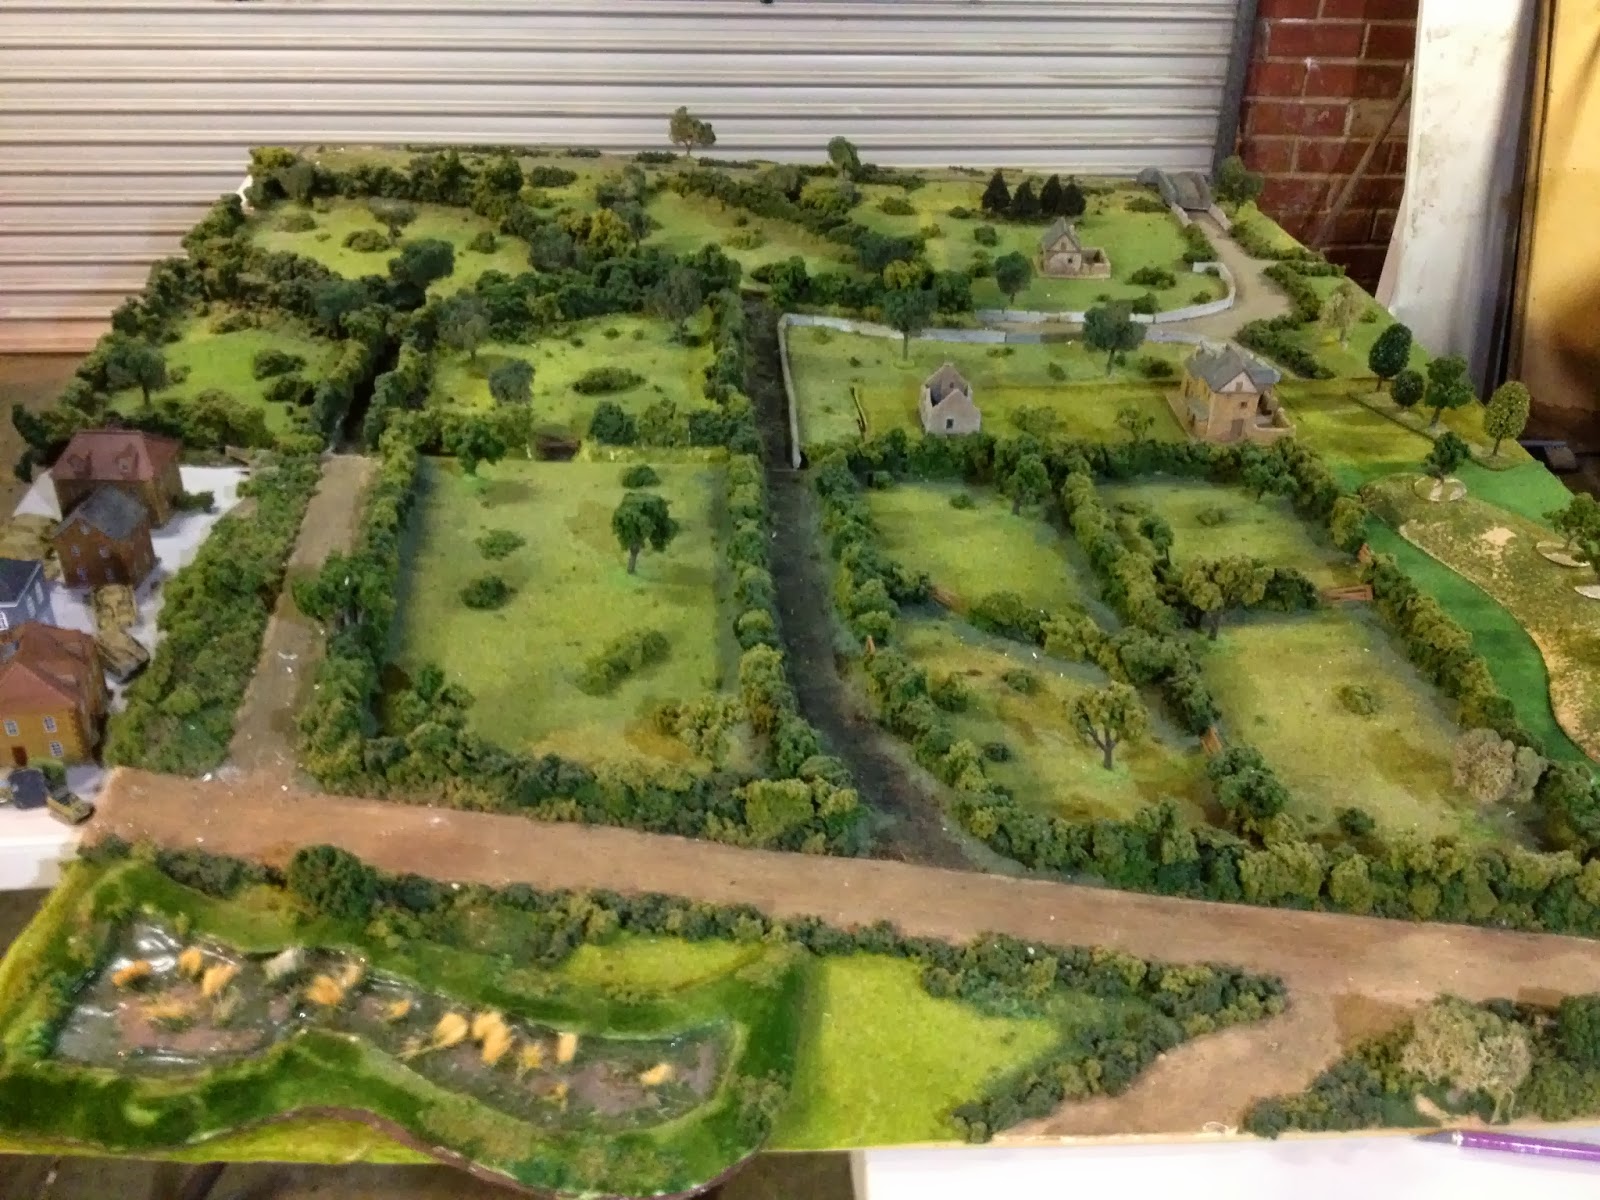
 The German objective is in the field on the far side defended by a 6pdr, a mortar & a HMG.  One Kiwi infantry section is advancing on each flank and two in the centre.  The Kiwi's objective is just on the right hand edge of the pic.  A grenadier section & a Stug have come on in the foreground, another grenadier section has occupied the big house, the other is on the right flank.he near flank.

The Kiwis have rushed onto the objective with a Bren carrier.   It withstood shots from 2 fausts, a schreck  & the Stug, but was taken out by the German command team charging it from behind the house.  On the left the grenadiers & Stug have destroyed the advanced Kiwi infantry.  The grenadiers are advancing down the flank, the Stug has turned right to help defend the objective.  Tired of being smashed by Allied artillery regardless of which side I'm on, I decided to use the artillery for smoke this time.  It would have covered the attack on the objective beautifully...except I threw a 1 and the Germans got to place it where they wanted.
After the bug was destroyed on the objective, the Kiwis charged 3 infantry sections and the HQ at it.  The Germans destroyed 2 sections & the HQ, but one survived to hold the objective and win the battle.  

A nice little battle this one.  The comparison with COC goes on.  Barrie prefers COC, but doesn't mind BA, I prefer BA, but don't mind playing COC.   Despite a few annoyances, the simplicity of BA wins it for me.   But it's nice that the same armies can be used for both.

Thursday, October 17, 2013

Thursday Arvo Bolt Action

Jim's Germans v. Mark's British

Mark flexed the afternoon off for a game of Bolt Action.  We made up our own scenario.  Either side winning by either taking the village or destroying more than half the enemy's units.  The Brits came in within 24" of the far corner, the Germans within 14" of the near corner.
The Germans got to the church first, putting 2 sections of infantry, HQ and their Panzerschreck in there.  There Stuh moved down the road to the crossroad, but declined to take part in a shootout with the Cromwell plus a 6pdr.  It's behind the church shooting up tommies advancing on the village.
The Brits have taken the house by the bridge.
On turn 3 the British artillery barrage landed on the church.  It took out the Panzerschrek team & the Stug & pinned down 2 infantry sections & HQ.  That pretty well stuffed the Germans.   While the Tommies in the house by the bridge were blasted out by mortar fire & the infantry section working around their right of the village was destroyed by fire from the church the British attack on their left destroyed the Germans behind the ploughed field and concentrated fire destroyed one of the infantry sections in the church. This caused the Germans to fail morale.

Bolt action is east to play and good fun.  My main criticism is that too often one lucky artillery barrage can decide a game.  Usually artillery is pretty ineffective, but this time the British artillery crippled me.  And I also lost the last time I played against Mark because of the British artillery - and I was British that time! 

Tuesday, October 15, 2013

Dunbar 1650: Hail Cromwell !

The scenario was based on Dunbar 1650 where Cromwell was all but cut off from England by Leslie's army on Doon Hill close to the North Sea.  In the real thing Cromwell made a night march to outflank the Scots and roll them up from their right.   In this scenario both sides were allowed night marches but each division's march was subject to a roll so they might move all, 3/4. 1/2 1/4 or none of the proposed distance.  The rules are Hail Cromwell = Hail Caesar house ruled to extend it to ECW.
Mike & David commanded the Scots.  Jim, Steve & Mark commanded the English.
The English troops started deployed this side of Spott Burn.  A cavalry and a shotte division have marched up the road in the night.  A piek & shotte division and a small cavalry division are covering the baggage train.

The Scots have moved forward overnight, but not so far as to get themselves over-exposed as in the real thing.
The English horse on the far flank have advanced to the foot of the hill to pin down the Scots there and hold the road open.  The shotte have deployed in front of the road.  The rear guard is making an advance to pin the Scot's left.
On the far flank the Scots cavalry attacked to try and close the road, but after initial success, they were stopped by the English horse.  In the centre the highlanders smashed a hole through the English musketeers.  Fortunately for the English the Scots pikes were making heavy work of moving on the hill and had been left behind.
The English rear guard has advanced onto the hill as the baggage train moves slowly along the road. 
The English rearguard's advance has shuddered to a halt as highlanders charge down the hill at them.  In the centre, the highlanders are withdrawing to the hill - saved from Cromwell's cavalry counterattack by lousy command dice (and he's a 9!).  Mark's horse is mopping up the Scots horse on the hill on the far flank,  but the pikes behind them make any further English progress there unlikely.
Steve's rearguard was pushed back but eventually saw the Scots off.   His foot I now starting its withdrawal while his horse is facing off the Scots lancers.  Cromwell's horse is holding the road open.
Steve's horse has pushed the lancer's back.  Both the Scot's flanking forces have now broken so even though they still have their two large centre divisions with small only losses, the Scots fail the army break test we use:  For armies with 4 divisions, they break if they lose 3 or if they lose 2 before the enemy lose any.  3 of 4 English divisions are on the verge of breaking, but it's the Scots who fail first.

The Scots must fear they are being outflanked and retire onto the hill letting the English get away.  15 of the 20 English units will get away (exactly 75%) and they have saved the baggage, so under the scenario rules they have salvaged a draw by the skin of their teeth.  But it was a moral victory for the Scots who did so much better than in the real thing.

Sunday, October 13, 2013

Operation Cromwell IV

Operation Cromwell IV was the 4th annual Flames of War tournament run by Camp Cromwell at the church hall in Cromwell St over the weekend 12-13 October.   As has become traditional, it was a teams competition with teams of 2 or more playing on 8x6' tables - double normal FOW size.  This time it was Normandy themed with all armies 2,500 points from the Earth & Steel or Turning Tide books and all Allies v. Germans.  Camp Cromwell & the Launceston Gaming Club has 1 team on each side, the Kingston Bunker Rats 2 teams on each side.  There were 4 tables each with a specific scenario designed for it.  Each team played each enemy team once, each game on a different table / scenario.

The Scenarios were:

Hit The Beach:   Based on the FOW Mission in D-Day.  The Allies will be provided with landing craft, air & naval support, engineers & funnies to add to their lists.  The Germans may swap platoons for fortifications up to the same points value - as in Earth & Steel.  If the Germans have any King Tigers, Jagdpanthers or Panthers, these must be traded for fortifications in this scenario as they were not available on June 6.  This is to be worked out beforehand with a copy of the calculations for checking so as not to delay the start of the battle.

Bocage:   The Allies have to grind their way through the bocage.

Rommel Strikes Back:  Bad weather has grounded the Allied air forces.  Rommel sees the chance to take back a row of hills that dominates the area.  He gives his forces in the sector additional assets & orders them to re-take the high ground.  In this scenario, the Allies can use counters to mark location of platoons out of sight of the enemy (with dummies to confuse the enemy further).
Falaise Gap:  The Germans are deployed in the Falaise gap and have to keep it open for their comrades still in the pocket.   The two Allied coys deploy one at each end of the table & have orders to close the gap.

FOW Victory Points were not used - generally Victory Points were gained by taking ground with 6 V counters marked 1, 2 or 3 placed on significant terrain features.  The missions were generally unsymmetrical and not necessarily balanced, but there were separate prizes for best Allied & Best German team, so while playing against the enemy teams you were really competing with the others on your side.
The Inglorious Bastards from Launceston Hit The Beach defended by Meyer's Marauders from Kingston.
Shaving Ryan's Privates from Kingston v. Kampfgruppe Kromwell in the Bocage.
Messines' Ridges from Launceston move their Tigers forward in Rommel's Fight Back v. Cromwell's Ironsides. 
The Justice League from Kingston try to close the Falaise Gap defended by 21st Panzer from Kingston.
The Justice League receive their Medal of Honour awards for Best Allied Team from the TO watched by some of the 21st Panzer - winners of the Iron Cross for Best German Team.  The Kingston Bunker Rats won the World Domination Award for best club.
 
Final results:
Allies:
1. The Justice League, Richard & Twisty, KBR, 11 VPs.
2. Inglorious Bastards, Rob & Shane, LGC, 9 VPs.
3. Cromwell's Ironsides,  Rich, mark & Jim, CC, 8 VPs.
4. Shaving Ryan's Privates, Griggsy & Gazza, KBR, 4 VPs.
Germans:
1. 21st Panzer, Smithy, Mark, Mat & Carl, KBR, 36 VPs.
2. Meyer's Marauders, John & Rusty, KBR, 34 VPs.
3. Mezzine's Ridges, Nick & Declan, LGC, 32 VPs.
4. Kampgruppe Kromwell, Steve & Nick, CC, 26 VPs.
 
There is an obvious difference in scores between the Allies & the Germans.  The scenarios turned out to be not as well balanced as play testing indicated beforehand - maybe because the German teams did a lot better in picking lists that we did for the playtests.  Or maybe they were just better at being Bad Guys than us.  3 of 4 teams had Tiger platoons that the Allied teams struggled to deal with.  But the difference in scores between all the Allied teams and the difference in scores between all the German Teams were quite small, indicating the close nature of the competition - which went right down to the last grabs for ground in the last round of games.


Wednesday, October 09, 2013

More preparing for Operation Cromwell

We did two test runs of the Falaise Gap scenario & terrain we will be using for one round.  The scenario has the Germans deployed along the road to Paris with the Allies attacking from both sides.

Saturday:  Jim with Stugs & Fusiliers v. Rich with Canadian Mech & 7th Armour

It looked very hard for the Allies early on, but the Air support and Across the Volga artillery wore the Germans down and in the end the Allies won a convincing 9:1 victory

Tuesday:  Jim with Canadian Mech & 7th Armour v. Steve with Panzers & Mech 


The terrain was tweaked a little to address some issues shown up in the first game.  This time the Canadians came the other way & the Germans had a lot of AA which pretty well kept the RAF at bay.  Again it looked bad for the Allies early, but the Canadian infantry managed to grab an objective on the road just before time was up to gain a narrow 6:4 win.

Although both tests were won by the Allies, the situation looked dire for the Allies at times in both games before turning around, so it's no cakewalk for either side. 

The Rules of Engagement for the tournament are now being given a final check and will be sent out to the participants shortly.


Saturday, October 05, 2013

Preparing For Operation Cromwell 2013

Operation Cromwell 2013 Flames of War Tournament will be held next weekend 12-13 October at St Georges Church Hall in Battery Point.

It is not a standard FOW tournament - we are trying to provide an interesting change with very different scenarios on 8'x6' tables.  It is a themed teams competition - all Axis v. Allied in Normandy.  There are 4 Axis teams who will fight each of 4 Allied teams - no Blue on Blue.  A team will play each of their games on a different table and each table will have a specific scenario played on it every round.  The teams comprise 2 or more players.  The armies comprise 2 companies totalling 2500 points from Earth & Steel or Turning Tide.  There will be awards for best Allied and best Axis teams and for best club (highest aggregate of their best Allied & best Axis team).

The scenarios are non-standard scenarios specifically designed for the occasion.  In each scenario, there are 10VPs to be gained by taking or holding 6 objectives worth between 1 & 3 VPs each scattered in the defender's deployment area.   All run for 3 hours plus a random 0-15 mins.

1. Hit The Beach: Basically the Mission from the D-Day book, but the Allies are provided with additional support platoons (boats, engineers & funnies) & the Germans can trade in platoons for fortifications. 

2. Bocage Bash:  The Allies have Air & Naval Support and have to fight their way lengthwise across a bocage table.

3. Rommel Strikes Back:  It is raining so the Allies have no air or naval support.  The Germans are provided with a Tiger Platoon and Across the Volga artillery and have orders to attack and take a chain of hills that dominate the otherwise flat & open area.  This scenario includes a hidden deployment system for some of the Allied platoons.

4. Falaise Gap:  The Germans start spread along the Paris Road.  The Allies start with a Coy at each end of the table.  The Allies gain VPs by cutting the road - scoring more VPs the closer to Paris they make the cut.
The Beach and Boccage tables are being provided by the Kingston Bunker Rats.  The bocage table was being set up & tested when I visited Griggsy's bunker last Thursday.
 Today at Camp Cromwell Rich & I play tested the Rommel Strikes Back Scenario.
The Allies are on the left.  Initially some of their force which is out of German sight behind the line of ridges is represented by counters, some of which are dummies.   After a brief happy time driving the infantry off the hill in the foreground the Stugs got a nasty shock when the counters behind the hill  turned out to be 2 Cromwell platoons.
On the far flank the Tigers and fusiliers took the scrubby hill for 3 VPs then they took the far end of the ridge this side of the road for 2 more.  In this game the VPs went 5 each.  The hidden deployment system worked well & we got a few clues for fine tuning both the scenario and terrain. 

Wednesday, October 02, 2013

Paper 28mm buildings

With everyone otherwise engaged this Tuesday I used the time to make some new paper 28mm buildings.  We have been using our old 15mm buildings with our new 28mm figures & that does work - the buildings are out of scale with the figures, but closer in scale to the unit footprints.  But in Bolt Action, having houses too small to hide a tank behind doesn't seem right. 

The buildings I've made are from Dave Griffam Models  http://www.davesgames.net/  (bought through http://www.wargamevault.com/ ).  They are pdf downloads which cost about $3 each.   Once you have the pdf you can make as many buildings as you want at the cost of only paper, glue, ink & a bit of time.  The pdfs have selectable layers that allow you to choose different finishes (stone, brick, stucco, half timbered), different numbers of windows & doors, different roof types (tile, slate, thatch) for each model. Some models are easily modified for even more variety.
The range of buildings is a mix of mostly fantasy & sci-fi buildings, but there are some good Western European style buildings amongst the weird ones.  I have the "Church", "Cottage", "Longhouse" & "Coach House".  There are 3 Coach houses in the pic with 3 different finishes.  I modified the stone one on the left of the tank to make it a single storey building.  They print naturally at 28mm scale, but you could print them at smaller scales.  The houses are each made from 4 A4 sheets.

It takes about 1/2 an hour to make a model house & it's quite easy once you get the technique right. 220gm matt photo paper is as heavy as will go thought my printer, but is strong enough.  A good pair of scissors makes cutting out easy.  I score the bend lines with the back of a Stanley knife run along a steel ruler - the stiff paper is then easily bent straight on the lines.  UHU in a tube is the best glue I've found - it doesn't wet & warp the paper & really sticks.

They don't come with an insert ruin you can lift the model off like PaperTerrain.com models, but I cut out the inside of the base so the building can be lifted, the troops placed & the building put back over them.  After doing the church, I improved on this by bending the base tabs outwards under the base ring so the full internal area is useable.   The base skirts on the Coach Houses are wider than they need to be for strength - I think I'll cut them back to about 6mm wide.