American Civil War Scenario in Black Powder
Rebs: Jim
Feds: Carl, Nick, Leigh
Venue & terrain: Nick
Troops: Carl's 15mm
Rules: Black Powder, distances halved
The Scenario has the Rebs attacking & the Feds reacting. The Rebs didn't try to be too subtle, advancing as fast as they could, though the command dice meant this meant an echeloned advance led by the right. The Feds initially got pretty good command dice and were deployed before the Rebs got to them.
Pic 1 is from behind the Reb left. Their right has charged home. Their left & centre have been held up by bad command dice. The Reb charge on the right was a disaster. They failed every break test & in 2 turns the whole brigade was routed.
Pic 2 is behind the Reb right. The Fed left has failed to get moving to exploit their victory. The Reb centre has attacked - charging 2 v. 1 on the left and starting a firefight on the right. The left hand Fed unit routed under hot shooting. The gap in the Reb line is where a unit routed when it tried to charge. On the far left both sides are having command problems.
Pic 3 is the end. The Reb centre is outflanked on both sides & doomed.
The game ripped along very well considering that no one was particularly familiar with the rules. The combats seemed to be very dicey - with most combats decided very quickly. The Rebs had rotten luck on getting creamed in a fair fight on their right, then failing to get any advantage out of their albeit temporary advantage in the centre. The command system too seemed to be very chancey, however it is also true that none of the players knew much about the opportunities the rules provide to skew the odds.
Saturday, March 26, 2011
Tuesday, March 22, 2011
FOW Dust-Up Mission
Steve's Panzergrenadiers
v
Jim & Byron's Russian Tankovy
1750 pts on 8x6.
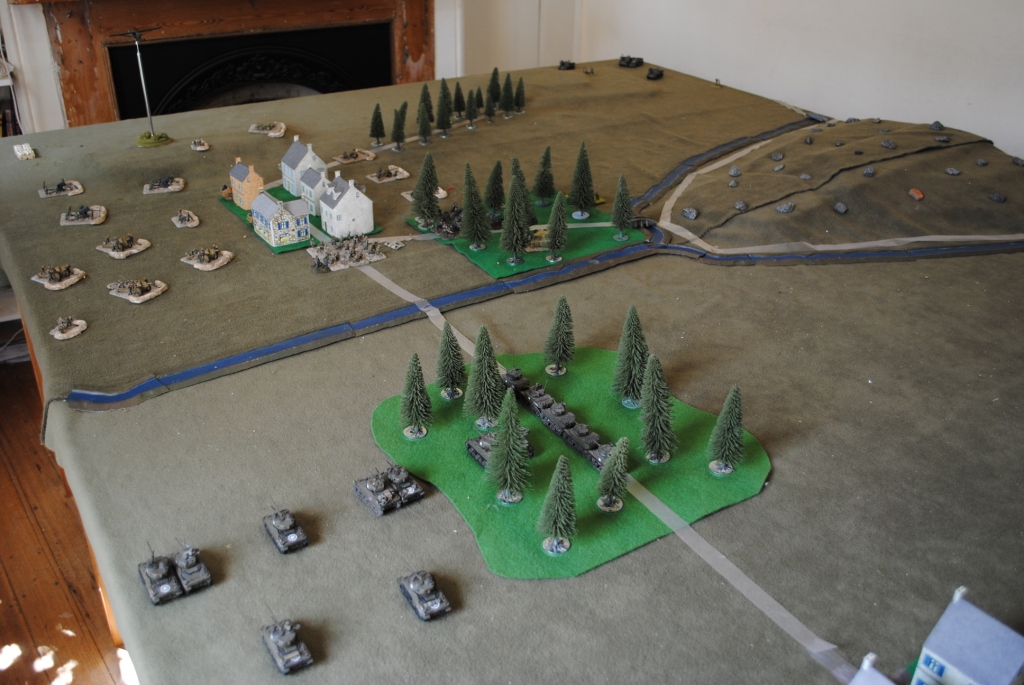
We tried out the Dust-Up Mission from a pdf. The armies deploy half on opposite quarters with delayed reserves coming on from a flank.
The pic is taken from the corner where the German reserves come on. The Russians are defnding objectives on the right, the Germans on the left. The Russian reserves come on in the far corner.
The Russians deployed their Motostrelk on their objectives with a T34 platoon in support. T34/85s, JS2s & KTs to come.
The Germans defended their objectives with 88s, Pak40s, Art & Werfers. A Pgren platoon moved past the centre objective into the wood to attack the Strelk.
The Russians sent T34s towards the German reserve point to try & destroy them as they came on - a tactic that didn't quite work. They destroyed the Paks, but there were too mnay Krauts & half tracks slipped past to attack the Strelk. So the T34s had to rush back to help defend the objective. Likewise, the attack thru the wood forced the Russians to send the T34/85s over to help, leaving only the JS2s & KTs to pressure the German held objectives.
Half tracks bristling with mgs & full of desperate Krauts with lots of Panzerwhatzits were too much for the Russians. The Strelk & the Tankovy melted away & the Germans ended up on the objectives unopposed.
Dust-Up is a good Mission - lots of options makes it interesting. We should add it to the standard list.
Sunday, March 20, 2011
FOG Version 2 Beta test
Nick vs Leigh. Gauls vs Late Republican Romans using standard starter armies.
The game was played on a flat plain. (Insert my usual rant about the FOG terrain system. We just couldnt face going through all that effort for no real terrain.)
The Romans legions ate through the Gauls, even with the experimental new rules increasing the power of the Gauls. The Roman light cav was pursued off the field, and on the other flank the Roman owned mercenary Gallic cav with a general fought the Gallic cav with a general -- a dead even tie. However, in this case the Romans got a bad die roll, and suddenly the Roman mecenary cavalry crumbled.
The battle then became a race for each others camps, as each side was close to breaking, but the Romans couldnt catch the Gallic cav, and the Gallic cav couldnt face to Roman legionarries, so the only way to get a victory was to get the enemy camps. One of the routing Gallic warbands rallied in front of their camp, and Caesar lead a legionarry unit into the Gauls in a headlong charge -- the legionarries needed to win quickly and get through to the Gallic camp before the Roman camp was sacked. However, Caesar failed to make headway, and was killed (Nick rolled a '12' as the general death roll, as he had put Caesar into the combat)
A long close game with lots of referring to the rules -- but that was the point of the game!
Friday, March 18, 2011
Fog in Launceston
A quick game of Field of Glory (FOG), using the Roman and Carthaginian starter armies in the book. Dennis was carthaginian, Nick was Roman.
Dennis did an 'unusual' deployment for the Carthaginians, with two lines of infantry -- African infantry and Spanish in the front, with Hannibal, more Aficans, and Gauls in a second row. Cavalry were on the carthaginan right flank, and skirmishers everywhere!
The Romans waded in with ferocity. The first row of Spaniards evaporated like they werent there. But the Gauls behind were tougher, sitting stoically and refusing to budge. Hannibal helped the Gauls pass any cohesion tests, and in fact helped them recover if they failed a test as well. Meanwhile, the Gauls were slowly eating through the Romans due to some unlucky death rolls. The Africans were similarly tough.
The Carthaginian cavalry had some trouble with the Roman cavalry, but eventually prevailed. The Roman camp was in trouble, and when the Carthaginian elephants got into the flank of the Triarii it was all over!
The Romans went for a break through the center attack, and it almost worked -- but Hannibal was the man of the match, keeping his center fighting while his left hook hit home!
Tuesday, March 15, 2011
Blitzkrieg
Jim's British Rifles v. Steve's Panzerchutzen
2000 pts Free For All on 8x6.
The Brits had 3 Rifles, mortars (2 with hq), HMGs, 2pdrs, 25pdrs, Bugs, MkIVBs & Matildas(3).
The Germans had 2 Panzerchutzen, Kradschutzen, Artillery, MkIVs(3) & Bunkerflak (2/88s on HTs).
The Brits put bugs & Light tanks on the left, Rifles, 2pdrs, HMGs & mortars in the centre, and attacked 2 Rifles & the Matildas on their right.
The Germans put Infantry on each objective with their HT's behind hill or wood close by. artillery behind a wood on their right centre & the Bunkerflak & Krad in the centre.
The Brits charged down the left flank with their light brigade threatening the artillery and advanced slowly into cover on their right. The Panzers went right to deal with the light brigade, the Bunkerflank went left to cover the Matildas.
On the Brit left, the light brigade hid in the village until the Panzers got close then the MkIVB's ran back for safety. The Panzers popped 1, the other got away & the Panzzers turned back as the bugs attacked the artillery on the other side of the village.
On the Brit right the infantry & Matilidas advanced. The Krads came out & did soem damage to the rifles, but were imemdiate;ly obliterated by HMGs & mortars. The Bunker flak were partly smoked out & the Matildas doubled past their line of fire, losing one to unreliability.
Two Rifle platoons supported by Matildas rushed the hill driving the Schuten back. They rallied & counterattacked, but there were too many Brits holding the objective to dislodge them all giving the Brits victory.
Early War is an interesting change. The Bunkerflak is scary, but also difficult to use with the awkward layout. Matildas can be king, but with no HE, slow move & unreliabilty it can be difficult to get value from them. The Krad can be deadly, but they are also awfully vulnerable.
Jim & Steve on the Eastern Front
Jim's Guard Tankovy v. Steve's Schwere Panzer
1750 pts Late War Breakthrough on 6x4, German's attacking (on the LWE Monday).
The Russians had 1 Strelk in a long line across the table, 2 KV85 platoons, 1 on table & 1 in reserve, plus Katies deployed as far back as possible.& KV85's.
The Germans had 2 KT's, AA Ht's & artillery on table, Armoured Panzergrens & 2 Tigers in flank attack.
The KT's attacked the Strelk with support from the AAHT's & artillery while the Russians deployed their armour to meet the flank attack. The KT's broke thru onto the the hill & a game of cat & mouse ensued as the Russians tried to get their tanks in flank while the Germans used Stormtrooper to avoid it. The Strelk were pulled back & a combined attack of Strelk & KVs did get a KT, but at great cost.
The flank attack came on was met by KV's & a shoot out ensued. The Tigers died but so did the KV's leaving the Germans with the objective. Then we realised that the Germans should have tested army morale first.
Pics taken from behind the German's objective.
Friday, March 11, 2011
Heavy Tank Walkovers
Three games played at Launceston last week and last night.
Game 1. Nick B with a King Tiger Co. Nick Ridge with British Armour. Scenario was breakthrough.
Nick B deployed his one King tiger allowed at start to rush to the objective, with a King Tiger CinC to hold off the horde. Nick R got first move, and rushed fireflies to get a flank shot of the one King Tiger, which they killed. The British 5.5" artillery tried to range in on the CinC, and missed. But the 25lbers did range in -- the CinC failed armour save, and the 25lbers got firepower. Before Nick B got to move his whole army was destroyed.
Game 2. Nick B with a King Tiger Co. Nick Ridge with British Armour. Scenario was fighting withdrawal. Nick R had three objectives to attack with armour. Nick B had 2x Tiger platoons (of one tank), and infantry and AA to defend. Nick rushed foward. The tigers couldnt kill enough tanks. The infantry came out of ambush and tried to kill some tanks, but failed tank terror. Next turn one tiger holding an objective was killed by a horde of shermans going for flank shots, and there was nothing that could get to the objective and contest it.
Game 3. Nick B with a Panzer Co (with Elefants). Rob with US armour. Scenario was encounter. With only two platoons on for the US, facing Elefants and a horde of Panzer IV's, the US wisely tried to rush the Panzer IV's. They got 3 of the 4, but the Panzers survived morale. The next turn the retribution from the Elefants and Panzer IVs (CinC, 2IC, and remounted survivor) wiped out the Shermans, with the CinC bailed. Rob failed to get reinforcements. Next turn the 105 shermans were killed by the Elefant, the CinC was killed, and it was game over.
The Launceston club has new premises. Worth going to if anyone is up north!!! Pic is Nick R and Dennis checking army lists
Saturday, March 05, 2011
Maharajah Grand Final 2010
Nick's US Armour v. Jim's Gepanzert Panzergrenadiers
2000 pts Breakout, Germans defending. Terrain on 8x6 by Steve.
Umpires Mark & Steve.
2000 pts Breakout, Germans defending. Terrain on 8x6 by Steve.
Umpires Mark & Steve.
The Germans deployed their infantry in the wood and nearby where they coudl quickly move onto the objectives. Their artillery & werfers were behind the village. A line of Pak 40s in front of the village faced the US easiest line of attack. Marders in village formed a local reserve. Stugs were off table to come in as reserves from the rh foreground corner.
The US put their Priests in the far corner (with a spotter plane giving them a full table field of fire. Stuarts on the road in the wood, Super shermans & HQ to the left of the wood. In reserve they had M10s, Armoured infantry & Shermans.
The US opened with a Honey rush down the road. They drove the infnatry in front of the village back into it where the artillery quickly finished them off. But a Panzerfaust, Paks, Marders & artillery destroyed the Stuarts as well. The US armour stood back & destroyed the 105s by direct fire, but not before they had taken out some tanks. The Germans redeployed their Paks into the wood & village, but lost 2 Marders to Supershermans or artillery.
Both sides got their reserves quickly, The Stugs came on & advanced over the open ground, but the M10s deployed in the village & popped 2 of them. The remaining Stugs turned & doubled out of range then headed over the hill towards the Priests. The US deployed for their assault while the Stugs and Marders dashed over to take out the Priests. The guns got one Stug bogged on the hill, and their 50 cals took out the last Marders, but the last 2 Stugs cleaned them up. With the Priests gone, the US could no longer win by sitting back, they had to charge over the bridge and attack.
The bunching up at the bridge gave the werfers great targets & US loses gradually mounted. The first US assault on the wood with Shermans was stopped by 1 Pak, a Panzerfaust and a counterattack by the Panzergrens. The tanks regrouped and went werfer hunting and the GIs dismounted to face the Panzergrenadiers in the wood.
Both sides were verging on army morale problems. The Germans had lost 1 Infantry & Marders, but their artillery was down to commander & staff & removed, the Paks were down to 1 gun & cmd, so on wood, The Stugs were down to 2 of 5, the werfers had lost their Pak and were about to be swamped by armour. The US had lost their Stuarts, Priests & Shermans, the remainder were in good shape.
The US armour took out the werfers leaving the Germans on wood. They had one last chance to save the day. The Panzergrenadiers charged out of the woods and the GIs failed morale to force an army morale test. Nick failed it and the Germans won a hard fought victory.
It was an epic stuggle, worthy of a Grand Final.
Subscribe to:
Posts (Atom)