Tuesday, October 30, 2018

Maharahah Trophy Battle from 1996

I dug into the archives to preprise a battle from our Maharajah Trophy competition of 1996 between Mark's Seleucids & Steve's Carthaginians.  In those days the battle reports were hand written with a steam photo added later.
In 1996 the battle was fought with our house rules of the day Marathon to Mafeking.  In our refight we used Hail Caesar with the OOB's converted to HC types.

 Mark commanded his infantry centre with Chris with his cavalry on the left & John on his right. 
 Steve had Jim with his right flank cavalry & Mike with his left flank cavalry.
Back in 1996 the hair was a different colour, but the umpire's outfit was the same.
The Seleucids are advancing in echelon their right forward from the far side of the table.  The Carthos are trying to advance on a uniform front. 
Battle commenced with some cavalry skirmishing on the far flank, then the Celts & Galacians charged eanch other in the centre.  Both sides held their cavalry back on the near flank.
 The Celts & Galacians both won one & lost one.
On the far flank: Although the Cartho cavalry did well initially, the Greeks reorganised & have now gained the upper hand.
The phalanx has locked onto the citizen spearmen in the centre.
The Thracians have sent one unit forward to attack the elephants & turned the other to the right to support the Galacians against the Scutari.
A unit of cataphracts has also been sent right to support the Galatians.
The cavalry on the near flank have finally got into the action.
The cavalry on this flank has split up into 4 separate action with the Carthos getting the upper hand.
On the far flank the Cartho cavalry is hanging on.
But in the centre the companions have charged the flank of the citizen spearmen & rolled up their infantry line from the left & Thracians have doen the same from their right.  Both Cartho infantry divisions have broken.  No Seleucid divisions have broken, so the Cartho's fail army morale & the 1996 result has been repeated.

It seems that Mark cannot reach as far across the table as he could in 1996. 


Monday, October 29, 2018

Musket Action: French & Indian Wars

Jim's French v. Chris' British
The two bridges & the two house are objectives.
Boths sides have regular infantry battalion with various supports.  The Brits have artillery, cavalry & some colonial regulars & woodsmen.  The French had some Canadian militia & Indians.
The game started with a deployment turn with units being put down up to 18" from own baseline.  The French are on the far side.
Both sides advance strong forces in the centre to seize half the village. 
The French have been losing casualties but have pushed on over the creek & now have their grenadiers poised to assault to British held house. A bunch of Indians are hodding the French line between the bridges.  The British cavalry have driven back the Indians on the French left.
The French grenadiers have taken the house so the French now have 3 of the 4 objectives.  But the British are pushing around both flanks.

The Fench have lost many more casualties than the British & their right has been rolled up, but they have held onto the objectives at the and of turn 7 to win.

Wednesday, October 24, 2018

English Civil War

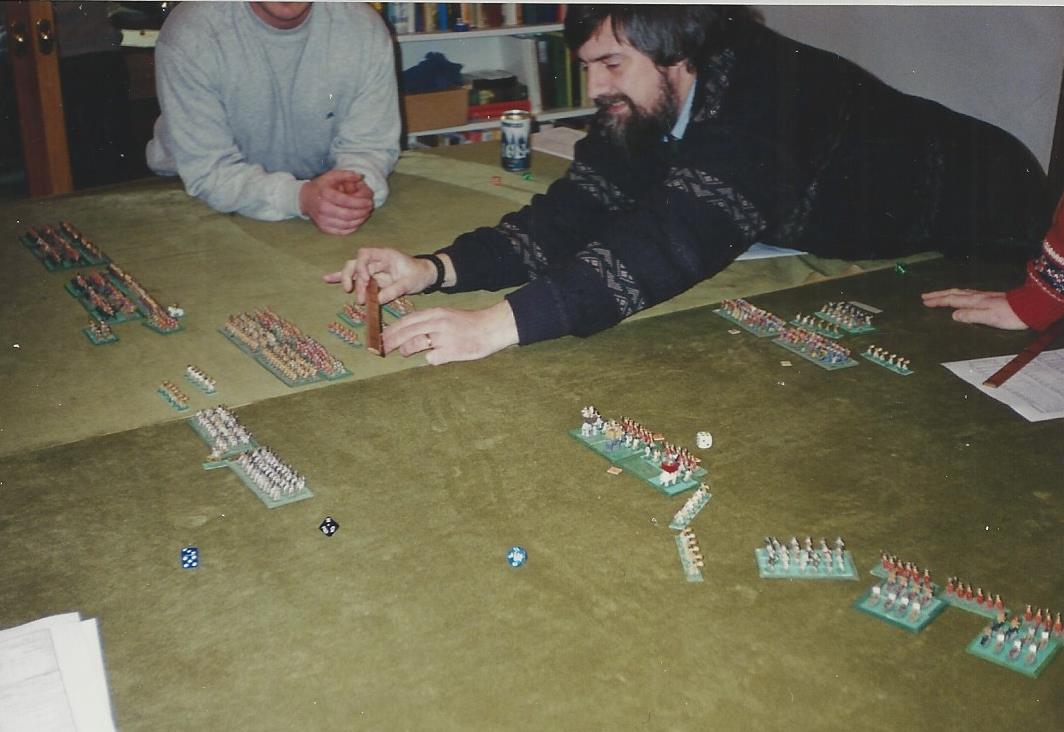
I dug into the archives & set up a scenario "Gloucester" from an English Civil War campaign we fought in 1996.
Back then we were using 15mm figs & our house rules of the time  Marathon to Mafeking.
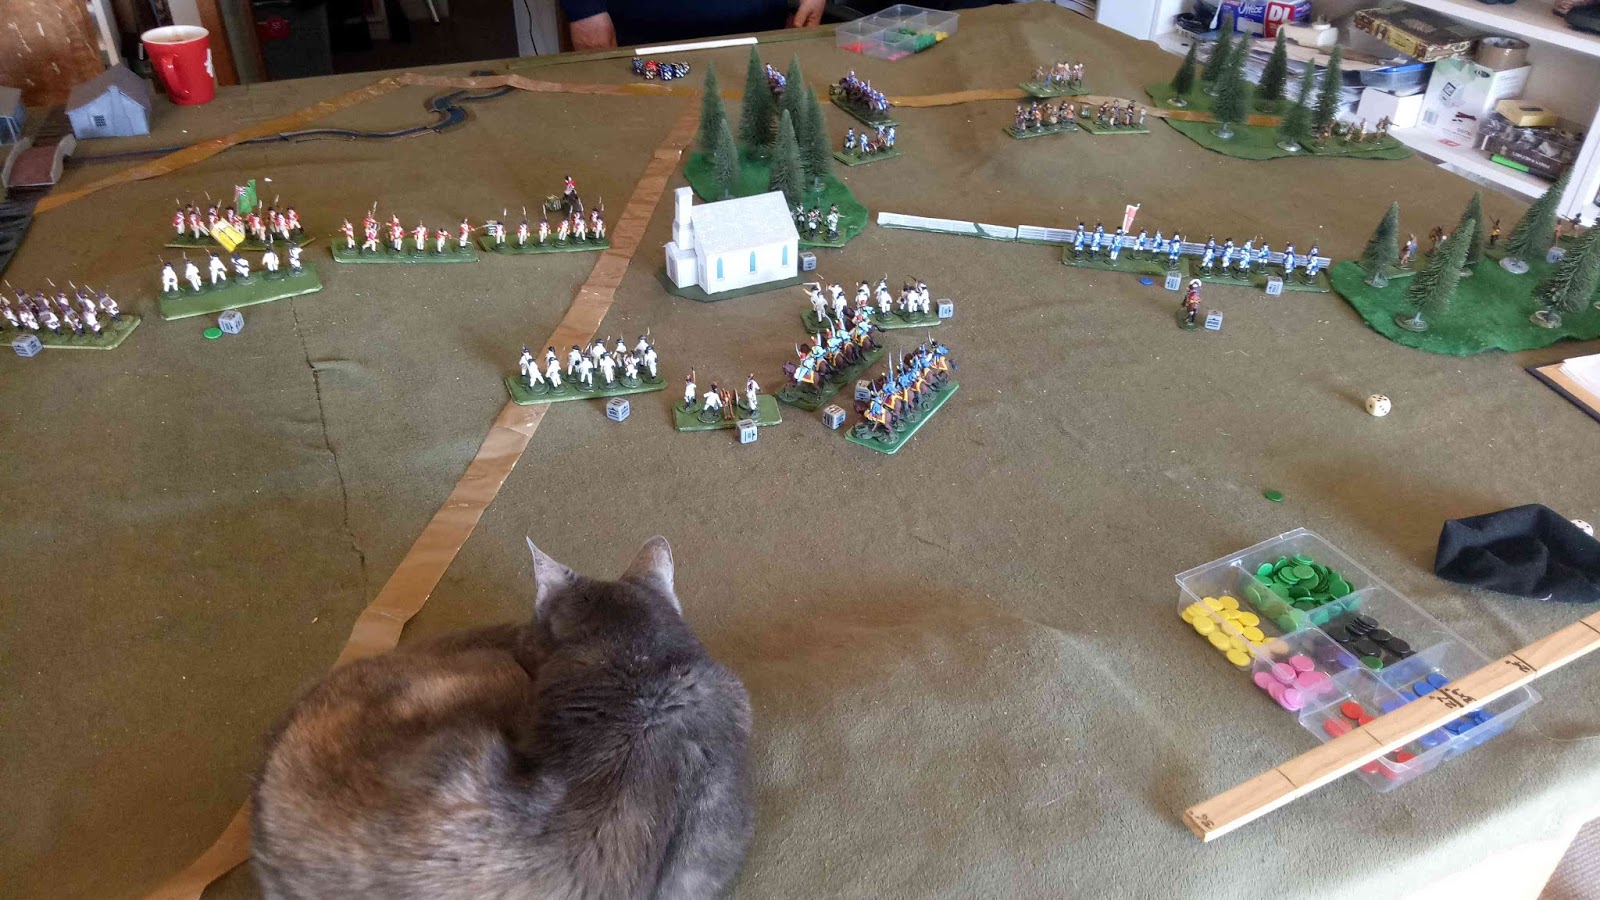
Now we are using 28mm & Hail Cromwell, our Hail Caesar based ECW rules.  The obvious difference is the reduction in room to move.
Both sides have 2 cavalry & 4 infantry brigades.
Parliament deployed first on the far side in a good defensive position,  The Royalists had the advantage of deploying second to balance Parliament's terrain advanatage.
Parliament have deployed with cavalry on each wing. The Royalists have put all their cavalry on their left wing.
The Royalists advance generally, but with their cavalry ahead on their left.
The 2 Cavalier brigades are separated by very different command dice & Jim's Roundheads try to take advantage by counterattacking Steve's lead brigade.
Parliament have noticed that the Royalists have weighted their flanks & Mitch is counterattacking in the centre.
The Roundhead cavalry attack was beaten back with some losses, but Rupert is getting ready to renew his attack as his 2nd brigade comes up.
On the other flank Mike's Roundheads have advanced to hold the creek line & is attacking Chris over the bridge.
Rupert has broken the Roundhead cavalry but have recoiled back from the line of infantry holding the creek line.  On the other side of the line of trees Parliamentary infnatry are attacking. 
On the far flank, Mike's Roundheads have thought better of firing pistols over the creek at musketeers & his attack over the bridge has been beaten off.   So he has fallen back.  In the centre Mitch is driving the Royalist center back.  
The Royalist centre has collapsed, but Rupert has pulled out from the left & is galloping to the rescue.
Chris has lost 2 infantry brigades in the centre, but Mitch's attack has been hampered by poor command dice slowing the advance of his reserve infantry to exploit the advantage.
Mitch's advance has been stopped by a counterattack by Royalist pikemen from their right flank & the timely arrival of Rupert's Cavaliers. 
At our 10pm nightfall, Parliament have lost 1 brigade (right flank cavalry) & the King has lost 2 infantry brigades in the centre.  Both sides had 6 brigades & needed to lose 3 to fail their Army Break Test.  So the result is a draw.

In 1996, Peter Moy's Parliamentarians also counterattacked in the centre, but they were defeated. This time Parliament's counterattack in the centre broke through, but their hopes of victory was frustrated by poor command dice for their reserve & Rupert's uncharacteristic move to the rescue. 

Saturday, October 20, 2018

Ancients at Black Hills: Chaeronea 338BC

Chris & Jim took a trip to Peter's shed in the Black Hills to fight an ancient battle using Peter's hme made Strategos rules.
The Greek hoplites on the far side have their flanks covered by light troops in woods or rough ground & their left is ona ridge.
The Macedonians have two phalanxes with light troops on each flank, cavalry in the centre & hypaspists on the right.
The Macedonians have attacked with their left hand phalanx witht he cavalry inclining left behind their flank.  The right hand phalanx has advanced obliquely with engage orders halting just short of the enemy.  
The Greek left has advance doff the hill to counterattack. 
The Greek right has broken.
The Macedonian cavalry has wheeled to attack teh Greek left in flank. 
The Greek left has broken & the Macedonians have won a decisive victory.

Bolt Action: 1250 pts

Germans: Jim & Steve.
US: Mark, John & Chris.
Demolition Scenario team game.

Each side had one objective - a fuel dump behind a wood 20" back from the table centre.
Both sides made attacks down their right flank & both attacks were comfortably held off resulting in a draw.

Friday, October 12, 2018

Musket Action: French & Indian Wars

Jim's French & Chris' Brits using Musket Action, our house adaption of Bolt Action for the black powder era.  The scenario is modified BA Double Envelopment.
Initial set up with the French on teh near side.
The event drew one interested spectator.
The regulars of each side square off on the hill on the left while the militias & Indians face off on the right.  Both side have their cavalry in reserve.
The French have seized the church & overlapped the far end of the British line.
The French have gained an advantage on the left losing 1 unit but breaking 2.
The French cavalry have broken another Brit inf then fallen back rather than face the fresh British dragoons with loses. 
The French have a narrow lead in units kills at the end of turn 5.
After the 6th turn the French retained their lead of 4 to 2, but the game went to 7 turns & the Brits collapsed to lose 9 VPs to 3.

Battle of Kerston 1862: Scenario from Black Powder 2nd Ed

Black Powder 2nd edition is a beautiful thing, but the rules are hardly changed at all - the only really usefull part of it is a bunch of new scenarios.  We tried out the ACW Kerston scenario.  There being nothing in the book to inspire us to change our opinion of Black Powder we used our Hail Mr Lincoln modification of Hail Caesar.
Union: Jim & Chris.
CSA: Mark & Mike.
The battle starts with most of the Union force on the table & CSA's advance guard cavalry.
Jackson arrives and immediately attacked Kimball's brigade on Pritchard's Hill, immediately breaking the RH unit before the Union cavalry could redeploy on their flank. 
The Union cavalry dismounted & stabilised the situation on the hill.  Sullivan has been called from the Union left, but is moving at glacial pace.  Burk's Reb brigade is advancing on the Union right.
 The cavalry managed to hold the line & Tyler has shown up on the Union right to distract Burk.
Tyler's counterattack against the Reb's left bounced off & Jackson has renewed his attack on the hill.
Both Kimball's brigade & the Union cavalry on the hill have broken under the renewed Reb assault.  Tyler's brigade is being shot to pieces by the Rebs on the Union right.  The Union conceded defeat.