Tuesday, January 31, 2023

Wars of the Roses again

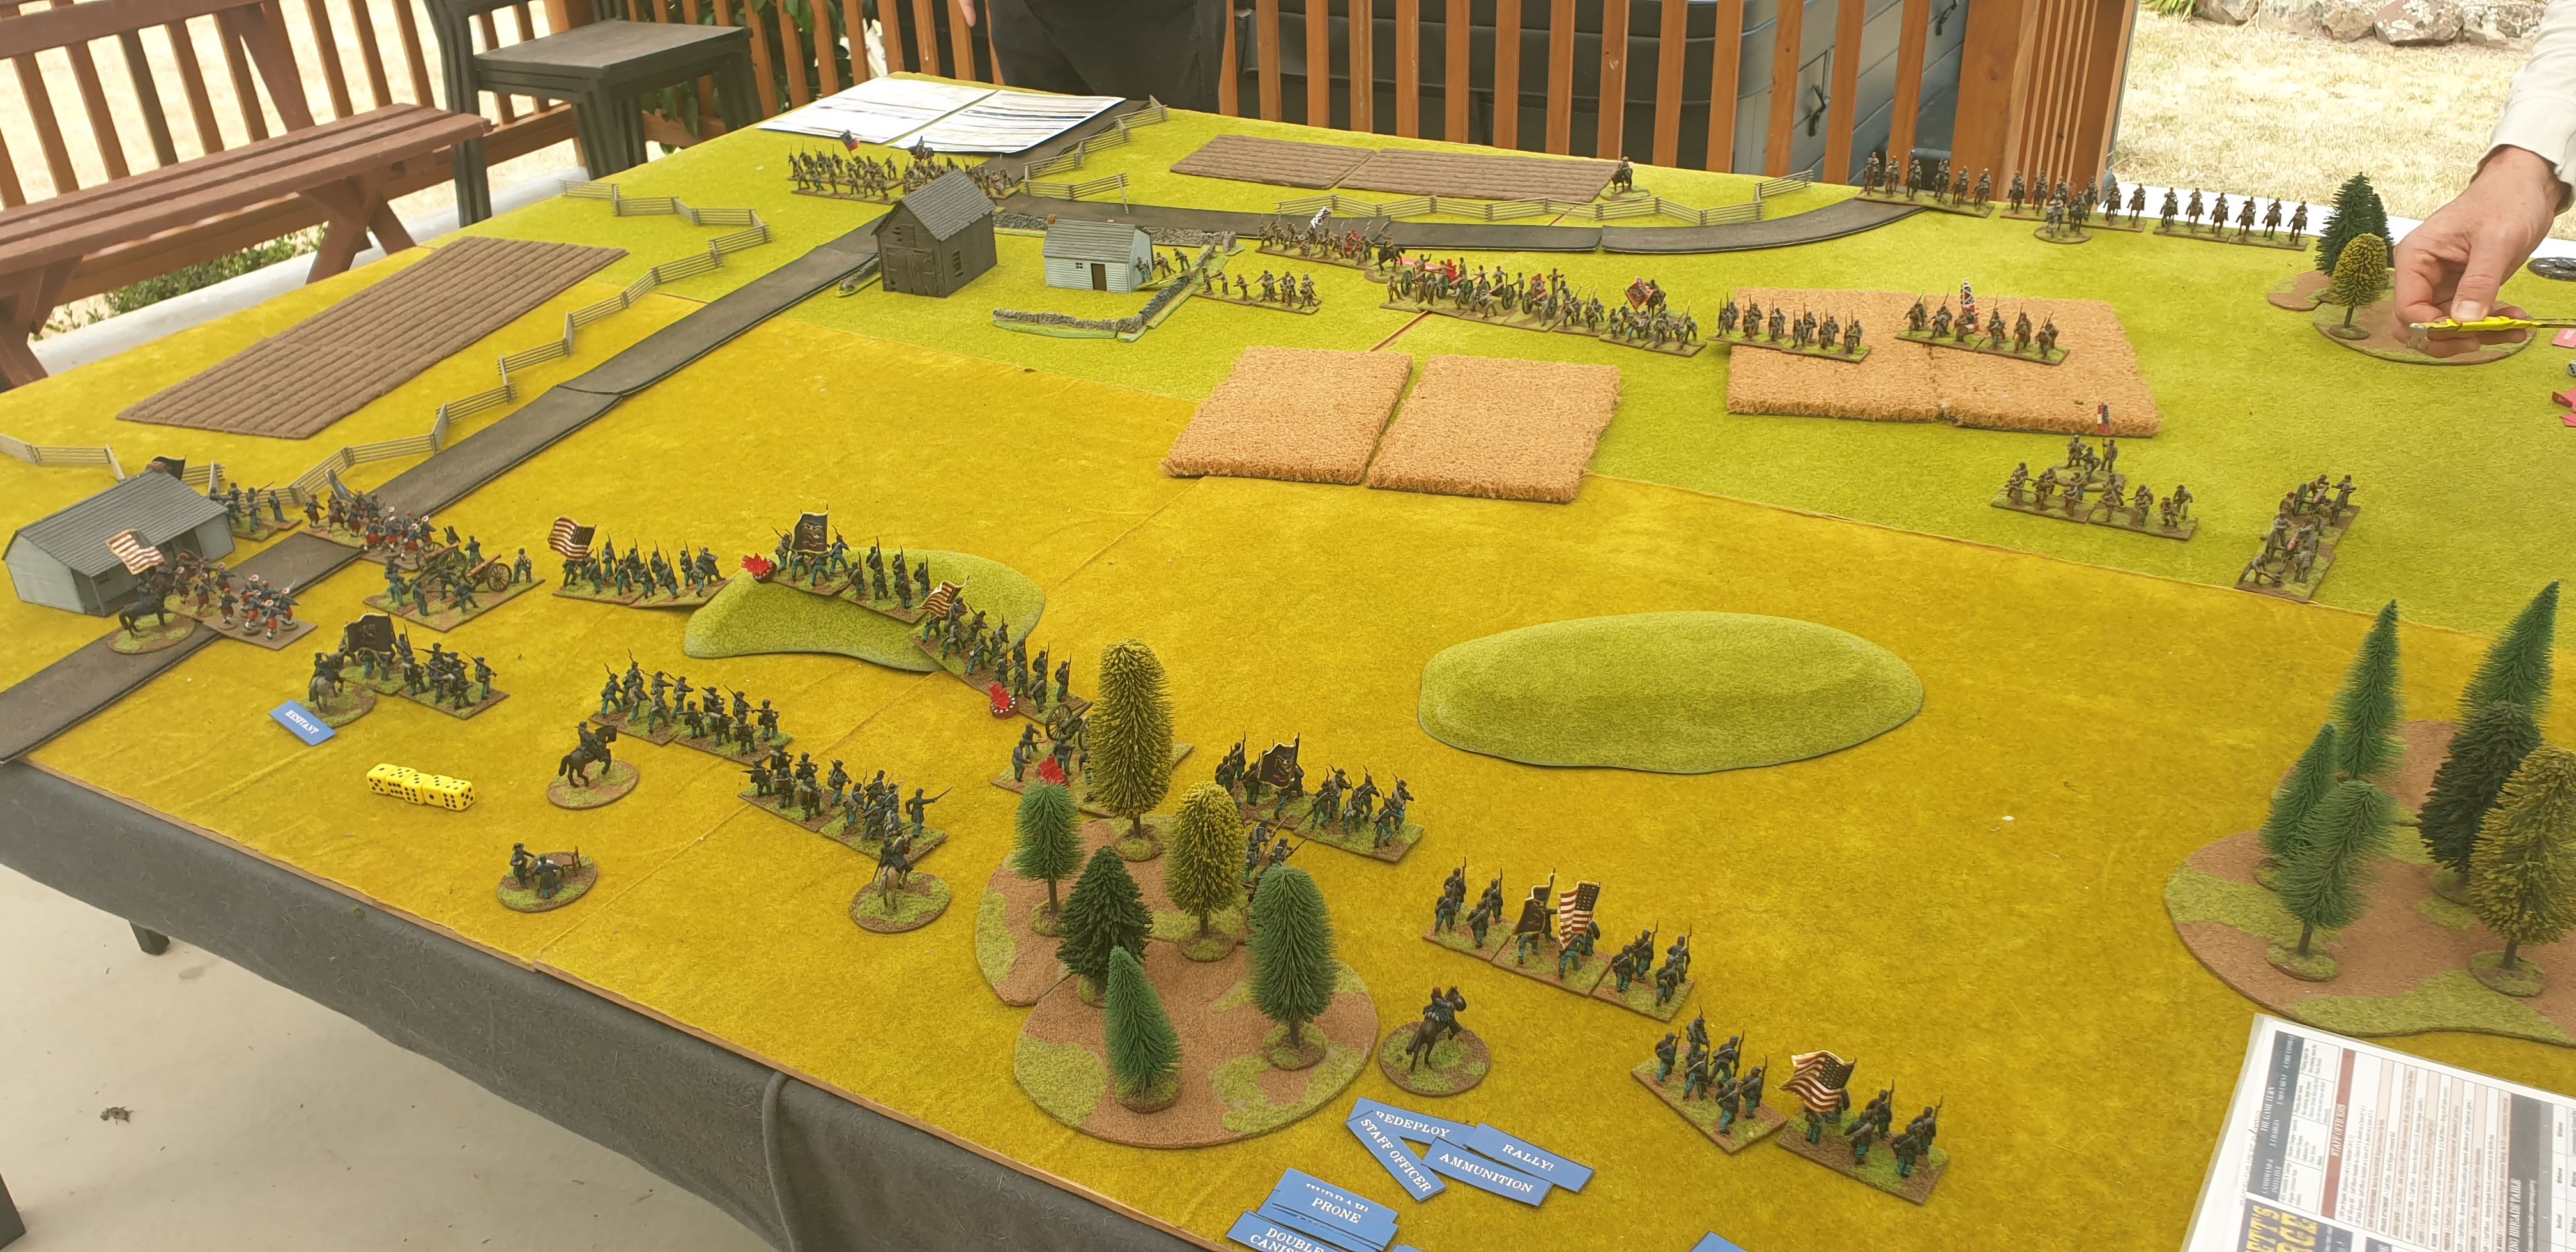
We added a lot more terrain to one end of the table this week. 
We divided the same troops we used last week into 6 battles of varying composition & randomly allocated the battles to the 6 players.  We then randomly located the battles on the table.

The Yorks are on this side of the table, Jim in the near corner, Mitch in the centre of the table & Mike on the right.
The Lancs on the far side of the table have Mark on the right, Steve in their centre & Chris is the far corner of the table.

At this end Jim is advancing while Mark is redeploying back into the woods & line of trees.
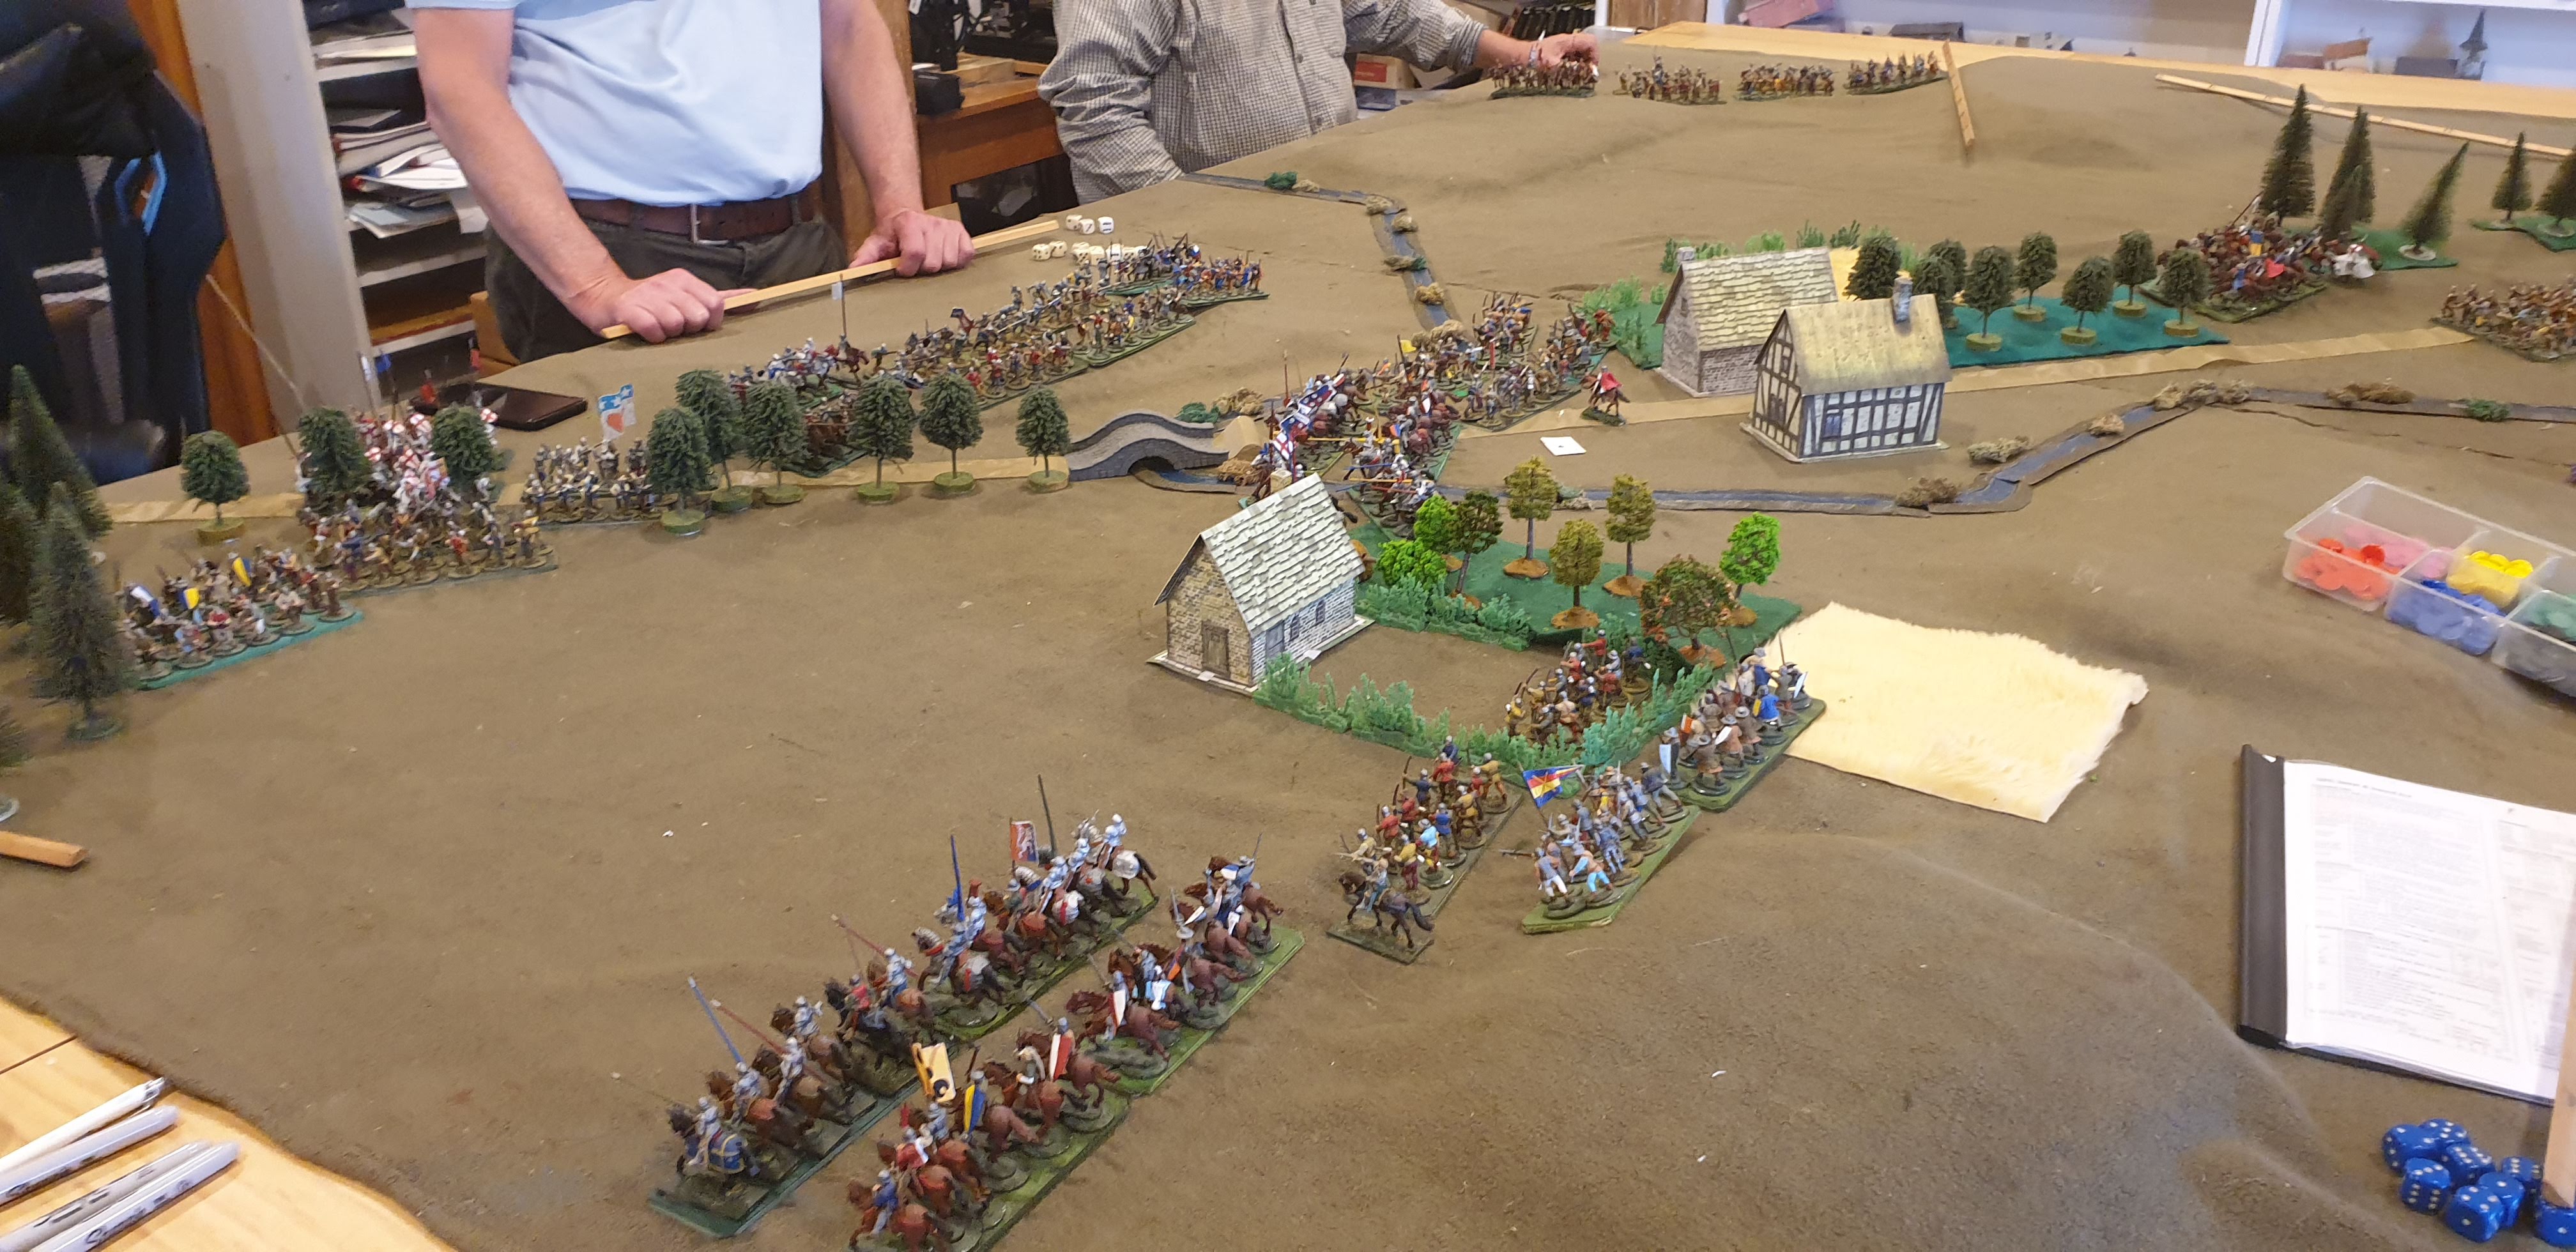
In the centre Mitch is reluctant to advance across the river against a bigger battle & is being peppered by more numerous bow fire.
On the far flank both sides are trying to advance on each other, but are still way apart.

The near flank is a stalemate as Jim is reluctant to attack Mark's infantry deployed in the trees & Mark won't come out of the woods in the face of superior cavalry.
In the centre Steve's bowmen supported by Chris cavalry is destroying Mitch's foot while the terrain constrains Mitch's cavalry.
On the far flank Mike has an advantage in numbers as Chris' cavalry is supporting Steve. 
Mitch's foot has been destroyed & Steve is now attacking the junction between Jim's foot & Mitch's cavalry.
On the far flank Mike is getting on top. 
On the far flank Chris' foot has been destroyed. 
In the centre Mitch's cavalry is just holding on, his battle on half strength.
Jim has lost some foot but his line still holds.
On the far flank Mike is moving his victorious troops left to support his comrades.
In the centre, half of Mitch's cavalry has counterattacked across the creek & broken Chris' last remaining cavalry while his other 2 cavalry units have fallen back into the wood to avoid bow fire. 
On the near flank Mark has gone on the offensive now Jim has had to send troops to assist Mitch against Steve.
When night fell the position was:
Jim's battle was still holding off Mark's attack.
Mitch & Steve's battles are still fighting, but both are verging on breaking.
Chris' battle has been destroyed.
Mike's battle is in good shape.
The Lancs have lost 6 more units than the Yorks, but their army is not broken, making it a minor win for York.


Tuesday, January 24, 2023

Wars of the Roses

York: SteveJ (left flank inf), Mark (centre inf), Jim (right flank cav).
Lancs: Chris (right flank inf), Mitch (centre with cav), Mike (left flank inf).

The Yorks are on the near side of the table.
The Lancs are advancing with their right flank foot & cavalry in the centre.
The Yorks are moving some foot towards the farm on their left & advancing their cavalry on their right.
On the far flank the Lancs are forming up to attack the farm.
In the centre the Lancs cavalry have charged into the York foot.
On the near flank the Yorks cavalry have wheeled left to support their foot.  
On the far flank Yorks inf are holding the farm against 2 to 1 odds. 
In the centre the first wave of Lancs cav was beaten off, but the second wave has broken through the first line of inf. The Lancs Sergeants protecting the flank of the main cavalry attack have been swept away by Yorks knights. 
On the near flank the rear of the York cavalry are suffering from accurate bow fire.
On the far flank the Yorks are giving ground in the farm but reinforcements are on the way.
In the centre the Yorks cavalry arrived in the rear of the Lancs cav before they broke the infantry & have about faced.
On the right the Lancs infantry have been left without easy targets.
On the far flank the Yorks in the farm have been supported by infantry & cavalry & the Lancs are about to break.
On the near flank, the Lancs have fallen back as the Yorks redeply infantry & cavalry to face 
The Lancs on the far flank are broken.
The Lancs battle on their left has not last a casualty & withdraw in good order.
The Yorks have won.

Thursday, January 19, 2023

Picket's Charge Rules at Molesworth

Dave & Stuart set up an ACW battle to show Chis & show us how Picket's Charge Rules work.  Chris & I commanded the Union.  Given our un-familiarity with the rules we adopted a defensive strategy.

The Union is in the foreground.
The Confederates are attacking on both flanks.  Well sited Union artillery have severely weakened the Confederate centre while both flanks are holding their ground.
The Confederate attack has run out of steam & they concede the battle.

The rules have some interesting aspects & seem to provide a good simulation, but their mechanisms are cumbersome compared with our M2M.

Wednesday, January 18, 2023

30 Years War

Mike set up tonight's battle between the Swedes & the Empire;
Empire: SteveJ, SteveD, Mitch:
5 P&S (10 modules ea), 2 THSwords (4m), 4 EH cav (3m) , 3H cav (3m), all regulars.
Swedes: Chris, Mike, Jim:
6 P&S (8 mods ea), 3 musketeers (2m), 8 H cav (3m), all veterans.

The Empire is on the right.  Both have have all their cavalry on the far flank.
The Swedes advance their foot but half their cavalry back partially on a ridge. The Empire advance their cavalry slowed by a wood & make small adjustments to their foot.
The Swedish foot have advance into musket range.
Some Empire cavalry turned to threaten the enemy's foot in flank, but some Swedish cavalry have advanced off the ridge to counter that. 
The Empire foot have charged rather than suffer the superior Swedish firepower.  Extreme dice rolls resulted in immediate rout of the supported units on each side's left flank.
The centre of the Empire's foot line has also suffered an extreme dice event & broken. 
The advanced Swedish cavalry have been broken. 
The Empire cavalry have changed the now outnumbered Swedish cavalry.  Two more Swedish cavalry units have broken & the rest are in trouble & doomed.
The two Empire tercios each side of the break thru have broken leaving just 1 tercio & the 2 handed swordsmen left of their foot & now shaken as more than half the formation has been lost.
The Empire's foot are doomed, but so is the Swedish cavalry.

It was judged that the remaining Empire foot have no chance of holding out before the Empire's cavalry have mopped up the enemy horse, so the Empire can only retreat covered by their cavalry, conceding the battle to the Swedes.  


Thursday, January 05, 2023

Bolt Action al fresco at Molesworth

Dave Hay invited us to his country estate for some summer afternoon 1,250 pts Bolt Action:


Jim's DAK v. Dave's Brits in top secret scenario.
The British bombardment totally disrupted the German advance & allowed the Brits to seize the objective.  But the DAK recovered & fought back destroying almost all the British force & salvaging a draw.

Mark's Australians v. Chris' Japanese in key positions scenario.
While Banzai charges scared the hell out of Mark, he fought on to pull off a win for Oz.

Wednesday, January 04, 2023

WWI Cruisers again

Germans (SteveJ & Mark): Seydlitz, Moltke, 3CA, 3CL, 6x2DD.
British (Mike & Chris): Lion, Tiger, 3CA, 3CL, 6x2DD.
Ships: 3D printed 1:1500. Rules: Deadnoughts.

The fleets are approaching each other as they pass thru an archipelago.  Brits are on the right.
The BCs & CAs pass on slightly divergent courses as the German CLs move into range of the Brit DDs in front of their own DDs.  Firing at extreme range the Moltke lands a lucky salvo on CA Black Prince & sinks her.
The British CAs have sunk a German CL as the German DDs charge towards them.
 
The British CAs turn away from German torpedoes & evade them.  The British light ships have made U-turns to protect the rear of their CAs & BCs.
The German DDs have retreated behind therr cruisers.  The British BCs have finally got past the island & their own DDs to finally get a clear line of sight on the German BCs & both ships immediately range in on their opposite number.
Molke gets the range on Tiger & the two ships trade broadsides.  Seydlitz fails to range in on Lion & is being pounded.  CA Blucher sinks her 2nd CL.  The German DDs are doubling back across the bow of 
Moltke.
CA Blucher has successfully turned away from British torpedoes, but only after sinking a Brit CA.  The German DDs are laying smoke preventing further fire between Tiger & Moltke with both ships heavily damaged.  The Seylitz takes more hits from Lion, still without replying.

As night falls, the Germans turn away laying smoke. 
Losses for the Germans are 1CA, 1CL & 1x2DD.  
Losses for the British are 1CA, 3CL & 2x2DD.
Seydlitz, Moltke & Tiger are all badly damaged.

The Germans definitely handled their light ships much better than the Brits as reflected in the relative losses, but that was countered by the deadly shooting of the big cats v. the German BCs.

In the morning the Berlin papers claim a great victory in sinking more ships, lauding Blucher's feat of sinking 2CLs & 1CA.
The British papers carry the news of a great British victory after forcing the Germans to retreat into the darkness.
Sounds familiar doesn't it?