Tuesday, October 29, 2019

Musket Action: AWI

It was Mike's turn to be introduced to Musket Action tonight.
Mike's Brit v. Jim's Colonials.
The Brits are on the far side. Unfortunately the cameraman missed the first 2 turns.
Colonial Militia has occupied half the village, Hessians have occupied the other half.  British vets have moved up to support the Hessians left.
On the near flank Colonial regulars have moved around the wood to threaten the British flank.
On the far flank the British Indian allies are being faced by woodsmen on the creek line. 
The Colonial commander got a bit careless on the right flank & most of the Colonial Regulars have been ridden down by the British cavalry.
The Militia in the village are holding firm against the Hessians.  To the right of the village the Militia is trying to attack the disorganised British Regs but just aren't aren't well enough trained to do it well.   British cavalry is sweeping around the wood into the Colonial rear.   
On the left the Indians were getting the worst of it & have retreated before losing any units.  The stalemate in the village goes on.  The Militia on the right have had to turn 2 units around to cover their rear against the British cavalry, weakening their front line. 
The British vets have finally got their line sorted & the Colonial left is melting away under their superior musket fire.  Next turn the Colonials fail their army morale test.

The Colonials never recovered from the devastating charge of the British cavalry.  The incident pointed to a possible shortcoming in the inf v. cav rules, but the fact was the Colonial general took a risk he didn't need to take, then threw such crap dice that the rule didn't matter anyway.  With no regular troops apart from 2 light guns left to help, the Militia in the village did ok, but the brigade in the open was outflanked & outclassed.

Thursday, October 24, 2019

Musket Action: Napoleonic

Jim's Austrians v. John's French
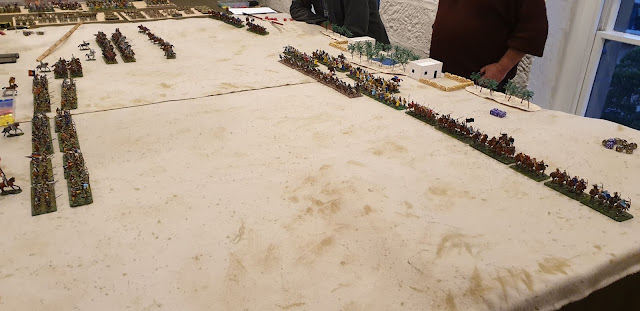
I forgot to take a photo at the start, this is the end of turn 2.
The Austrians started with an Landwehr division deployed where they still are beside Mitzi. with 2 grenadier battalions & a cavalry brigade on their left.
The French started with a veteran infantry division behind the farm with artillery & a cavalry brigade on their right.  The Austrians have taken most of the plateau, but losses are even.
Both sides also had an infantry division & a cavalry division coming on from the corner at the far end of the table on turn 2.
The reserves have been deploying out of road column at the far end. 
On the near flank the Austrian cavalry has been destroyed, but their grenadiers are coming up.  In the centre, yegers are masking the French guns, but not much else is happening.
On the near flank, the grenadiers are clearing the plateau.   In the centre the French are redeploying their guns to face the grenadiers & deploying their reserves on the far side of the river.  French Legere in the wood are delaying the Austrian infantry reserves.  At the far edge French hussars are bottling the Austrian cavalry up while their dragoons move up on the infantry.
The Landwehr have moved forward to the fence line & faced their right to the river.  The French dragoons are threatening the Austrian infantry on the far slope.  Austrian cuirassiers have swept the French hussars aside at the table edge.
The French dragoons smashed through the Austrian front line on the far hill, but were destroyed in turn by musket fire from the 2nd line & cuirassiers in their rear.  
At this stage the French conceded as it was clear they were going to fail army morale very soon.

This was my first chance to actually play Musket Action v.2019 after umpiring 3 play test games.  I really enjoyed it.  As rules should, it seemed to reward the player's good moves & penalise their mistakes without too much interference by the dice.  It shares a lot with Hail Napoleon, but also has some major differences.  The big one is using the Bolt Action Order dice system to decide the order of activation of units rather than IGoUGo.  The main problem with the BA system for Napoleonics is slow play due to actioning one unit at a time when there are a lot of them.  We have addressed that by having only half as many Order dice as units on each side & allowing group activation of adjacent units of the same brigade. This also had the unintended consequence of providing an automatic Army Break Test.  We are finding that when one side gets close to running out of Order dice they are stuffed & give up - no calculation needed. 


Wednesday, October 23, 2019

Musket Action: Napoleonic

Mark's French v. Steve's Austrians
The French force comprised 2 veteran infantry brigades, 2 regular cavalry brigades & 2 field artillery.  The Austrians had an Inexperienced landwehr brigade, a regular infantry brigade, 2 regular cavalry brigade, 2 grenadier battalions, a yeger battalion & 3 light artillery.
 The French are on the right.
The Austrians advance their cavalry on both flanks.  The French advance their cavalry to meet them on the near flank.
With infantry support the French cavalry are prevailing on the near flank.  The Austrian infantry have begun to advance on the far flank.
On the near flank the French infantry need some sorting out after helping their cavalry beating the Austrian cavalry. The French cavalry are been sent to the far flank. The infantry are closing in the centre. 
The French left have redeployed.  The landwehr have started to advance.
Action is joined all along the line.  On the far flank the Austrian infantry have crossed the creek & their cavalry is threatening the French infantry's flank.
On the near flank the Landwehr have been pushed back, but still hold.  On the far flank the French flank is in trouble.
The Landwehr have held on while the French right has collapsed reducing the Austrians to below half strength & giving the Austrians victory.

Musket Action started as a game for small actions in the French & Indian Wars & War of Independence.  But it has evolved into a general Black Powder era game that also works with larger forces. Our Hail Napoleon is BP era rules derived from Hail Caesar ancients.  Musket Action is BP rules derived from WWII Bolt Action.  They share some mechanisms, but are quite different games.  Although still being refined, I think MA is a better game than HN for small actions.  But I expect that Hail Napoleon will remain our preference for large games where its faster speed of play gives it a big edge.

Tuesday, October 15, 2019

Musket Action: American War of Independance

It's been a while since we played Musket Action & some ideas for improvement have been germinating & we tried MA v.2019 tonight.  It's a bit less Bolt Action & bit more old school.  The BA order dice remain a key feature, but with some tweaks,while the pins have been replaced by harder to get but more serious Disorder Counters.
British: Steve v. French & Colonials: Mark.
The British are on the near side. On the left, American woodsmen have advanced thru the woods while the British Indians have dithered while mounted infantry galloped over from central reserve. British vets hold the centre with cavalry on their left & light infantry & artillery on their right.  Hessians have advanced into the farm. 
The French vets form the French/Colonial front line with Continental Regs behind & Militia on the far flank.

The skimishers in the woods are mutually destructing. The French cavalry broke one British Cavalry troop but was beaten off by vet infantry.  A slow fire & advance by the British vets supperted by cavalry has decimated the French line. 

On the far flank, the Hessians & artillery are holding the Militia of.  In the centre, the French have broken & the Continental regulars are now being pounded by the British vets.  The French & Colonials concede defeat & order a retreat as night falls.

The rules revisions generally worked very well. The battle showed up a few omissions & some scope for some further improvements.  It was judged a significant improvement even by the loser.

Monday, October 14, 2019

Flames of War: Doubles Event at Kingston Bunker Rats


The Bunker Rats put on a two day event for teams of two players, each with two companies totalling 2,500 pts.  Early war in Africa. on 8'x6' tables.  2 rounds each day over the weekend. There were 5 teams entered, so each played 3 games with a bye.  Only three Camp Cromwellians were available this weekend so we entered one British team with Leigh playing all games with his Infantry coy & Jim & Chris taking turns with a Crusader coy. 
Round 1: Breakthough Mission v. Afrika Korps:  It was tough fight, but Camp Cromwell, as defenders, secured both objectives on turn 6 to win. 
Round 2: Surrounded Mission, Camp Cromwell attacking British in Blue on Blue.  We made  a concentrated attack down the far side of the table & were within 1 move of victory when time ran out.  Only 4 turns had been completed due to the slow play of defenders, but we still lost because the scenario rule is that the attackers have to take an objective to win. 

Round 4: (Round 3 was our bye).  Dust Up mission v. British in another Blue on Blue.  The enemy had hordes of armoured cars on a table with vast areas of hard desert floor that gave them many opportunities for rapid manouvre.  The enemy took advantage of this to make a rapid strike around our left flank into the rear of the town to attack an objective defended by just our artillery battery.  Our Crusaders out of reserve raced to catch them & the artillerymen held on just long enough for the cavalry arrive.  Then Camp Cromwell went on the offensive, but the enemy attack had soaked up so much time that while we had gained a material advantage with no platoons lost to 3 we didn't have enough time to clinch victory.

We only play FOW once or twice a year to support the Bunker Rats events so we find remembering the rules a bit of struggle, but Leigh still plays it often & took care of the tricky tactical details of infantry & artillery while Chris & I simplified our task by taking a list of 3 Crusader platoons.  FOW looks good & I enjoy the wider strategic options you have with the larger scale of action than Bolt Action, but Battlefront lost their way by adding too many special rules to sell supplementary books in v3 & then made it worse with v.4.  The Kingston players use v.3 with a selection of the v.4 rules they like, which is fine for them playing all the time.  The end result is an over-complicated set of rules that is confusing for occasional players.  The FOW fanboys seem to thrive on tactical exploitation of complex rules, but personally I prefer strategic level decision making with simpler rules that don't make my head hurt.  But a team situation with Leigh on board worked well for us & it was a good weekend's wargaming.

Thursday, October 10, 2019

Flames of War: Practice for upcoming event

The Kingston Bunker rats are running a Flames of War Doubles event next weekend.  Camp Cromwell is entering a team so we had a practice match to bone up on the rules as we haven't played FOW since their last event last year.  Leigh, Jim & Chris are making up a British Team.  For this practice match Mark & Jim have an Afrika Korps force v. Leigh & Chris' Desert British.  Each force is two coys, totaling 2,500 pts.  One infantry & 1 tank.  Mission #1: Free for All.
Both sides have objectives on the flanks. The DAK are on the near side.  Their 3 MkII & 4 MkIV are concentrated in the centre.  The Brits ahve spread their 9 Crusaders across their front.
The Panzers advanced to engage the British with superior numbers.  The Brits counterattacked but the Panzers kept the upper hand with a bit of help from their artillery on the Portees.
As the tanks slugged it out in the centre, the DAK infantry advanced on their left.  More Crusaders were fed into that tank fest, only to follow their comrades into the first half of death or glory.  With the destruction of a whole coy, the Brits failed army morale to end the game.  The German initial concentration of armour combined with some good dice was leathal combination. 

Wednesday, October 09, 2019

Crusades: Hail King Richard

Crusaders: Mark & Steve.
Muslims: Jim, Chris & Mike
Both sides have 3 infantry divisions & 2 cavalry divisions, deplyed with map depoyment.
The Infidels unsportingly put all their cavalry on their left wing.
The Muslims right wing cavalry had no chance of resisting the Infidel cavalry, so went into delay mode.   The Muslims reid to reinfoce their right rather than advance with an exposed flank.
Poor command dice screwed the Muslim plan to reinforce the right. 
So they were forced to Plan C:  Try & take out the Infidel's right before their own right was ridden down
The Muslim cavalry did break an infantry division, but nothing could save their right where they lost thei cavalry, then two infantry divisions to fail their army break test.

Friday, October 04, 2019

Friday night Hail Caesar

Dave's crusaders v. Jim's Muslims, 390 pts.
The Infidels are on the far side.   Both sides have 3 divisions.
 The Muslims tried to advance but only their left actually did.
The Muslim cavalry was no match for the Crusaders & their left flank was broken before the rest of their army advanced much at all.
The Muslim left & centre finally got moving, trying to pull something off before the Crusader cavalry could smash into the left flank.
The Muslims got a break when the Crusader cavaly blundered backwards, but then discovered that their foot was outclassed & soon broken.  Their right flank cavalry did have some success, but it was too late to save the day as the loss of 2 divisions meant they failed their Army Break Test.

This an example of how crude the Hail Caesar points system is.  The armies were evenly matched according to the HC points, but clearly not so on the table.  The main deficiency is they give equal weight to each parameter, but they are not equal, in particular the morale value is far more important than the others.   

Friday afternoon Bolt Action

John's Germans v. Jim's Brits.
1,100 pts Meeting Engagement.
The Brits are coming on this side.  They got off to a good start when their Bombardment came in immediately, took out the SP gun. & pinned down the infantry squad the hill & the SP AA, but not before the AA took out the bug. 
The Brits might have got off to a good start, but it was all downhill from there.  A German flank attack on the left took out the 25pdr.  The Mortar took out the HMG.  The AA rallied its pins off & blew off an infantry squad in 1 turn.  Hits on the AA by the  25pdr, the mortar, the Honey & a PIAT all failed to any more than pins - which were rallied off.  Then the mortar lost the range.  The quad AA only got to shoot 3 times, but wiped out a unit each time. The Brits attack on their right failed to do enough damage & the Germans won with 5 kills to 2.

Wednesday, October 02, 2019

Worcester 1651

Chris set up this scenario based on Worcester 1651, fought with Hail Cromwell rules.
English: Mike & Jim
Scots: Mark & Chris
 The English are coming on the left hand side of the table.
The English immediately attack with their cavalry while the infantry & artillery forms up behind their left. 
The New Model cavalry is better then the Scots' but outnumbered.  At first a surfeit of English 1's & 2's nearly allowed the Scotts to break thru the centre of the cavalry melee, & while the English horse pushed forward on their left flank the Scots have counterattacked with a pike block.
The tide has turned in the cavalry fight & the English now have the upper hand. The Scottish foot on their right is advancing slowly, hampered by their lower command rating.  The English foot is now largely deployed.
The Scotts foot have got to grips with the English foot but the English cavalry have taken out the left end of Scottish line.
The Scots have formed a hedgehog to protect their left from the cavalry as the infantry slug it out.
The cavalry have disengaged from the hedgehog & musketeers are firing into it.  
The English left is collapsing, the hedgehog anchoring the Scot's left is now being attacked by 2 pike blocks with musket support & the cavalry is sweeping around the Scot's rear.
The hedgehog is hanging on grimly as both armies teeter on a the edge of a break test.
The hedgehog has finally broken & the English horse has ridden down two musketeer units to break 2 more divisions & the Scots army.