Thursday, July 29, 2021

Macedon v. Persia 28mm

Chris: Persia v. Mark: Macedon. 
Rules: Marathon to Mafeking.

The units were deployed BA style with coloured dice in a bag & when your colour was drawn you placed a Command Group up to 18" from your base line.  The Macedonians are on the right.  Both sides deployed conventionally with cavalry on both flanks.

The Macedonians are making a general advance.  The Persians have tried to send horse archers forward on both flanks, but they only passed their command test on their right.
On the far flank the Persian horse archers were ineffective & swept aside & the Persian cavalry is in trouble.  On the near flank, the horse archers advanced & shot well plus the Persian had an uphill advantage. In the centre the infantry are about to get to grips, but the Macedonians have held their left flank back.
Both sides' right flank cavalry has broken their opponents & are moving cavalry towards the left flank of the enemy's infantry.   Both sides have done well on their right flank & are trying to pull back the left end of their infantry line..
The infantry lines have cartwheeled anti-clockwise.   The Peltasts on the left of the Macedonian line earned MVP by holding off the charge of the Persian cavalry & buying time for their right to try & win the battle.
On the far flank the leading Macedonian cavalry have swept the horse archers away & are wrapping around the Persian line.  In the centre the Macedonian foot has renewed their assault.
Both side's infantry lines have been outflanked.  The Macedonian left has managed to hold on long enough for their cavalry to rescue them by hitting their enemy in rear.  The Persian left had no such luck & is being rolled up.  The Persians fail army morale giving the Macedonians victory.


Tuesday, July 27, 2021

7 Years War 15mm

Prussians: Mike, Steve & Mitch.
Austrians: Mark, Chris & Jim
Somewhere in Silesia detachments form the Austrain & Prussians armies are marching on collision courses towards the small village of Buggerhoff. 

The Prussians are on the right.
The Austrians continue marching down the road towards Buggerhoff.  The Prussians begin to deploy further back.
On the far flank the Austrian cavalry have charged hoping they get lucky & sweeping thru the Prussian cavalry before the infantry behind are deployed.  But the hot dice required for their plan to work didn't happen & the cavalry melee continues indecisively.
In the centre Grenz have occupied Buggerhoff & the infantry of both sides are deploying out of their road columns.
The cavalry fight on the far flank has ended with mutual assured destruction with the survivors in no fit state to do anything. 
Another cavalry fight is raging on the near flank. 
Prussian infantry are advancing slowly & firing on the village causing heavy casualties in the Grenz. 
The Prussians have formed a much neater line than the Austrians & the Austrians are suffering for it.  On the near flank the Prussian cavalry ahs got the upper hand.
A desperate double or nothing charge by the Austrian infantry on their left was not supported by the dice gods & their line is collapsing under Prussian musket fire.
The Austrians concede the battle & sound the retreat.

Tuesday, July 20, 2021

30 Years War with 28mm

SteveJ's Imperialists v. Mikes' Swedes.
The Empire has regular troops, bigger tercios, more cavalry & 2 units of 2 handed swordsmen.
The Swedes have veteran troops & smaller tercios but 1 more of them.

The Empire is on the left.
Both sides started cautiously.  The Empire advanced to just outside artillery range & stopped.  The Swedes advanced their right a bit.
The Empire has attacked with their cavalry on the near flank & begun an advance of their foot in the centre.
The Swedes had an big stoke of luck when a unit of detached musketeers on the right of their cavalry saw off a charge by the dreaded Polish Hussars way against the odds with two showers of 6's.  This robbed the Empire cavalry of numerical superiority in the cavalry fight which has so far been indecisive, with both sides winning some & losing some. 
In the centre the tercios have come to grips & the Swedes has gained a tactical advantage by overlapping the end of the Empires line of tercios by keeping the Empire left busy with a mass of skirmishing musketeers.
The cavalry fight remains indecisive, but the battle has been decided in the centre where the Empire's tercios are breaking as hot dice magnify the Swede's tactical advantage.

It was interesting to compare the pike & shot battle with 15mm 2 weeks ago to this one with 28mm.  The 15mm battle felt like there were more strategic options as the small troops meant the table was in effect bigger.  But the 28mm certainly look better as toy soldiers.  The rules work equally well for both.  My opinion is that the 28's are best for pick-up battles, but 15's are better for doing historical or campaign scenarios.


Thursday, July 15, 2021

Ancients at the Black Hills: Late Romans v. Goths

PeterC's Goths v. Jim's Romans using Peter's ancient 25mm Ancients.
Rules: Camp Cromwell House Rules.

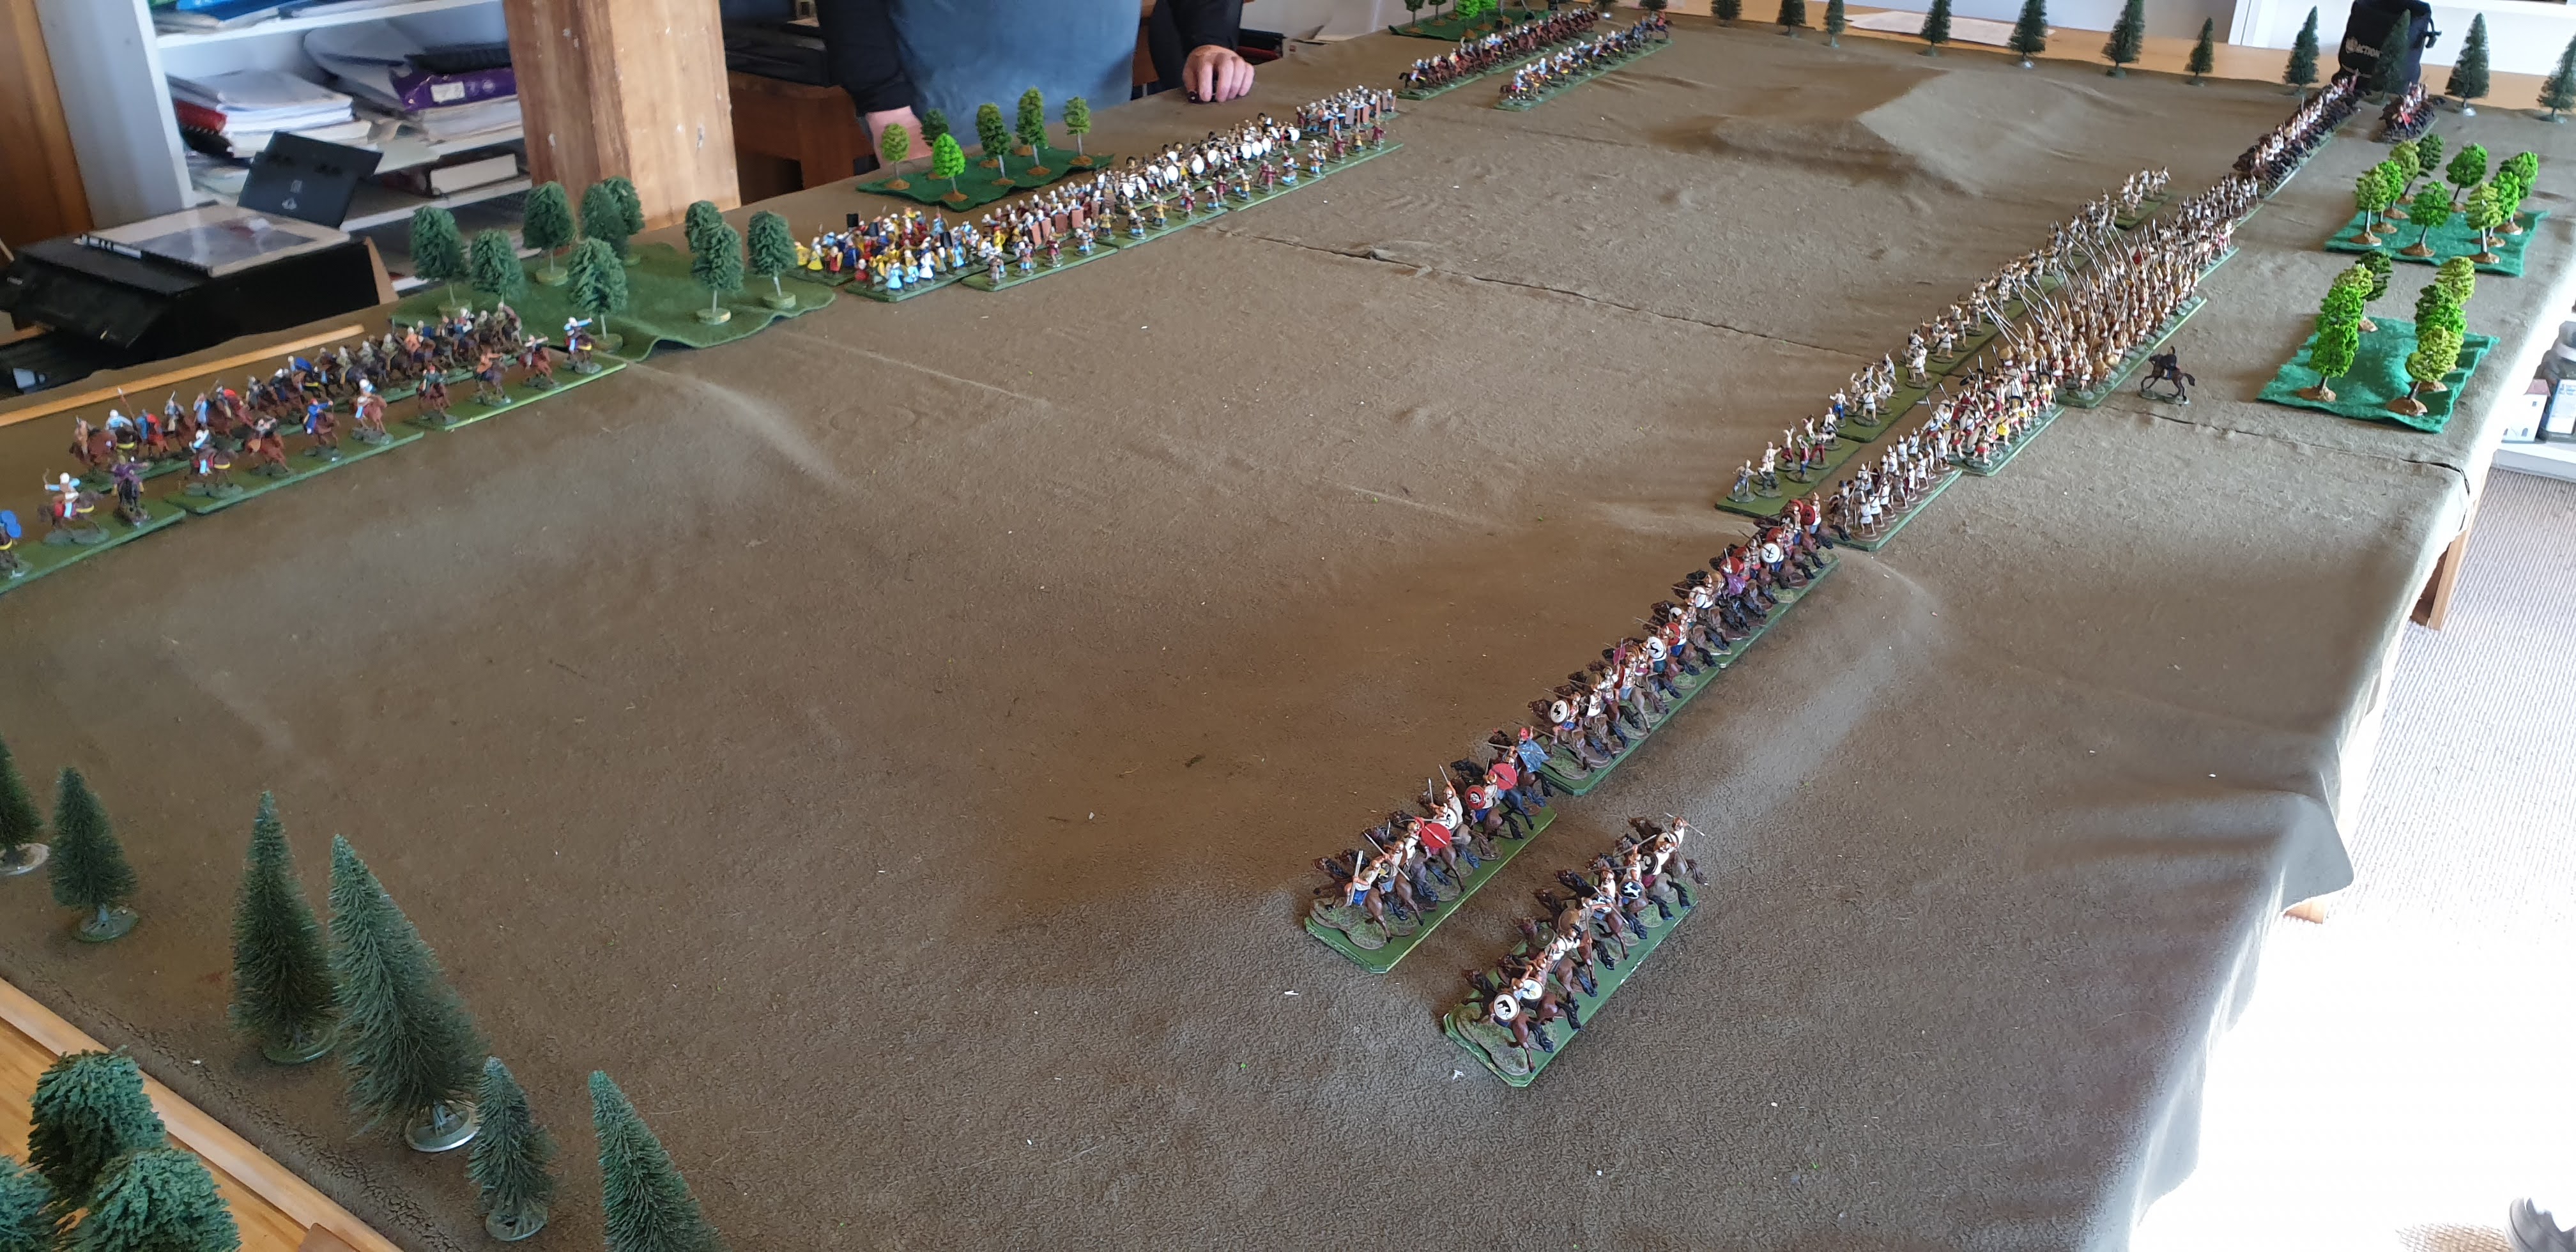
Photos from behind the Romans.
The Goths have made a general advance allowing their cavalry to get ahead of their foot.  The Romans have advanced their cavalry on the left, to take advantage of a small ridge., Their infantry has also advanced in the centre.  On their right they tried to improve their deployment, but bad command dice scuttled the idea & delayed their advance.
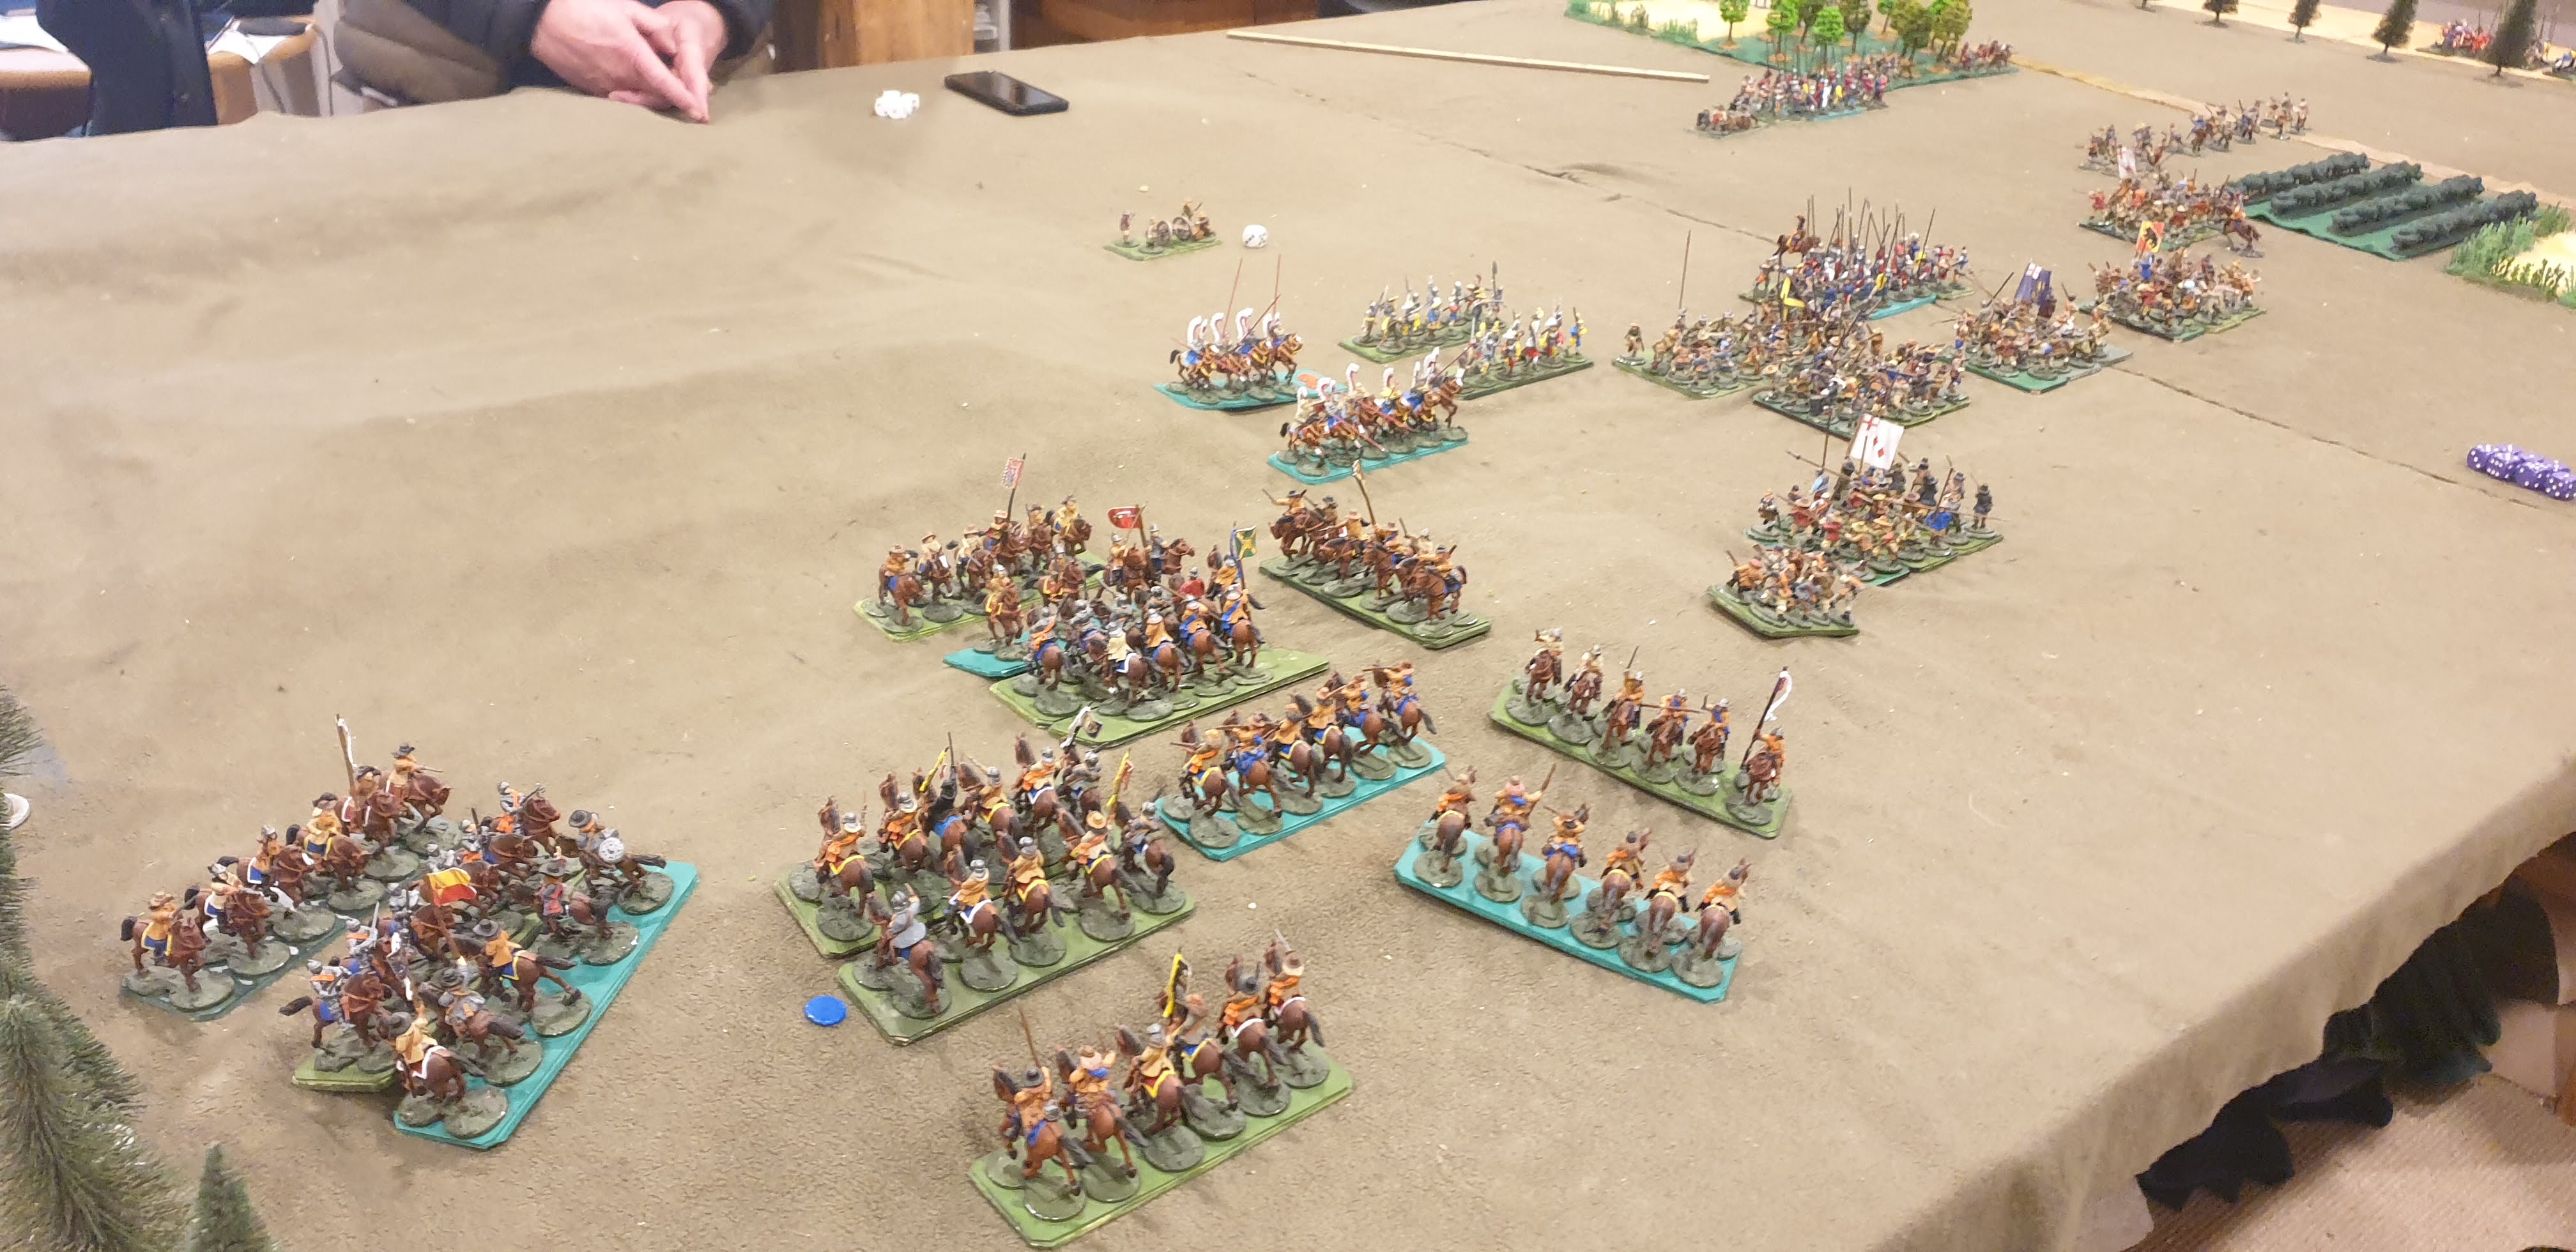
On the left the outnumbered Roman horse is holding their own courtesy of better armour, the ridge & ne good dice.  On that cavalry's immediate left Goth cavalry has charged thru a gap in the line left by the delayed advance of the Auxilia.  Half the infantry have engaged in the centre.  On the right, Goth heavy cavalry have charged home on Roman cavalry & Auxillia & Goth medium cavalry have Roman horse archers off the table.
On the left the Cavalry fight is still indecisive.  In the centre part of the Roman line has been broken.  On the right the Roman horse has been defeated leaving just one heavy infantry unit to hold the flank.   The Goth medium cavalry still haven't passed a command test to return to the fray.
In the left the Roman cavalry has finally won, but it's too little too late for Rome.  Their centre is out-fanked on both side & is about to collapse completely.  A decisive Goth victory.

Our house rules have had a bit of revamp over the last few weeks with PeterC providing a great deal of help with his knowledge of Ancient warfare & editing.  Before we took up Hail Caesar ca 2011, our house rules were called Marathon to Mafeking, as that was the time span they covered.  They had evolved over a period of 40 years of the group writing our own rules.  Then for a decade we used Hail Whoever, which was Hail Caesar with house rules to extend it into other periods.  A couple of years back I wrote a new set of house rules I called Camp Cromwell Action.  These started out as rules for small French & Indian Wars actions but evolved into other periods & for bigger battles & have taken over from Hail Whoever  as out main rules set.  I recently dug out a copy of M2M 2009 & realised that though our current house rules are more concise & have some new tricks, they are remarkably similar.  They are clearly more an evolution of M2M than anything else.  So I'm goin back to our old name for our house rules, calling them Marathon to Mafeking 2021


Tuesday, July 13, 2021

Napoleonic Naval

British: Steve, Mike & Nick.
French: Cameron.  Spanish: Ross.
Ships : 1:1000 3D prints.
Rules: Men o' War house rules.

Each squadron has 4 ships, with 3rd rates lead by a 1st or 2nd rate.  The Brits have Elite crews, the French Regular & the Spanish Inexperienced.  The Spanish squadron leads the French squadron on the windward edge of the table.  Two British squadrons are downwind of them. The allies have the weather gauge & bigger lead ships to compensate for the better British crews.

For a while the 2 fleets sailed in opposite directions before the Allies turned downwind & the British (on the left) tacked back towards them.

Steve's squadron engages the Spanish squadron at the head of the allied fleet.

The Spanish were no match for the Brits.  Their lead ships are badly damaged & have broken off.  The French have turned to engage the 2nd British squadron coming up after them.

The Spanish squadron has broken off pursued by 2 British ships.  3 of the Spanish got away, but one struck its colours.  The other 2 British ships have turned to engage the French. 

 
The Spanish have lost 1 ship surrendered while 3 have escaped with significant damage.  The ships of the 1st British squadron have suffered significant damage from Spanish & French fire, but the French were not inclined to try & finish them off with a fresh British squadron upwind of them & closing fast.  The French have so far avoided significant rigging damage so the Brits will be unable to catch them.  So the battle was called at this point as a British victory. 

Friday, July 09, 2021

Swedes v. The Empire: 15mm Pike & Shot

 Mark's Empire v. Jim's Swedes.
A small battle to fine tune the latest developments in our house rules.The Empire are on the left.  The forces have equal numbers & quality of troops, the only difference is that the  Empire's pike & shot units were twice as big & half as many.  Both sides advanced on their left.  The Swedes also advanced their centre.On both flanks the attackers are doing best even though attacking uphill.  In both cases the attackers had some infantry support & also better dice. On the flanks both side's rights are collapsing.  In the centre the Empire's bugger formations are winning out over the Swede's smaller ones.  The Empire have some artillery support & the Swede's haven't been able to extract any advantage out of their extra numbers of units.Both side have won on their left flanks.  The Empire's left is moving towards the centre.  The Swedes have already charged the end tercio with cavalry as their battered infantry try to hang on.The tercio attacked by cavalry after already receiving high casualties from the Swedish infantry has broken.  But tit is too little too late for the Swedish foot as their right has been overlapped & broken by Imperialist foot & artillery & the first of the Empire's cavalry from the far flank is in their rear.  The Swedes fail their army morale test & the Empire has won.


Tuesday, July 06, 2021

Ottomans v. the Empire: Pike & Shot with 15mm fig

 Ottomans: Mike & Mitch
The Empire: Mark, Chris & Steve.

Having modified our house rules to cope equally well with figures on group bases or on individual bases with movement trays, I dug out my old 15mm pike & shot era figs. 

The Ottomans deployed first & are on the right occupying a line of ridges.
The Empire advanced in echelon, left flank forward.
On the far flank the Ottoman horse has done a good job of holding up the Winged Hussars, but are being overlapped at the end of the line.  On the near flank the Ottomans have advanced to counterattack, but have already lost the combat on this end. In the centre the Pike & Shot are advancing, harassed by bow armed skirmishers.
On the near flank the Ottoman horse have been defeated & the Empire cavalry have advanced onto the ridge to outflank the Ottoman artillery.  On the far flank the cavalry melee is ongoing, so far indecisively with both sides winning some & losing some.  The  Empire's pike & shot are trading shots with the Ottoman light troops & supporting the cavalry on their left. 
The cavalry fight on the far flank has pretty well petered out in mutual destruction.  On the near flank the Empire's horse is moving around the Ottoman's flank. 
The first charge of the Empire cavalry on the near flank have broken the front levy unit, but recoiled from the second line.  In the centre the pike & shot & Janissaries are squaring off against each other.  But at this point the Ottomans are doomed with the mass of Empire cavalry opposed only by levy infantry about to roll up their left flank.  But in any case they fail their army morale test having lost more than half their close order units.  It is a victory for the Empire.


Sunday, July 04, 2021

Crusaders in the desert

We recycled the desert table yet again replacing Crusader tanks with Crusaders in horses.
Chris' Saracens v. Jim's Crusaders.
The Saracens deployed first, but were allowed to have hidden deployment for units in the hills.

The Crusaders are on the left.  In their first move their centre advanced with Knights in the centre & bows & spears on each side.  Mounted Sergeants wheeled left & right to cover the flanks.
The knights smashed a hole straight through the front line of Saracen infantry.  Saracen cavalry appeared on both flanks.
The RH unit of knights continued on through the second infantry line, but the LH unit was held up.  On each side of them it is inf v. inf , but so far indecisive.  On the near flank the LH Sergeants have won & turned to help their comrades.
The cavalry hare now engaged on the far flank.  On the near flank the victorious Sergeants were too slow to help their comrades who have broken & the Saracens have turned to face.  In the centre, the victorious kniht are rallying.  The other knights have fallen back with high casualties.  On both sides, the Crusader foot is gaining the upper hand.  The cavalry fights on both flanks have turned into stalemates, but the battle is being decided in the centre where the victorious knights have charged back into the action & the crusader foot is getting on top.The returning knights have smashed thru the Saracens rearguard in to rear of their front line & the Saracens fail their army morale test.  So the Crusaders will get to the oasis & get a drink tonight.

Thursday, July 01, 2021

The Granicus 334BC

 A trip to the Black Hills where Peter had set up a battle of Granicus.
Chris commanded the Macedonians v. Peter's Persians.
We used Camp Cromwell house rules modified to work with Peter's 25mm figures on 60mm wide bases.

The Macedonians are on the right.
Both sides have advanced their front line to the river with some cavalry in reserve.
The Macedonian heavy infantry s attacked across the river.
The results were mixed.  The phalanx on the left & the hypaspists on the right pushed the Persian cavalry back & gained the far bank.  One of the mercenary hoplite units broke. 
Most of the combats along the river bank remain indecisivef, but on the near flank, the Macedonian peltasts' attack was broken & exposed the flank of the phalanx.
On the near flank the Macedonian phalanx has been broken when attacked in front by cavalry & in flank by light infantry.  The next phalanx has also bee broken by mercenary hoplites.  In the centre the Macedonian cavalry has crossed the river to follow up the victorious phalanx.
The victorious Persian right is redeploying towards the centre.  The Macedonian centre has redeployed with cavalry covering the flanks of the infantry.  On the far flank Persian light cavalry has swamed into the Macedonian rear.
A Persian cavalry charge against the hoplites on the Macedonian right has broken through & though stopped by the companions behind, this loss has caused the Macedonians to fail army morale.