Sunday, May 28, 2023

Picket's Charge Rules in Canberra

Dale set up an ACW game using his Warlord's Epic Scale figures. 
The scenario had Jim's Union Army of mostly green troops having to intercept & hold up SteveD's better quality Confederate force.

The Union army is coming on from the right, the Confeds from the left.
Both sides deploy their lead brigade facing the enemy at extreme artillery range to cover their deployment of the rest of their forces. 
Both sides deploy their 2nd brigades to the centre, then the Confeds pull back their front brigade & sent it to their far left.
The Union responds to the Confed move to the left by redeplying their 1st brigade to their right.
The Confeds advance along the wooded ridge as their centre falters in front of the Union line wrapping their left flank.

The green Union brigade in the woods has fallen back from the Confed assault.  The Union counterattack on the far flank is faltering in front of the Confederate artillery.

A renewed push by the Confeds in the woods has pushed the Union left back further, but the Confed left is now retreating.
A bad morale test has caused the Union brigade on their left to break.  At this point the umpire pointed out that the victory conditions gave the Confids victory iof they controlled the road junction.  The Union conceded that they had no way of tstoping the Confeds taking it & no way of taking it back & conceded defeat.

The Union command didn't  listen closely enough to the Victory Conditions & the Confed move to their left worked well to help them to continue to overlook it.  The Confed command claimed it was their plan all along. 

This was my second game of Picket's charge & I did enjoy it.  As I said in my previous report I think they give a pretty good simulation though the mechanisms are bit over complex for my taste.  But in a game run by an umpire who knows the rules you seem to be able to do pretty well by military principles without needing to know the rules chapter & verse.   


Saturday, May 27, 2023

Talavera 1809 in Canberra

A scenario set up by SteveD for my visit to Canberra.
French: Jim.
Spanish: SteveD
British: Dale
Rules: Camp Cromwell M2M
Figures: 15mm

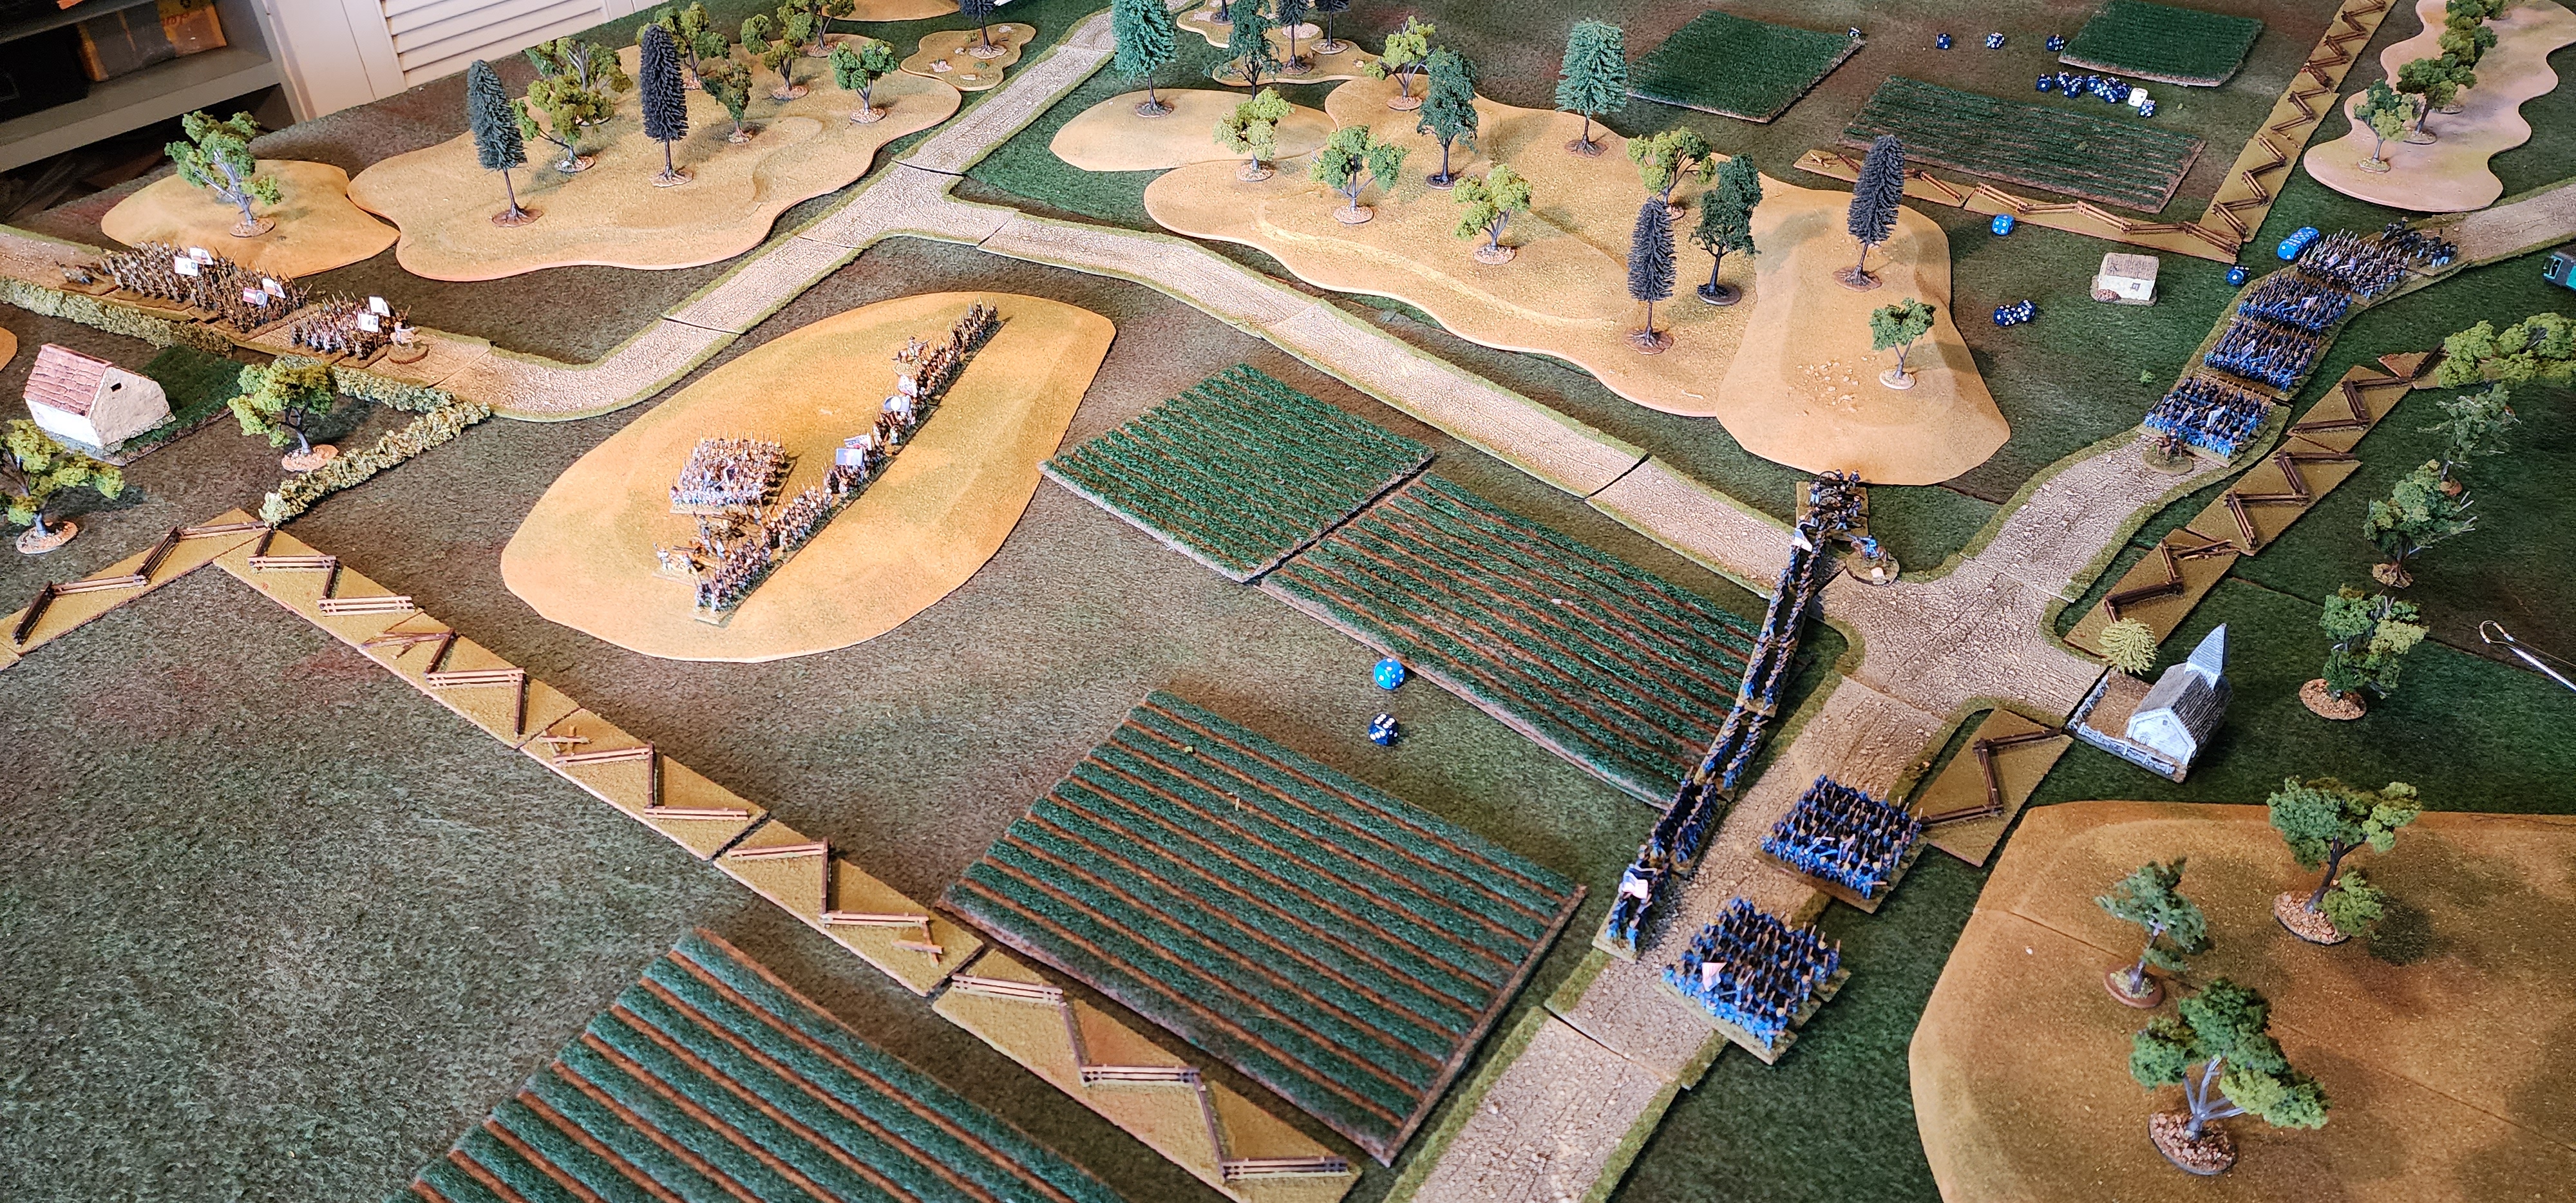
View after turn 1 from behind the Spanish on the allied right flank.
The Brits are on the left, the French on the far side.
The French have made a general advance all along the front to deploy & intiate a long range artil;ery duel to open the battle.  They are also moved 2 cavalry brigades from their central reserve to the their right flank.
On the near flank, the French have advanced in line to engage the Spanish.  On the far flank they have taken upa  defensive position on & behind a ridge. 
The Spanish are moving cavalry from their central reserve to the far flank to support Brits against the Frech cavalry.
The French are now attacking the Spanish.  Mostly with cannon fire & musket fire from lines of infnatry, but with infantry columns & cavalry at points of weakness. (One brigade of dragoons was held back in central reserve). On the far flank the Soanish cavalry eventually came up to suport the British cavalry who have now attacked the French cavalry. The British infantry seem reluctant to leave their good defensive position behind the creek line.
This pic is from behind the British flank.  The British cavalry are getting the better of the French on the end of the line, but otherwise both sides are happy to enagage on long range artillery on this flank.  On the far flank the French are attacking the whole Spanish front.  The Spanish aregrimly defending the town, vineyards & creek line.
In their attack on the Spanish the French front line lost a lot of casulties, but their second line has smashed thru the brittle Spanish troops.  More than half the Spanish units have been broken but only one French.
|On the far flank the British have beaten one Frencg cavalry brigade, but it's only effect to ensure that the Brits can retreat safely behind a superior cavary screen.
It was hard ask for the Spaniih to hold their line against a well organised French attack.
The British should have attacked to take the pressure off theie allies, but the French deployed just enough of their troops in a sound defensive position to discourage them from doing so.   


Tuesday, May 16, 2023

Multi-player Bolt Action

Mike deployed 1250 pts of US v. Steve's 1250 pts of Germans on opposite sides of a 10'x6' table with two objectives - the village & the railway bridge.
Then Mark & Mitch turned up, so both sides got reinforcements.  Mark came on the far end of the table (on the US left flank) with 2 Hetzers & 2 half tracks with infantry.  Mitch came on the near end of the table on the German left flank with 2 Shermans & 2 half tracks with British infantry. 

The flanking forces ensured that both sides were able to dominate one objective,so it became a battle of attrition as both side pulled back their left flanks & attacked on their right.  The Germans did better in this than the Allies & lost only one unit to the Allies' five.  


Tuesday, May 09, 2023

Something completely different

While the flu cut a swath through the attendance tonight we had a rare visit from Nick, so a party of three.  Fortuitously, Nick brought along a boardgame "Maria" with the unusual feature of being a game for three.  The "Maria" is Maria Therese & it is a strategic game set in the War of Austrian Succession (right before the 7 years war).

The game is from Germany with the rules & playing pieces all bi-lingual - being in both German & English.   Nether Mike or I liked the use of cards rather than dice & there was too much gaming technique involved for our tastes, but it wasn't hard to learn to play & strategy did matter too.  It certainly presented interesting conundrums to the players, so a good rare option for 3 players.


Tuesday, May 02, 2023

Bolt Action 2,500 pts

Both sides had two 1,250 point forces.
Chris's Germans faced Mark's Brits on the German right.
SteveJ's Germans faced Mitch's US on the German left.
Jim assisted Chris & umpired one flank.
Mike assisted Mitch & umpire the other flank.
The table is 10' x6'.  There are two objectives, the railway bridge & the village.  The objectives count as 3 VPs if held unopposed at the end.  Each enemy unit killed counts as 1 VP.
There was separate dice bag for each flank.  The order dice were pulled at each flank's own pace but whoever finished a turn first waited for the other side before starting the next.   Units are at liberty to engage the enemy on the other flank.  To do so they announce that they are doing so the other  flank pauses other actions until the cross flank action is resolved. 

Picture taken from the German right flank.  

The only cross flank action was between the US Sherman on their left & a Panzergrenadier unit in the woods on Chris' left.  The Sherman killed a few Panzergrenadiers but the Panzergrenadiers got their revenge by popping the Sherman with a panzerfaust.

On the near flank there was a lot of firing across no man's land before both sides rushed the objective on the last turn.  It ended up disputed with 2 Panzergrenadiers surviving with 3" of it.  On this flank the Germans lost 3 units & the Brits 4.

On the other flank the objective also ended up contested, but the Germans only lost 3 units to the US's 6. So in aggregate the Germans won 10 VPs to 6.