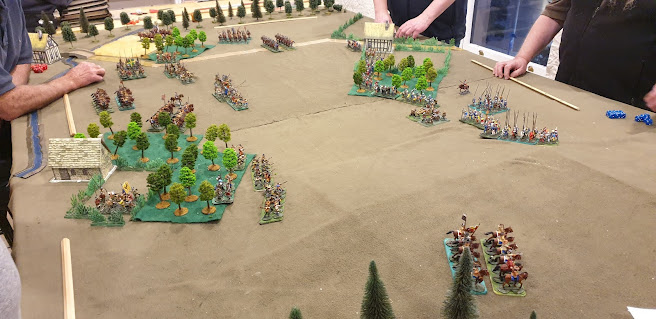
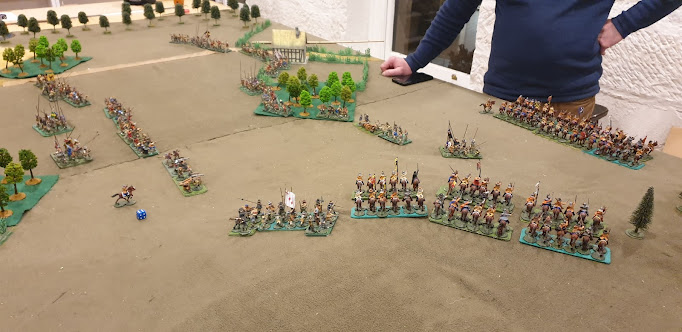
We had to postpone finishing the Jutland campaign battle as one of the players couldn't make it this week. Jim's Panzergrenadiers v. Mike's US. 1000 pts, key positions scenario.
The Germans are on the near side. There are 5 objectives: Each house, the bridge & one on each flank. Both sides deployed guns to cover the open ground in the centre & deployed most of the forces on the flanks.The Germans got a lucky break in turn 1 when their Pak38 took out the Sherman with 1 shot.There are bloody close range combats in the woods on both flanks.On the right, the Germans had taken the objective, but have been destroyed by US counterattacks. On the left the objective is still unsecured by either side, but the Germans have got the upper hand with the last US unit heavily pinned down. In the centre guns & mortars are engaged in MUD while the German LMG team is advancing on the ridge.On turn 6, the US take the RH objective but the Germans grab the bridge & the left flank objective to gain victory 3 objectives to 2.Wednesday, October 28, 2020
Tuesday, October 20, 2020
Jutland Campaign: Battle off the coast of Denmark
In their 5th & last sortie of the campaign the High Seas Fleet paid another visit to the Skagerrak & gained another Economic Victory Point. Zeppelin patrols found that the Grand Fleet had put to sea soon after the HSF, so Scheer headed south to run south down the Danish coast, calling his detachments he left nearer home to head north to join him. He was hoping for battle, but wanting to make sure he had a clear run home first. But he found British light forces in his path near the south edge of the Skagerrak.
The HSF is moving south from the RH edge of the table. The British CLs & DDs have turned to run in front of them as more British CLs & DDs appear from the NW.The HSF ran south after the British DD & CLs to find British battleships also coming from the NW but in front of the HSF.The ruler under the Jellico's elbow marks a German minefield the Brits were blissfully ignorant of & a second column of British ships runs right through it. The 4 BCs in the lead were all badly damaged with one sunk but the BBs behind went through the path they cleared the hard way.Hipper's BC's in the German van are engaged with the 1st British BB division.A squadron of German DDs has appeared from the SE in front of the British.
The 1st British division is exchanging shots with the German van while their CLs partly screen off the German rear with smoke. So far the damage in this exchange is about equal to both sides.
Off-shot to the south the Germans have their squadron of pre-dreadnoughts & a DD squadron. With Beatty's force not present & the losses on the minefield, the numbers are as close to even the Germans were ever likely to get. But the 2nd British division is on a course to squeeze the HSF between the GF & the Danish coast (which neither side is allowed within 3 hexes of) & there are British light ships both in front of & behind the HSF. It's a fascinating situation & this battle could go either way - a fitting climax to a great campaign.
It is turn 18 of the battle with nightfall at turn 34.
We decided that this was a good time to finish for the night & will continue next Tuesday.
Monday, October 19, 2020
Sunday Bolt Action in the jungle
Rich's US v. Chris' Japanese: 1,000 pts key positions mission. The scenario was varied for a 6' square table by having a deployment turn where units were put down up to 24" from baseline. 4 objectives.
Pics from US side. The Objectives are: one each side of the big clearing on the left, one in the village & one mid-table on the right. The Japanese have deployed evenly across their front. The US have concentrated their infantry right of centre with their tank & a mmg on the left & a mmg on the right.The concentrated US attack right of centre was unstoppable. A bazooka deterred the Japanese tank on that flank while the Sherman prevented any Japanese attack on the US left. The Us gained botht eh objectives on the right& held the one o their left as well as destroying most of the Japanese for few casualties of their own.Rich is an old FOW veteran, but hadn't played for a long time & was unfamiliar with Bolt Action, but his strategy was excellent & produced a decisive victory.
Tuesday, October 13, 2020
30 Years War
The Empire: Chris & Mark.
Swedes: Mike & SteveJ.
Both sides are sending cavalry around the enemy's left flank. Swedish cavalry have charged the Imperialist battery. The gunners have run away. But the cavalry recoil from the pike block behind the guns.The Imperialist cavalry have galloped into the Swede's rear around their left flank, but the Swedes have turned some cavalry to face them.
On the Swedish left their infantry have formed hedgehogs to hold off the Imperialist horse.
On the near flank Swedish horse have galloped off shot around the Empire's left.On the near flank the Empire's infantry are trying to defeat the infantry to their front before the Swedish cavalry can attack their rear.The Swedish foot on their right flank succeeded in pinning their opposite numbers long enough for the Swedish cavalry to charge their rear & the Empire's left flank has been destroyed. In the centre an Imperial Tercio is leading a counterattack supported by cavalry.The Empire's tercio in the centre lucked out in an even fight & with them went the Empire's only chance of turning the tide. So a Swedish victory.
Sunday, October 11, 2020
Sunday afternoon BA
Chris's Soviets v. Jim's Panzergrenadiers, 1200 pts on 10'x6' table. The scenario is Meeting Engagement, tweaked for the big table by having a Deployment Turn where units are put down up to 24" on from each side's baseline. The table is left over from last Tuesday's ECW, so a lot more open than most BA tables, even after we popped a few more trees down.
Pics from behind German lines.Both sides were wary of sending troops over the open ground & concentrated their forces either in the woods on the far flank or the orchards right of centre.
In the big woods the Veteran Panzergrendiers partly armed with assault rifles were too good for the Soviets who died in droves.
Tuesday, October 06, 2020
ECW again
Jim's Parliament v. SteveJ's Royalists, Parliament on the left.
Both sides had 4 pike & shot units of 1 pike 2 shot, 6 cavalry & 2 guns.
On the left of the cavalry the Royalist shot in the orchard is under heavy fire.
On the far flank the Royalist shot are getting the better of the exchange of musketry.The Parliamentary cavalry have fallen back up the slope.
The Royalist shot in the orchard have been broken by musket & cannon fire.
On the far flank the parliamentary foot have lost 2 shot units & are falling back.The cavaliers have counterattacked up the hill & are gaining the upper hand in the cavalry fight.
But in the centre the parliamentary foot have swept past the orchard into the flank of the Royalist infantry as their left counterattacked & the Royalist foot have failed their Divisional Break Test.
The Royalist foot is withdrawing. The Parliamentary cavalry is verging on breaking too, but it has gained enough space to withdraw out of charge range before actually doing so. So the battle is a a win for Parliament.
This was the second test of some tweaks to the Camp Cromwell Action rules. They have proved to be a success.
Friday, October 02, 2020
English Civil War
Chris & I fought a small ECW battle to try out some new tweaks to our house rules I wanted to test before introducing them to the more argumentative members of the group.
Jim's Parliamentary army is on the left. Parliament has 2 shot units for each of their 4 pikes 4 cavalry & 2 guns. Chris's Royalists have 1 shot unit for each of their 4 pike, 6 cavalry & 2 guns.Parliament got the first move & immediately advanced their cavalry to gain an uphill advantage. Then Cavaliers charged them anyway. On the rest of the front, Parliament advanced inclining to their right, while the Royalist took up a defensive position in the farm. The cavalry fight is initially indecisive. Parliamentarian shot is advancing on the Royalist guns while their own guns have deployed to fire at the pikes beside the orchard. There is an exchange of shot in & out of the orchard with the Royalist cover negated by superior numbers able to fire.The Parliamentary horse had gained the upper hand over the Cavaliers, but the shaken Cavaliers have been withdrawn & their fresh 2nd line has now charged. The Royalist gunners are evaporating under musket fire. One of the Royalist shot units in the orchard has broken & the other has withdrawn.The fresh Cavaliers are beating the Parliament's horse while their 2 shaken units are being rallied by their general. The Royalist gunners have run away. The pike have charged the Parliamentary shot, but threw awful dice & bounced off. Then they fell back further as the Parliamentary shot overlapped their right.The cavaliers have finished off the enemy horse, but the pikes on their right have been broken by the ring of shot.
The Royalists are withdrawing.We have been using casualty removal rather than casualty counters in these rules. We weren't happy with the way unit looked when they got close to half strength (at which point they broke & were removed). But today we tried a mixed system where a casualty is removed every 2nd hit & a counter used to record the odd hits. We also re-introduced a Shaken Status. Both changes seemed to work really well with no unforeseen problems arising.


