Wednesday, May 29, 2024

Crusaders again

Saracens: Steve, Mike & Chris. 4 Egyptian foot, 4 Arab foot, 8 heavy cav, 8 horse archers.
Crusadrers: Jim, Mark & Mitch. $ bows, 4 spears, 4 sergeants, 4 knights.
The Crusadera made a map of their deployment, the Saracens set up, then the Crusaders put their troops down.  The result was very unsymmetric deployment.  Both sides put their foot in the centre & their heavy cavalry on their left.  The Saracen right flank was horse archers.  The Crusader right flank was overlapped.

The Crusaders are on the left.
The Saracen heavy cavalry immediately advanced on the Crusader foot which wheeled to face them abchoring their right on the table edge.  On the far flank the Crusader horse is trying to drive the horse archers off the table. 
The Saracen horse is attacking the Crusader foot with a mix of charges & bow fire.  The Crusaders are defending with the spearmen in front & their bowmen firing overhead,
In the centre the Arab foot is advancing face d by just 2 units of sargeants.
On the far flank some of the horse archers have been driven off the table, some have escaped into the oasis (defended by the Egyptian infnatry). 
The Saracen horse has broken thru the Crusader line but the knights aare galloping to the rescue from the far flank.
The surviving Crusader foot hang on desperately as the knights ride down some the Saracen foot in the centre. 
Both sides are verging on the edge of failing their army morale test as both sides cavalry hack into the  enemy foot.
In the end it became matter of luck as to which side lost half theri force first.  In the last turn, both sides  only had to lose 1 more combat to fail morale, but the Saracens hung on in two combats they were at a disadvantage while pulling off a win to break the Crusaders. 


Wednesday, May 22, 2024

Still in the desert, but back in time

Crusaders: Mark & Mike.
Saracens: Jim, Steve & Chris.

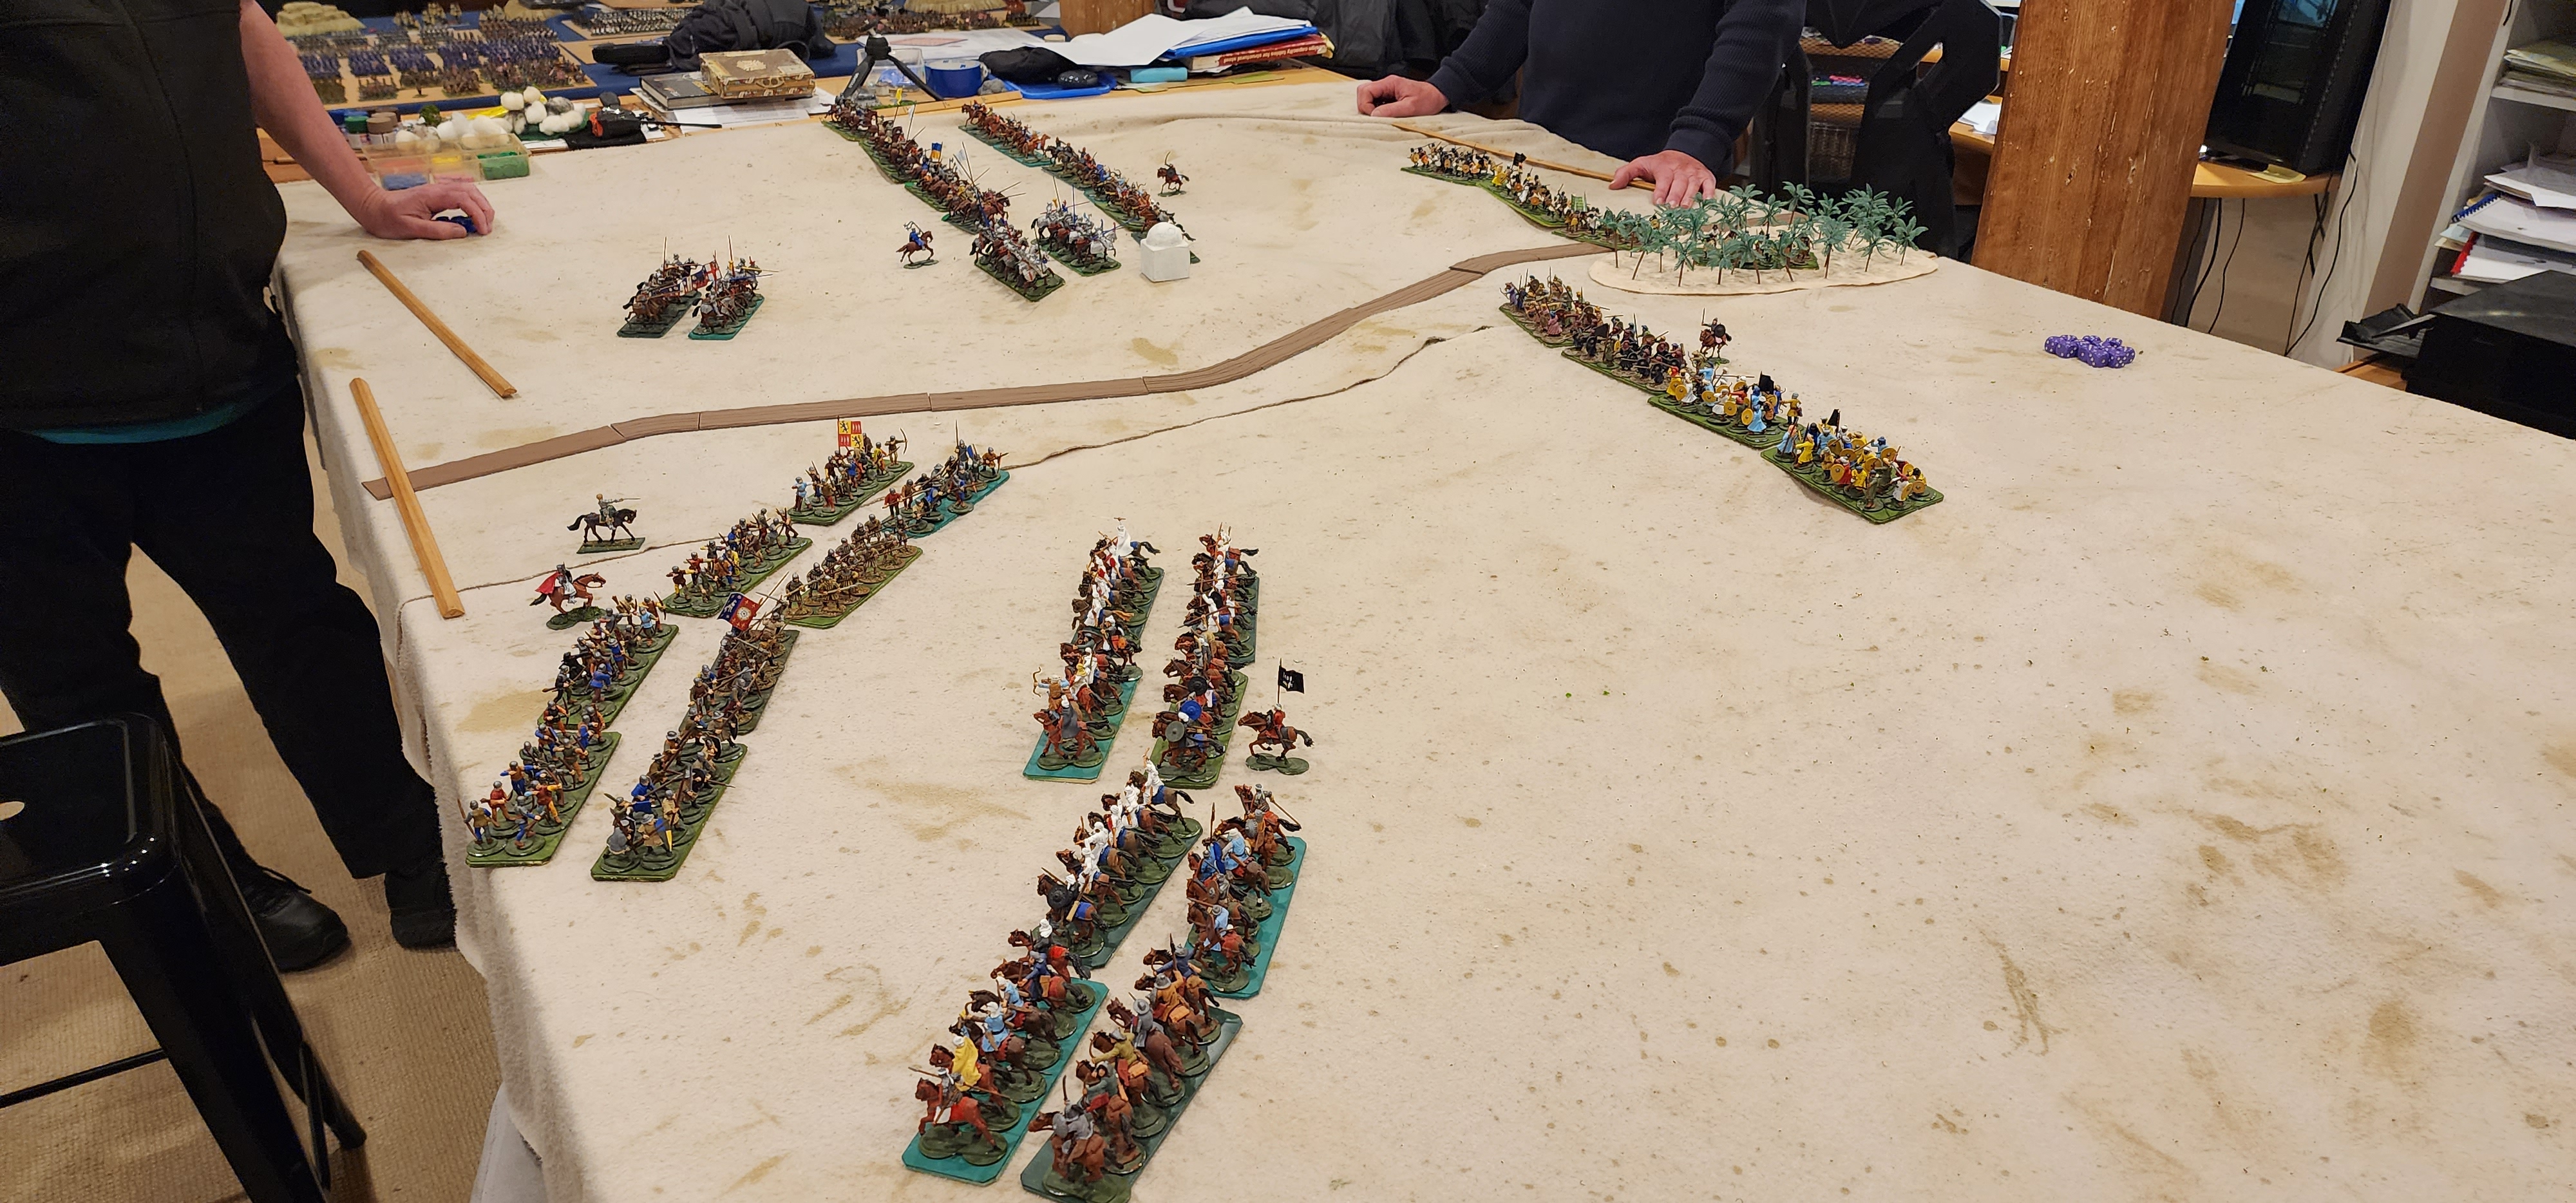
The Crusader army is marching down the road needing to get to the oasis for water that night, but a Saracen army is hidden behind the ridges & in the village to prevent them doing so.
The Saracen players have placed playing cards next to each brigade on trays off table corresponding to cards on the table.
As the Crusaders deploy either side of the rocky ridge horse archers com eove rthe ridges to begin harassing them.
When the Crusaders breast the ridges they find Saracen heavy cavalry on both flanks behind the horse archers & infantry near the oasis. 
On the near flank the Saracen heavy cavalry are putting up a good fight against more heavily armoured enemy cavalry.
On the far flank, the horse archer shave been more effective in assisting the heavy cavalry, but the Crusader infantry have attacked in support of their cavalry. 
On the near flank the Crusaders have won the cavalry fight, but not without severe casualties.
On the far flank, the Egyptian infantry advanced out of the village to support their cavalry & the Crusader attack on that flank has run out of steam.
At this stage it looks like the Saracens are winning.
On the far flank the Crusaders have pulled back to regroup.
On the near flank the Crusaders have attacked the Arab foot with their last serviceable cavalry & spearmen while their archers rain arrows on the Arab centre.
The Crusader charges on their left flank broke though & at the same time the archers destroyed the Saracen centre.  In one turn the Saracens lost 3 Arab infantry units & failed their army morale test, so were forced to withdraw giving the Crusaders a victory.

Despite the Saracens having a a great run of the dice thru most of the game, one turn of good luck was all it took for the Crusaders to win.  The post battle discussion brought up four possible explanations:
1. The Crusaders had a better strategy.
2. The points system over-valued the Saracen army. so the armies were unequal.
3. The scenario was tough for the Saracens
4. Luck on that the Crusaders didn't have a lot of it, but they got it the right time.

The Saracens strategy of weakening the enemy with horse archers, blunting the attack with their heavy  cavalry, then holding on with their foot didn't work.  In the first wave of combats, the Saracens stopped the Crusader cavalry, but in the process they lost almost all their cavalry broken while the Crusaders had a lot of units shaken but few broken.  Only broken units count in the army morale test, not shaken ones, so when the Crusaders pulled back their weak flank to cut their losses there & renewed their attack with their few remaining unshaken units on the other flank, just three good combat results against the Arab infantry was all it took for the Saracens to have half their formed units broken & fail army morale.  

My conclusion is that the critical factor in this battle was the Crusader's tactics of pulling back the flank where they were losing & reinforcing success. The better command ratings of the Crusader troops made it easier for the Crusaders to control the action.  Perhaps the points system doesn't give sufficient weight to the difference in command ratings. 

Tuesday, May 14, 2024

Playing with tank rules

This week we used the same scenario as last week with 15mm tanks, but modified the rules a bit:  Basically standard Bolt Action except we used IGoUGo instead of the BA Command Dice.  

The card draw provided a similar scenario to last week with the battle fought lengthwise.  Again the Brits had Crusaders on their left facing the MkIIIs & Valentine/Matildas on their right facing Marders.  Both times the MkIVs were to the rear, but this time behind the Marders rather than the MkIIIs.
Once again Jim got the Matilda/Valentines & Steve the MKIVs.  But now Mark has the Crusaders, Mike the MkIIIs & Mitch the Marders.
On the left, the Crusaders rush for the village while the MkIII's go for the oasis.
On the right the Crusaders advance towards the village as the Germans advance move towards their flank behind the ridge.
On the left the Crusaders & MkIII's slug it out at close range.
On the right, the Germans move onto the to engage the Matilda/Valentines from hull down.
On the left, 9 Crusaders destroyed the 7 MkIII's without loss, then moved thru the oasis to supoprt the Valentine/Matildas.
On the right, the Valentines/Matilda's pop guns managed to take out just one Marder before being almost wiped out before the Crusaders arrived & their 6pdrs saved the day.
2 MkIV's & 1 Marder made a getaway leaving an immobilised Marder.   The Brits had lost 1 Crusader & 8 Valentine/Matilidas.

The IGoUGo certainly sped up the game, tonight's battel took little more than half the time to last week.  Otherwise the progress of the game was pretty similar.  The difference in strategy was that the MkIV's supported the Marders this time rather than the MKIII's.   The Valentine/Matildas were wiped out by the Marders & MkIVs, but without the support of the MKIV's the MkIII's were destroyed by the Crusaders with no loss & were able to go on the take out the rest of the Germans.  Oakie's luck being transferred from the MKIII's to the Crusaders, was cited as another decisive factor, but only by the losers, the winners pointing out that the Valentines/Matilda's couldn't buy a hit. 


Wednesday, May 08, 2024

Bolt Action Tank War in 15mm

 Still on tank binge, this week we moved to the desert with 15mm models.

We used random deployment for 5 platoons for 5 players.
Steve's 5 MkIVs are in the far LH corner.
Marks's 7 MkIII's are at the centre left.
Mikes' 4 Marders are centre right.
Mitch's 9 Crusaders are near LH corner.
Jim's 9 Valentines/Matildas are near RH corner.
The Crusaders have advanced to a line of ridge & palm grove.
The Valentine/Matildas have advanced to just behind a ridge line.
The Marders are set up in ambush waiting for the Valentines/Matildas to advance.
The MkIII's have moved into The palm grove near the village.
The MkIV's are laying smoke to cover the MkIII's deployment.
The Marder ambush immobilised two tanks, destroyed one & pinned down down another on the ridgeline as the rest of the platoon rushed forward to get into close range of the Marders.
On the left the Crusaders & MkIII's are slugging it out , but the dice gods are favouring the Germans.
Some MkIVs are advancing, the others firing at Crusaders at long range. 
Despite early loses the Valentines/Matildas struck back taking out the Marders & advancing into the village to move on the MkIII's flank.
MkIVs have moved up to support the MkIII's flank as the crusaders continue to die with no gain.
Time for a cuppa to relieve the stress of battle.
The Valentine/Matilda attack thu the village petered out, their their 2pdrs found wanting against the MkIVs.  The MkIII's finished off the unlucky Crusaders.

The Brits are elft with 2 immobilised tanks on the ridge, while several MkIIIs & IVs survive so clearly a German victory.