Tuesday, July 30, 2024

ACW without IGOUGO

Tonight we experimented with a command system that has simultaneous movement rather than IGOUGO. It uses a set of command counters like our naval games with a new game turn sequence:
1. Command phase: Both sides put down command counters face down.
2. Movement: Both sides reveal their orders & move their units.
3. Firing: Both sides fire simultaneously.
4. HTH:  HTH combats are resolved.

The system means that the players have to make their plans for each turn without knowing exactly where the enemy are going to be, thus introducing another skill element.

In the main our M2M rules require few changes to match the system.  The main issue is tweaking the HTH system to compensate for the fact that there is only one round of combat compared with two with IGOUGO in the time taken for both sides to move.
 

The objectives are the railway station & the saloon.  Two Union divisions have come on from the far side of the table while two CSA divisions have come on the two roads on the near side of the table.  have come on.  In the early moves  the CSA cavalry have seized & occupied both buildings while their infantry are still coming up.   The US troops have deployed in preparation for an attack.

The right flank CSA infantry have deployed to support the cavalry in the buildings but have lost their artillery to sharp shooting as the US left attacks the railway station supporting the attack with their rifled artillery on the ridge.  while 1st division.
On the far flank the US have fallen back from a CSA attack. 
The initial US attack on the railway station has been beaten off, but the CSA right is suffering under the US fire.  On the far flank the US has retreated into the woods. 
The US has again charged the railway station as the CSA right crumbles.
The US right has taken up a strong defensive position in the woods. 
The US have taken the railway station & the CSA has pulled back their survivors on their right flank. They are now converging on the saloon. 
The US attack on the saloon from the far side has been repulsed & the CSA have held onto it until nightfall brought the battle to a close.
Both sides hold one of the two objectives at nightfall, but the CSA has lost 3 infantry units & a battery compared with just 2 infantry lost by the US.   

The alternative turn sequence & command system worked really well considering I only invented it yesterday.  We found some room for improvement, but are keen to try it again next week in an earlier period where HTH combat is more prevalent.  


 . 


Tuesday, July 23, 2024

Modder Fokkers

 With 3 players we found some 2 v. 1 Modder Fokker scenarios.

Game 1: Mitch with an Albatros DII v. Jim & Mark with DH2's.

At first it looked like the two DH2's had the advantage as the planes were about equal in performance  & while both sides a total of two MG's the two DH2's could between them take a lot more hits.  But the Albatros got lucky scoring two critical hits on Mark's DH2's engine sending it down.  The other DH2 then ran away.

Game 2: We upgraded Mitch's Albatros to a DIII to make a bloody April scenario.

This time things were very different with the DIII being tougher & more manoeuvrable that the DII.

This time the Albatros got on Jim's tail & put him down.  Then Mark buggered off.

Game 3: Jim's Bristol fighter v. two Albatross DIII
The 2MGs in the tail made the Bristol a nasty beast.  It took a  bit of flack from Mark while the tail gunner pounded Mitch.  
Mitch tried to run, but the Bristol pursued & finished him off with the single front MG.  Mark didn't fancy facing the Bristol alone & ran for home.

So we all got shot down once in the course of the evening.  It was the first time in long while that we flew early war planes & were reminded why we usually fly late war.  The early planes are slower & harder to manoeuvre, so not so many options to choose from when you get into trouble.   


Thursday, July 18, 2024

Bolt Action in Canberra

Game 1:
Japanese (Jim) v. Chinese (SteveD):
1200 pts Meeting Engagement

Table viewed from Japanese side at start. 
The Japanese betetr managed their fields of fire & won with fire power rather than Banzai charges.

Game 2:
Japanese (Jim) v. Chindits {British in Burma} (Steve).
1100 pts, Point Defence, Japanese attacking.

Table viewed from Japanese side.
This is one of the scenarios where familiarity with the scenario is a great advantage. 
The Japanese knew exactly what to do & won comfortably. 
They sacrified forlorn hopes to buy time to over-run the objective, then set up a defensive perimeter to defend it.


Tuesday, July 02, 2024

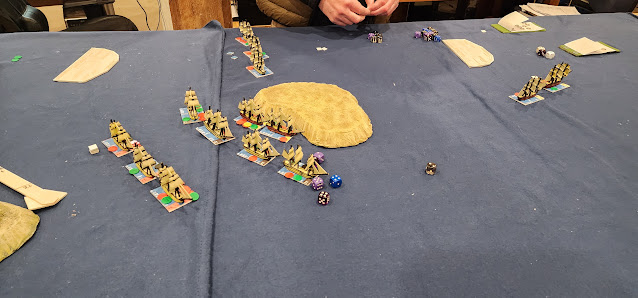
Napoleonic Naval again

With only two players tonight we reprised last weekend's game with the same fleets, but different random deployment.
SteveJ: 4 French & 4 Spanish.
Jim: 2 British squadrons of 3.The Spanish are in the far corner, the French on the right.
Wind coming left to right down the table.
The Spanish tried to run behind the Brits, but the Brits are tacking to starboard to intercept their run.
The French are tacking to beat up to windward to help their Allies.
The 2nd Brits are sailing towards their comrades as fast as they can.

The Spanish turned to starboard & ran past the 1st Brits exchanging broadsides.  The 1st Brits are tacking to pursue, the 2nd Brits closing from upwind.  The french are workign their way uo towards the 1st Brits.
The 2nd Brits have caught the tail of the Spanish squadron.
The 1st brits & the French are engaged at long range.
The 2 rear Spanish ships have struck their colours then run aground as the lead 2 ships run for Cadiz.
The 2nd Brits are passing to Port of the French exchanging broadsides.
The first Brits have engaged the French on the other side.
The 1st Brits have passed the French & are about to tack back.
The French & the 2nd brits are exchanging broadisdes.  Both are receiving heavy damage but extra ship is telling for the French.
The 1st & last French ships have had to fall out of the line with critical damage, but all 3 Brits of the 1st squadron are in the same state & the flagship so badly damaged she has had to fall out of the line.

We adjudicated the result from there.  The Brit 1st squadron flagship will be captured while the other 2 ships escape.  But the French won't hang about because the Brit 2nd squadron is in better shape than them.  The French will follow their surviving allies to Cadiz with their prize while the Brits will burn the stranded Spanish ships.