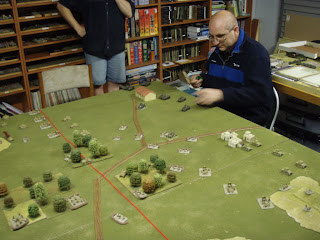
2000 pts Breakthrough Mission in Tunisia, US attacking.
Fought at Nick's with Joe & Leigh umpiring (Byron did the map).
With both sides having armour Attacker/Defender had to be diced for. Both sides wanted to attack because the defender can only have 1 motorised platoon on the table at the start. Nick was very relieved to win the roll as defending would have hurt him the most as his army was entirely motorised whereas the Ities had 4 non-motorised platoons.
The Ities deployed Bersaliglieri in the centre, 90mm AA on their right (in the cover of a light wood with a geat field of fire over the US deployment zone), 100mm howitzers on the left, Semos behind the Beraglieri & their 75mm artillery as an anti-tank screen on the other quarter of the table.
It looked a good deployment, but Nick rather trumped it by only putting his Priests & recon on the table & putting his 2 Sherman (x4) platoons, Honeys (5), SP mortars & command (2 Sherms) in flank attack. He ran a risk of then not showing up in time, but the odds were on his side.
In the early turns not a lot happened as both side's reserve platoons were a bit slow showing up. The Bersaglieri& Semos moved up to a position to defend the objectives. The USAF showed up a lot but didn't do much. The Priests & planes tried to nail the 90mm AA, but just couldn't. Nick tried to sneak his Recon around the right flank, but the 75's popped the jeeps and an M14 platoon came on at the right time & place to fnish them off.
 On turn 5 both Sherman platoons came on together with command - 10 Shermans & suddenly it looked awfully bleak for the Ities as their tin cans started to melt away. But they struck back. The 75's dropped smoke to keep the Shermans on the move & reduce their firepower, as well as to draw them forward into AA range. One 90mm AA got in one volley thru the gap in the olive groves & popped 3 Shermans before the Priests & planes finally got it, the M14s & Semos converging from 2 directions got some side shots & the 100mm howitzers pounded them. Half the Shermans were destroyed in one turn.
The Honeys came on & destroyed an M14 platoon but a vicious 100mm howiter bombardment scared the survivors away. The Armoured Mortars came on, tried to hide behind the monastary, but were immediately destroyed by the L6's of doom.
The Honeys attacked the 75s, but were beaten off, then both platoons sides failed morale.
Both sides lost more tanks in the shirtfight in the corner & were teetering on the verge of army morale tests. The 3 surviving Shermans were cowering in the corner of the table among the burning tanks but they were still the most powerful pieces on the table. The Ities just needed to get another bail to force a platoon morale check & automatic army morale failure (no hq left). But they just couldn't get it. Meanwhile, while the Shermans ground the Ities down. The Itie CIC still lived having transferred to the last L6 (now hiding behind the monastary saying Hail Marys). He passed one army morale test, but failed the next to give Nick a hard fought victory.
This was a ripper of a wargame between two well matched veterans. The game balance swung from one side to the other several times - the sort of game that makes us love FOW warts & all. In the end the Ities just couldn't quite nail it.
Nick's US Armour now meets Mark's Fucilieri in one Semi Final while Byron's Spahpanzers meet Leigh's Death or Glory Boys in the other one.
Pic 1 is from behind the Itie left. The objectives are in the open ground on the left. The Priests are in the far RH corner. The US Recon are on the far table edge. The M14's bushwacked them as they slipped around the ridge on the left table edge. The US flanking force cames in on the LH corner. The other Ities reserves come on in the closest corner.
In Pic 2 Nick is so carefully deploying his 10 Shermans.
In Pic 3, half the Shermans are under smoke while the rest have copped a pounding. The Honeys have just come on & are about to smash the M14s on the table edge, but they make a nice target for the howitzers & run away along the table edge before taking on the 75s.
Pic 4 is at the end - just 3 Shermans & 1 L6 have survived the armoured carnage.


No comments:
Post a Comment